There’s something truly magical about the holiday season. The air is filled with warmth, laughter, and the delightful aroma of freshly baked treats wafting from the kitchen. One recipe that captures the spirit of Christmas in every bite is the Christmas Cheesecake Cookies. These cookies aren’t just regular treats; they are a celebration of flavors, colors, and festive cheer.
Why We Love This Christmas Cheesecake Cookies Recipe
There are plenty of reasons to adore Christmas Cheesecake Cookies. Firstly, they are incredibly easy to make, making them perfect for bakers of all skill levels. Even if you’re a beginner in the kitchen, these cookies allow you to get creative with colors and toppings, turning a simple recipe into a festive masterpiece.
Secondly, the combination of cream cheese and peppermint adds a delightful twist to traditional cookie flavors. These cookies deliver a rich, creamy texture combined with a refreshing minty finish. You will find yourself reaching for just one more, and trust us, they pair perfectly with a warm cup of cocoa or tea.
Moreover, these cookies are versatile enough to cater to different tastes—whether you’re a chocolate lover or a fan of candy canes, you can easily customize the toppings. The vibrant colors also make them a show-stopping centerpiece on any holiday dessert table, inviting excitement and joy with every bite.
Ingredients About Christmas Cheesecake Cookies
To whip up a batch of these scrumptious Christmas Cheesecake Cookies, you’ll need the following ingredients:
- 8 oz cream cheese, softened
- 1/2 cup unsalted butter, softened
- 1 cup granulated sugar
- 1 cup all-purpose flour
- 1/2 cup powdered sugar
- 1 tsp vanilla extract
- 1/2 tsp peppermint extract
- Red and green food coloring
- Chocolate chips or crushed candy canes (optional for topping)
With these ingredients on hand, you’ll be well on your way to creating the perfect festive indulgence.


How to Make Christmas Cheesecake Cookies Directions
Creating these delightful cookies is a joyous experience. Let’s begin your culinary adventure!
- Preheat the Oven: Set your oven to 350°F (175°C). This will ensure your cookies bake evenly and come out perfectly soft.
- Combine the Cream Cheese and Butter: In a spacious mixing bowl, combine the softened cream cheese and unsalted butter. Using an electric mixer or a sturdy spoon, beat them together until the mixture becomes creamy and smooth. This can take a couple of minutes; don’t rush it!
- Add the Granulated Sugar: Gradually mix in the granulated sugar until everything is well incorporated. The mixture should be fluffy and light at this stage.
- Sift in the Other Ingredients: It’s time to add the dry ingredients. Sift in the flour, along with the vanilla extract and peppermint extract. Stir gently to combine everything into a soft, cohesive dough. If your dough feels too soft, don’t worry—you want it to be a bit pliable for the next steps.
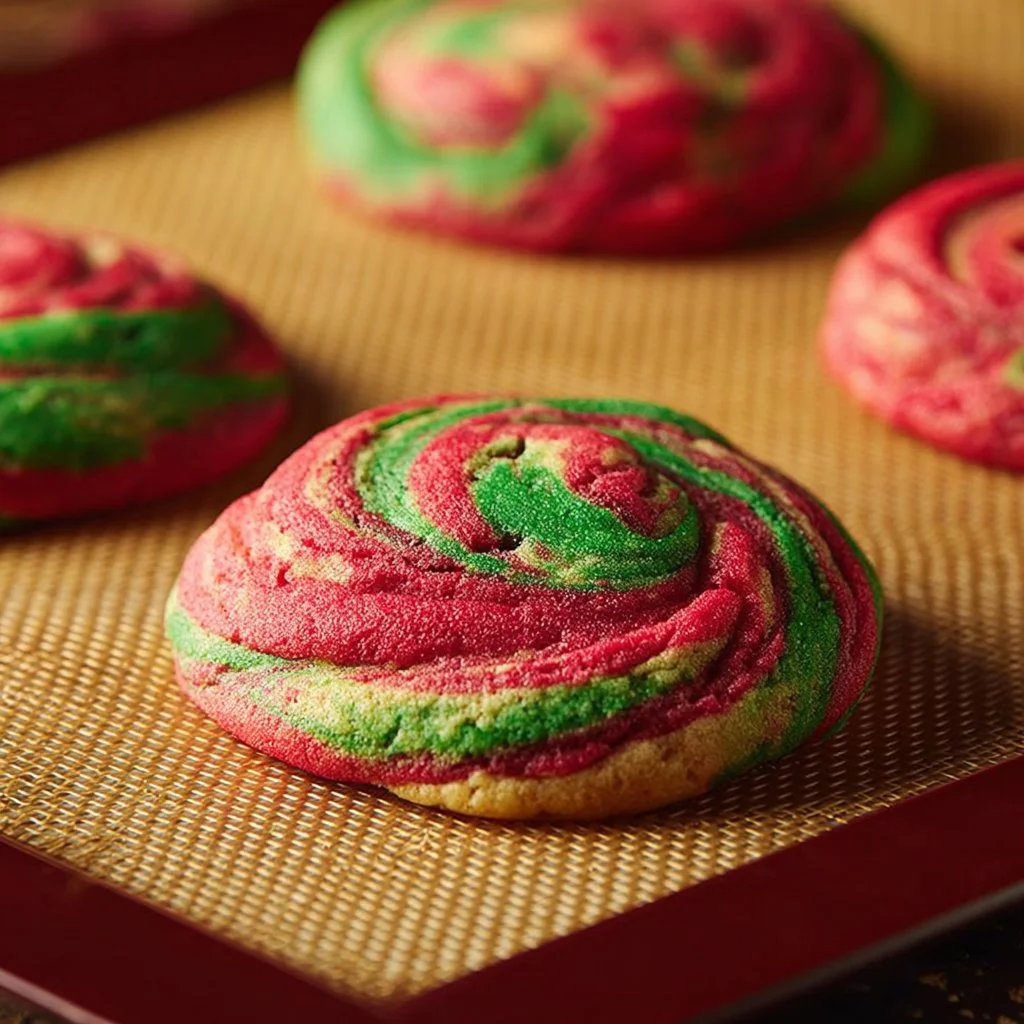
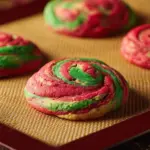
- Color the Dough: Divide the dough into two equal parts. In one half, add red food coloring, and in the other half, add green food coloring. Mix each portion until the colors are vibrant and uniform. This step is where the cookies really start to become festive!
- Create the Cookie Swirls: On a lined baking sheet, drop alternating spoonfuls of the red and green dough. Aim for a bit of fun chaos here – the more random the drops, the better! Then, take a toothpick or the end of a spoon and swirl the colors together lightly, but be careful not to overmix.
- Bake: Pop the baking sheet into your preheated oven and let the cookies bake for about 10-12 minutes. Keep an eye on them; you’re looking for lightly golden edges while the centers maintain their soft texture.
- Cool and Add Toppings: Once baked, remove them from the oven and let them cool on a wire rack. If you’d like to add toppings, now is the time! Sprinkle some chocolate chips or crushed candy canes on top for an extra festive touch.
- Enjoy!: Finally, take a moment to admire your handiwork before indulging. Each bite will surely remind you of the joys of the holiday season!
How to Serve Christmas Cheesecake Cookies
Serving Christmas Cheesecake Cookies can be just as fun as making them! Here are a few delightful ideas:
- Festive Dessert Platter: Create a stunning dessert platter featuring your cookies alongside other holiday treats like gingerbread men and peppermint bark. The vibrant colors will make your dessert table shine!
- Gift Them: Pack your cookies in festive tins or boxes as gifts. Adding a little ribbon can elevate the presentation, making them a delightful gift for neighbors, teachers, or friends.
- Serve with Beverages: Pair your cookies with warm beverages like hot chocolate, coffee, or tea. The rich creaminess of the cookies complements these drinks beautifully.
- At Parties: If you’re hosting or attending a holiday gathering, set your cookies out as part of a festive dessert spread. They’re bound to be a crowd-pleaser!
The versatility of these cookies ensures that they’ll be a hit no matter how you choose to serve them.
Expert Tips: Christmas Cheesecake Cookies
To ensure your Christmas Cheesecake Cookies turn out perfectly every time, consider the following expert tips:
- Room Temperature Ingredients: Make sure both your cream cheese and butter are at room temperature to guarantee a smooth batter without lumps.
- Don’t Overmix: When combining your dry and wet ingredients, mix until just combined. Overmixing can lead to dense cookies.
- Chill the Dough: If your dough feels too soft to handle, consider chilling it in the refrigerator for 15-30 minutes. This will make it easier to drop and swirl.
- Use Parchment Paper: Line your baking sheet with parchment paper to prevent sticking and to ensure an easy cleanup.
- Watch Closely While Baking: Oven temperatures can vary. Keep an eye on your cookies to prevent overbaking; they should be soft in the center.
These tips will help you perfect the art of baking these delightful cookies.
How to Store Christmas Cheesecake Cookies
To keep your Christmas Cheesecake Cookies fresh and delicious, follow these simple storage tips:
- Cool Completely: Ensure your cookies are fully cooled before storing them. This prevents moisture buildup and keeps them from becoming soggy.
- Airtight Container: Place your cookies in an airtight container to maintain their softness. They can be stored at room temperature for about a week.
- Refrigeration: If you want to keep them longer, consider refrigerating them. Just ensure they’re in an airtight container, and they should last up to two weeks in the fridge.
- Freezing: For longer storage, these cookies can be frozen. Wrap them tightly in plastic wrap or place them in a freezer-safe bag. They can be stored in the freezer for up to three months. When you’re ready to enjoy them, simply thaw at room temperature or microwave for a few seconds.
By following these storage guidelines, you can enjoy your festive treats well beyond the holiday season.
Variation of Christmas Cheesecake Cookies
While the classic Christmas Cheesecake Cookies are stellar on their own, you might want to explore some fun variations:
- Chocolate Variation: Swap half of the all-purpose flour for cocoa powder to create a chocolatey version of these cookies. The peppermint will still shine through, but with a rich chocolate twist.
- Nutty Addition: For added texture and flavor, consider incorporating nuts such as finely chopped walnuts or pecans into the dough. This adds a lovely crunch.
- Different Extracts: Experiment with other extracts, such as almond or orange, instead of peppermint. This can give a different flavor profile that’s equally festive.
- Rainbow Swirls: Instead of just red and green, use a variety of colors to create a rainbow effect. This could make for an exciting and colorful cookie that’s fun for kids.
These variations encourage creativity and add a personal touch to your holiday baking!
FAQ
What are Christmas Cheesecake Cookies?
Christmas Cheesecake Cookies are festive treats that blend cream cheese and peppermint flavors into a soft dough. These cookies are vibrant, colored red and green, embodying the holiday spirit.
How do I store Christmas Cheesecake Cookies?
To store these cookies, allow them to cool completely, then keep them in an airtight container at room temperature, or refrigerate or freeze them for longer storage.
Can I customize the toppings on Christmas Cheesecake Cookies?
Absolutely! You can top your cookies with chocolate chips, crushed candy canes, or even sprinkles to elevate their festive cheer.
How long do Christmas Cheesecake Cookies last?
When stored properly in an airtight container, these cookies can last up to a week at room temperature or up to two weeks in the refrigerator.
Can I use different colors for the cookies?
Certainly! Feel free to get creative with your food coloring, using a variety of festive colors to make your cookies even more exciting.
Christmas Cheesecake Cookies
Ingredients
For the Cookie Dough
- 8 oz cream cheese, softened Make sure it’s at room temperature.
- 1/2 cup unsalted butter, softened Ensure it's at room temperature.
- 1 cup granulated sugar
- 1 cup all-purpose flour
- 1/2 cup powdered sugar
- 1 tsp vanilla extract
- 1/2 tsp peppermint extract
- Red and green food coloring For festive colors.
For the Toppings
- Chocolate chips or crushed candy canes Optional for topping.
Instructions
Preparation
- Preheat the oven to 350°F (175°C).
- In a mixing bowl, combine softened cream cheese and unsalted butter. Beat until creamy and smooth.
- Gradually mix in granulated sugar until fluffy.
- Sift in all-purpose flour, then add vanilla and peppermint extract. Stir until combined into a soft dough.
- Divide the dough into two parts; color one half red and the other half green with food coloring.
Baking
- Drop alternating spoonfuls of red and green dough on a lined baking sheet, then swirl slightly with a toothpick.
- Bake for 10-12 minutes until edges are lightly golden and centers are soft.
- Remove from oven and cool on a wire rack. Optional: add toppings like chocolate chips or crushed candy canes.
- Enjoy your festive cookies!
Send me this recipe!
Just enter your email below and get it sent straight to your inbox!