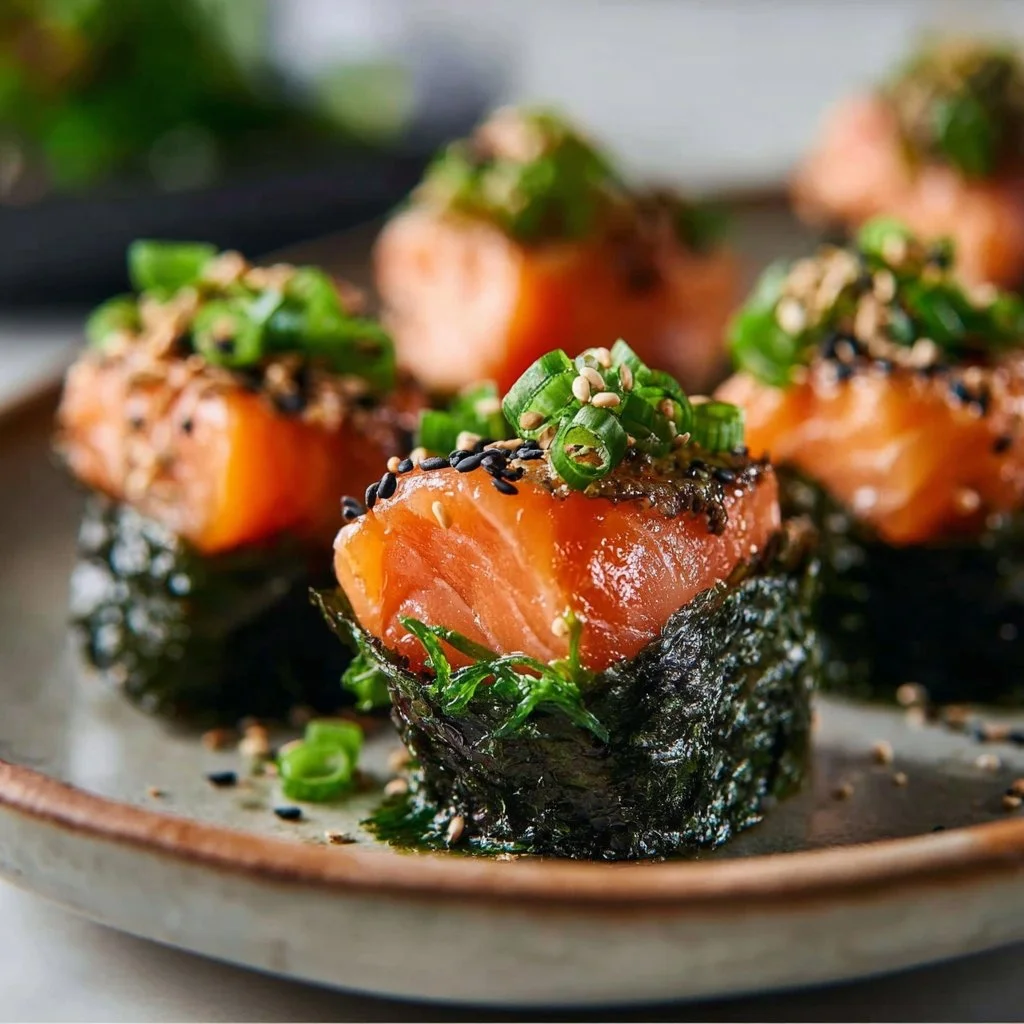
Baked Salmon Sushi Cups bring a mouthwatering twist to traditional sushi. Imagine the delightful combination of flavors and textures: crispy nori, creamy salmon, and a hint of spice, all perfectly baked into bite-sized cups. This innovative dish transforms your favorite sushi ingredients into a fun and easy appetizer or main course that everyone will love. Whether you are hosting a party or looking for a quick weeknight meal, these sushi cups are wonderfully versatile and incredibly satisfying.
Why We Love This Baked Salmon Sushi Cups Recipe
This recipe is a fantastic choice for sushi lovers and those who appreciate unique culinary twists. One of the striking features of Baked Salmon Sushi Cups is their balance of flavors. You have the rich and buttery taste of salmon perfectly elevated by the acid in the toasted sesame oil and the spicy kick from the sriracha. Each bite delivers a satisfying crunch from the baked nori, combining beautifully with the texture of the sushi rice.
Another reason to love this recipe is that it’s simple to make. Even if you’re not an experienced cook, you will find the steps straightforward and manageable. This dish uses familiar ingredients that are often easy to find, and the preparation time is minimal compared to making traditional sushi rolls.
Baked Salmon Sushi Cups are also highly customizable. You can adjust the spices, add vegetables, or even switch up the proteins based on your preferences or dietary restrictions. This versatility ensures that every time you make them, you can create a unique dish tailored to your tastes.
Ingredients about Baked Salmon Sushi Cups
To create the delectable Baked Salmon Sushi Cups, gather the following ingredients. This recipe is designed to serve a crowd, so prepare to enjoy these flavorful morsels!
- Cooking spray
- 2 cups cooked sushi rice
- 3 nori sheets, quartered
- 1 1/2-pound skinless salmon fillet, cut into 1/2” cubes
- 2 scallions, thinly sliced, plus more for serving
- 1 teaspoon toasted sesame oil
- 4 tablespoons Japanese mayonnaise (such as Kewpie), divided
- 2 1/4 teaspoons sriracha, divided
- Kosher salt, to taste
- 2 teaspoons black and white sesame seeds
How to Make Baked Salmon Sushi Cups Directions
Making Baked Salmon Sushi Cups is a delightful adventure that allows you to showcase your culinary skills. Let’s dive into the process step by step, ensuring you create a perfect batch every time.
- Preheat Your Oven: Start by preheating your oven to 400°F. This is a crucial step, as it ensures that your sushi cups bake evenly and develop that delicious crispy texture.
- Prepare the Muffin Tin: Lightly coat a standard 12-cup muffin tin with cooking spray. This will help the sushi cups release easily once they are baked.
- Layer the Nori and Rice: Take one heaping tablespoon of cooked sushi rice and place it in the center of each quartered nori sheet. Next, gently press down on the rice while transferring the nori into the muffin tin, ensuring it holds its shape. This creates a little cup for your salmon filling.
- Make the Salmon Filling: In a bowl, combine the cubed salmon, sliced scallions, toasted sesame oil, 2 tablespoons of Japanese mayonnaise, 2 teaspoons of sriracha, and a pinch of kosher salt. Gently mix until all the ingredients are well combined, revealing a colorful mixture that smells fantastic.
- Fill the Nori Cups: Divide your salmon mixture evenly into the prepared nori cups, placing about 1/4 cup of the filling in each one. Ensure that the filling is mound slightly over the top, as it will shrink during the baking process.
- Bake to Perfection: Place the muffin tin in the preheated oven and bake the sushi cups for approximately 11 minutes. Then, switch your oven to broil mode and allow them to char on top for an additional 2 to 4 minutes. Keep a close eye on them; broiling can happen quickly!
- Prepare the Spicy Drizzle: After removing the sushi cups from the oven and letting them cool slightly, whisk together the remaining Japanese mayonnaise and sriracha to create a delectable drizzle. This adds an extra kick and a lovely finishing touch to your dish.
- Garnish and Serve: Once cooled, bring your creativity into play! Drizzle the spicy mixture over each sushi cup, and top with a sprinkle of black and white sesame seeds. Add extra sliced scallions for garnish, enhancing the visual appeal even further.
How to Serve Baked Salmon Sushi Cups
When it comes to serving Baked Salmon Sushi Cups, presentation is key. Consider presenting these savory delights on a beautiful platter or individual serving dishes. You may want to serve them warm, allowing everyone to enjoy the crispy nori and flavorful filling.
For an added touch, pair your sushi cups with soy sauce for dipping or a side salad to create a balanced meal. If you want a little extra spice, offer wasabi or pickled ginger on the side. These complementary flavors enhance the overall experience and allow your guests to customize their meal.
Don’t forget to communicate the unique characteristics of this dish when serving. Highlight the homemade aspect and the exciting mixture of flavors. This will generate interest and may inspire guests to ask for the recipe!
Expert Tips: Baked Salmon Sushi Cups
Creating the perfect Baked Salmon Sushi Cups requires attention to detail. Here are some expert tips to help you achieve the best results.
- Rice Texture Matters: For sushi rice, make sure it’s sticky enough to hold its shape but not overcooked. The right texture helps the cups maintain their form and provides an ideal base for your filling.
- Nori Quality: Use high-quality nori sheets for the best flavor and texture. Look for brand names that specialize in sushi supplies for the freshest product.
- Customize Your Spice Level: The amount of sriracha can easily be adjusted based on your spice tolerance. Stay within your comfort zone, and feel free to add more if you prefer a dish with heat.
- Experiment with Fillings: While this recipe uses salmon, you can try other proteins like shrimp or tofu, or even create a vegetarian version with your choice of vegetables.
- Keep an Eye on Broiling: When switching to the broil setting, stay attentive to avoid burning your beautiful sushi cups. They can char quickly once the broiler is on.
How to Store Baked Salmon Sushi Cups
If you find yourself with leftover Baked Salmon Sushi Cups, don’t fret! Storing them correctly will ensure they stay delicious for your next meal. Let the sushi cups cool completely before storing them in an airtight container. They can be refrigerated for up to three days.
When you’re ready to enjoy them again, consider reheating gently in the oven at a low temperature. This will help restore some of the crispy texture you loved when they were freshly made.
Variation of Baked Salmon Sushi Cups
One of the exciting aspects of Baked Salmon Sushi Cups is their versatility. Feel free to experiment with different ingredients or flavor additions. For example:
- Avocado: Add sliced avocado to the filling for a creamy texture that balances the rich salmon.
- Vegetables: Incorporate shredded cucumber or carrots for added crunch and nutrients.
- Cheese: Blend in a dollop of cream cheese for a rich and tangy element that pairs wonderfully with the salmon.
- Different Sauces: Instead of sriracha, try a sweet chili sauce or teriyaki glaze to switch things up a bit.
These variations allow you to tailor the recipe to your taste and keep the dish fresh and exciting each time you make it!
FAQ
What makes Baked Salmon Sushi Cups a good recipe to try? Baked Salmon Sushi Cups are an ideal recipe because they combine the delightful flavors of sushi with a fun, easy-to-eat format. They’re suitable for various occasions, from casual dinners to elegant party appetizers.
Can I use frozen salmon for this recipe? Yes, you can use frozen salmon, but make sure it is completely thawed and well-drained before cutting it into cubes.
How do I ensure my sushi rice is perfect? For sushi rice, rinse it thoroughly before cooking to remove excess starch. This results in a sticky yet fluffy rice that holds together perfectly when forming your cups.

Baked Salmon Sushi Cups
Ingredients
- 2 cups cooked sushi rice
- 3 sheets nori, quartered
- 1½ lbs skinless salmon fillet, cut into ½-inch cubes
- 2 scallions thinly sliced, plus more for serving
- 1 tsp toasted sesame oil
- 4 Tbsp Japanese mayonnaise (such as Kewpie), divided
- 2¼ tsp sriracha, divided
- to taste kosher salt
- 2 tsp black and white sesame seeds
Instructions
- Preheat your oven to 400°F (200°C).
- Lightly coat a standard 12-cup muffin tin with cooking spray.
- Place one heaping tablespoon of cooked sushi rice in the center of each quartered nori sheet. Gently press down on the rice and transfer the nori to the muffin tin to form little cups.
- In a bowl, combine the cubed salmon, sliced scallions, toasted sesame oil, 2 tablespoons of Japanese mayonnaise, 2 teaspoons of sriracha, and a pinch of kosher salt. Mix gently until well combined.
- Divide the salmon mixture evenly among the nori cups, mounding slightly over the top.
- Bake in the preheated oven for about 11 minutes. Switch to broil mode and char the tops for an additional 2-4 minutes, watching closely to avoid burning.
- Whisk together the remaining Japanese mayonnaise and sriracha to create a drizzle. Once the sushi cups have cooled slightly, drizzle this mixture over each cup and sprinkle with sesame seeds and extra scallions.
Send me this recipe!
Just enter your email below and get it sent straight to your inbox!


