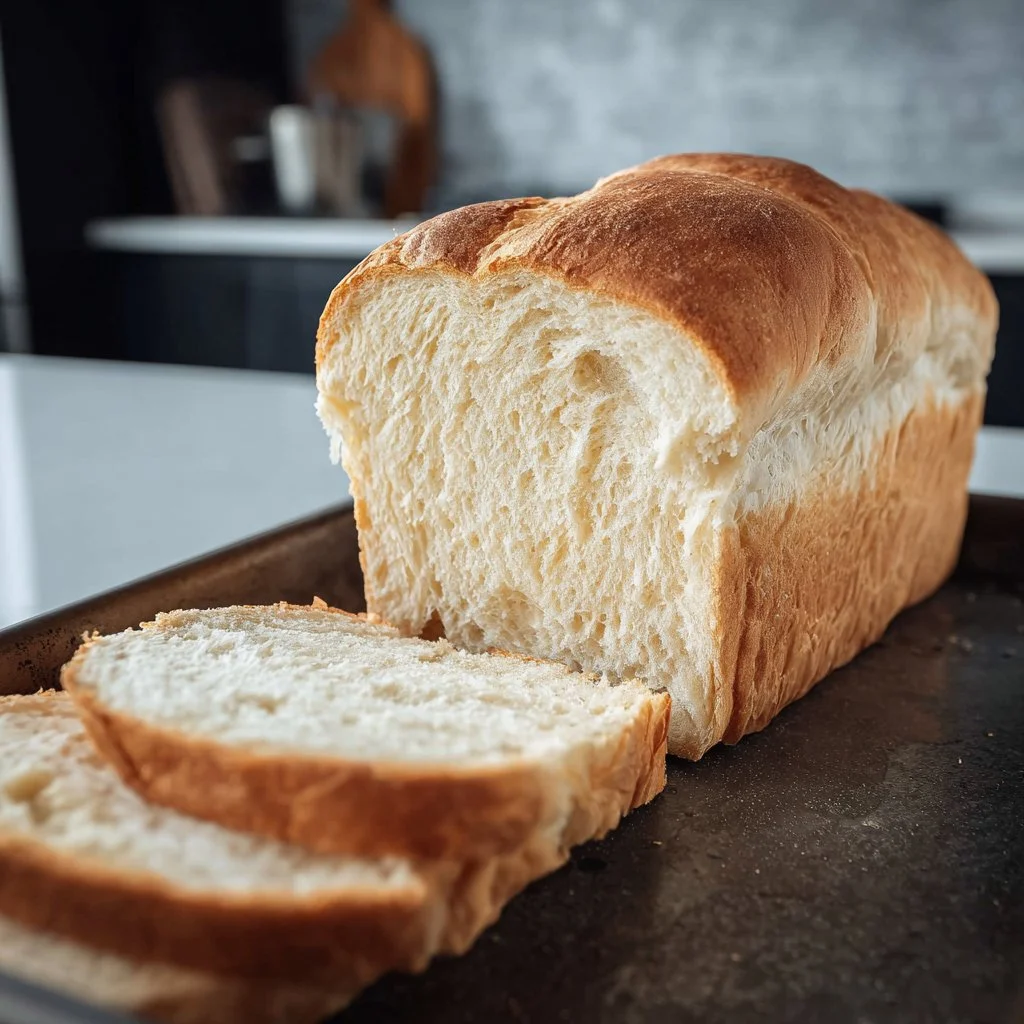
There’s nothing like the smell of fresh bread baking—and with a bread machine, it couldn’t be easier. This simple recipe gives you a soft, fluffy loaf with a golden crust, perfect for toast, sandwiches, or enjoying on its own. Just add the ingredients, press a button, and let the machine do the work. Homemade bread has never been this easy or satisfying.
Why We Love This Bread Machine Bread Recipe
This bread machine recipe is cherished for more than just its delicious flavor. The beauty of using a bread machine lies in the simplicity and precision it offers. You don’t need to worry about kneading or manually mixing the ingredients; the machine does it for you. This recipe yields a lovely homemade bread that is versatile enough for sandwiches, as a side for soups, or just buttering a slice for breakfast. Moreover, with the right ingredients, you can achieve that perfect balance of sweetness and saltiness, alongside a texture that is soft yet holds structure.
The ability to customize your bread comes as an added bonus. Whether you prefer it plain or with various add-ins, the possibilities are endless. Perhaps you want to incorporate herbs, cheese, or seeds. You can experiment and make this recipe your own.
Ingredients for Bread Machine Bread
You will need the following ingredients to create your perfect loaf of bread:
- 1 cup water (very hot)
- 1 egg
- 4 tablespoons butter (cold, not softened)
- 1/4 cup sugar
- 1 1/4 teaspoons salt
- 3 cups flour
- 1 tablespoon quick-rise yeast
These ingredients are typically available in most kitchens. They are simple yet effective in crafting a delicious loaf of bread.
How to Make Bread Machine Bread Directions
Making Bread Machine Bread is a straightforward process that can be broken down into a few easy steps.
Start with Ingredients: Begin by taking your very hot water and pouring it into the bread machine’s pan. This hot water will help activate the yeast and ensures that your bread rises well.
Add Egg and Butter: Next, crack the egg into the pan, ensuring it’s well incorporated with the water. Add the cold butter, which will melt during the dough cycle, providing richness and flavor to your bread.
Mix in Sugar and Salt: Sprinkle the sugar and salt into the mixture. Sugar not only sweetens but also helps with browning the crust. Salt is essential as it enhances the flavor.
Add Flour: Now, measure out your flour and gently add it over the wet mixture. Be careful not to stir it in just yet! You want the flour to cover the liquid so that you can later create a small well for the yeast.
Make a Well for Yeast: Using a spoon, create a small well in the flour. This is where you will add the yeast. It’s crucial that the yeast does not come into contact with the liquid until the dough cycle begins because you want to preserve its leavening power for the rise.
Add Yeast: Carefully add the quick-rise yeast into the well you created.
Set the Machine: Now, close the lid and set your bread machine to the ‘dough’ cycle. This usually takes around 90 minutes, depending on your specific machine.
Prepare for Baking: Once the dough cycle is complete, the dough will have risen nicely. Remove it from the machine, and pour it directly into a greased bread pan. If you find it a bit sticky, you can gently knead in a little extra flour, but be careful not to over-knead.
Shape the Loaf: If you want a smooth top for your bread, gently tuck in the edges or turn it over while placing it in the pan to ensure a nice shape.
Bake in a Cold Oven: This is where the magic happens! Place the bread pan into a cold oven, and then set the temperature to 350 degrees Fahrenheit. Setting a timer for 30 minutes will allow it to bake beautifully.
Cooling: When the timer goes off, carefully remove the pan from the oven and let the bread cool for a few minutes. Then, gently lift the bread out and place it on a cooling rack.
Butter the Top: Brush the top with some melted butter for added flavor and a lovely sheen.
How to Serve Bread Machine Bread
Once you have crafted your delicious homemade bread, serving it becomes a delightful experience. The bread is incredibly versatile and pairs well with a multitude of dishes.
- As a Side: Slices of this bread served alongside your favorite soup or salad create a wholesome meal. You can toast the slices lightly for extra texture.
- With Spreads: Enjoy the bread warm with butter, honey, or your favorite jam. The warmth of the bread enhances the flavors of spreads.
- For Sandwiches: This bread is perfect for sandwiches. Whether you go classic with turkey and cheese or choose a variety of fillings, the robust texture holds everything together splendidly.
- As Rolls: If you prefer serving smaller portions, you can take the dough, divide it into 12 equal pieces, and shape them into rolls. Serve these with dinner, and watch them disappear!
Expert Tips: Bread Machine Bread
To make your bread-making experience even more enjoyable, here are some expert tips to keep in mind:
- Use Fresh Ingredients: Always use fresh yeast and flour for the best results. Expired ingredients can lead to flat or disappointing bread.
- Measure Accurately: Baking is a science, so measuring your ingredients accurately is essential. Too much flour or not enough liquid can affect the dough’s consistency.
- Room Temperature Ingredients: Set your cold butter out to reach room temperature before use. This makes it easier to combine when it melts into the dough.
- Customize: Feel free to add herbs, cheese, or nuts into the dough for added flavor and texture. Just keep in mind that adding too many solids may affect the bread’s rise.
- Experiment with Settings: Depending on your bread machine, don’t hesitate to experiment with various settings like crust color preferences for a darker or lighter finish.
How to Store Bread Machine Bread
Storing your freshly baked bread correctly ensures it remains fresh and delicious for longer. Here are some tips to help you properly store your bread:
- Cover with a Towel: To maintain the bread’s crustiness, place a towel over the bread once it cools. This prevents it from drying out too quickly.
- Plastic Storage: Alternatively, you can place your bread in a plastic Ziplock bag. Ensure that it is completely cool before doing so to avoid moisture build-up and soggy bread.
- Slice Before Storing: If you plan to use the bread over several days, consider slicing it before putting it away. This way, you can easily grab a piece without the need to re-slice each time.
Variations of Bread Machine Bread
Embrace creativity in the kitchen by experimenting with variations of the basic bread machine bread recipe. Here are some ideas to inspire you:
- Herb-Infused Bread: Add dried herbs like rosemary or thyme to the dough for a flavorful twist that pairs wonderfully with Italian dishes.
- Cheese Bread: Incorporate shredded cheese like cheddar or mozzarella into the dough during the mixing stage. This creates a savory, cheesy loaf perfect for snacking.
- Sweet Bread: Add a dash of cinnamon and raisin or cranberry to your dough for a comforting and sweet version of bread that’s tasty for breakfast or dessert.
- Nutty Bread: Toss in some chopped mixed nuts to add a crunchy texture, making for both a nutritious and delightful bread that can stand on its own.
FAQs
What is the best bread machine for making homemade bread?
Investing in a reliable bread machine can elevate your bread-making experience. Look for machines with multiple settings, a removable pan for easy cleaning, and good customer reviews on reliability.
Can I use all-purpose flour instead of bread flour?
Absolutely! While bread flour yields chewier bread due to its higher protein content, all-purpose flour can also work well. Just be sure to keep an eye on the dough consistency, as it may require slight adjustments.
How can I troubleshoot my bread if it doesn’t rise properly?
If your bread doesn’t rise well, check if the yeast is fresh and active. Ensure the water temperature is optimal for yeast activation (not too hot). Additionally, avoid using expired ingredients and give your bread enough time to rise in a warm environment.
Can I make gluten-free bread in a bread machine?
Yes! Many bread machines have a gluten-free setting. You’ll need specific gluten-free flour blends that work well in the bread machine. Just follow a gluten-free recipe suitable for your machine.
How long does bread stay fresh after baking?
When stored properly, homemade bread can stay fresh for about 3-5 days at room temperature. For longer storage, consider freezing it in slices for up to three months.

Bread Machine Bread
Ingredients
Bread Ingredients
- 1 cup water (very hot) Hot water helps activate the yeast.
- 1 piece egg Ensure it is well incorporated with water.
- 4 tablespoons butter (cold, not softened) Melts during dough cycle adding flavor.
- 1/4 cup sugar Helps with browning the crust.
- 1 1/4 teaspoons salt Enhances the flavor.
- 3 cups flour Use all-purpose or bread flour.
- 1 tablespoon quick-rise yeast Keep away from the liquid until dough cycle starts.
Instructions
Preparation
- Pour the very hot water into the bread machine’s pan.
- Add the egg and cold butter into the pan, ensuring they are well incorporated.
- Sprinkle the sugar and salt into the mixture.
- Measure the flour and gently add it over the wet mixture.
- Create a small well in the flour and add the yeast into the well.
- Close the lid and set your bread machine to the 'dough' cycle.
Baking
- After 90 minutes, remove the dough from the machine and pour it into a greased bread pan.
- Shape the loaf as desired.
- Place the bread pan into a cold oven and set the temperature to 350°F (175°C).
- Set a timer for 30 minutes to bake the bread.
- Once baked, remove from oven and allow to cool on a rack.
- Brush the top with melted butter for added flavor.
Send me this recipe!
Just enter your email below and get it sent straight to your inbox!


