When the holiday season approaches, there’s an unmistakable charm in the air, filled with the scents and sights of celebration. Among the myriad of treats you might encounter, Christmas Shortbread Cookies stand out as a delightful classic that has been cherished across generations. These cookies are not just delectable but also embody the spirit of the festive season, making them a perfect homemade gift or treat for family gatherings.
Why We Love This Christmas Shortbread Cookies Recipe
There’s something incredibly inviting about Christmas Shortbread Cookies, and it often begins with nostalgia. For many, the memories of baking these cookies together with family or decorating them as a kid evokes warmth and joy, creating a bond that lasts a lifetime. Not only are these cookies simple to make, but their versatility allows you to customize them with various toppings and decorations. The base recipe is straightforward and can easily be adapted to your taste.
The combination of buttery richness, sweetness from the powdered sugar, and the refreshing hint of peppermint in the glaze and buttercream makes these cookies a crowd-pleaser. The process of rolling out the dough, cutting out festive shapes, and decorating them can become a fun and interactive activity, making the experience of baking just as delightful as devouring the cookies themselves.
Ingredients about Christmas Shortbread Cookies
To create your own batch of homemade Christmas Shortbread Cookies, gather the following ingredients:
- For the Cookies:
- 8 ounces butter (2 sticks, softened)
- 1/2 cup powdered sugar
- 1 teaspoon vanilla extract
- 1 3/4 cups all-purpose flour
- 1/4 cup cornstarch
- For the Mint Glaze:
- 2 cups powdered sugar
- 4 tablespoons half and half (or milk, adjust as necessary)
- 1/4-1 teaspoon peppermint extract
- For the Buttercream Piping:
- 1 tablespoon very soft butter
- 1 cup powdered sugar
- 1 1/2-2 tablespoons half and half (or milk)
- 1/2 teaspoon peppermint extract
- 3-4 drops green food coloring
How to Make Christmas Shortbread Cookies Directions
Creating these delightful cookies involves a series of straightforward steps that will have your kitchen bustling with holiday cheer in no time.
- Prepare the Baking Sheets: Start by lining two sheet pans with parchment paper. This will prevent the cookies from sticking and make cleanup easier.
- Mix the Butter: Place the soft butter into a mixing bowl. Use a spatula or an electric mixer to stir until it’s nice and smooth.
- Add Sugar and Vanilla: Incorporate the powdered sugar and vanilla extract into the butter. Mix for about one minute until the mixture becomes fluffy and creamy.
- Incorporate the Dry Ingredients: Gradually stir in the all-purpose flour and cornstarch. It may seem a bit dry at first, but keep mixing until you form a shaggy dough.
- Knead the Dough: Transfer the dough onto a floured surface and knead it gently until it is smooth. Form the dough into a disk shape.
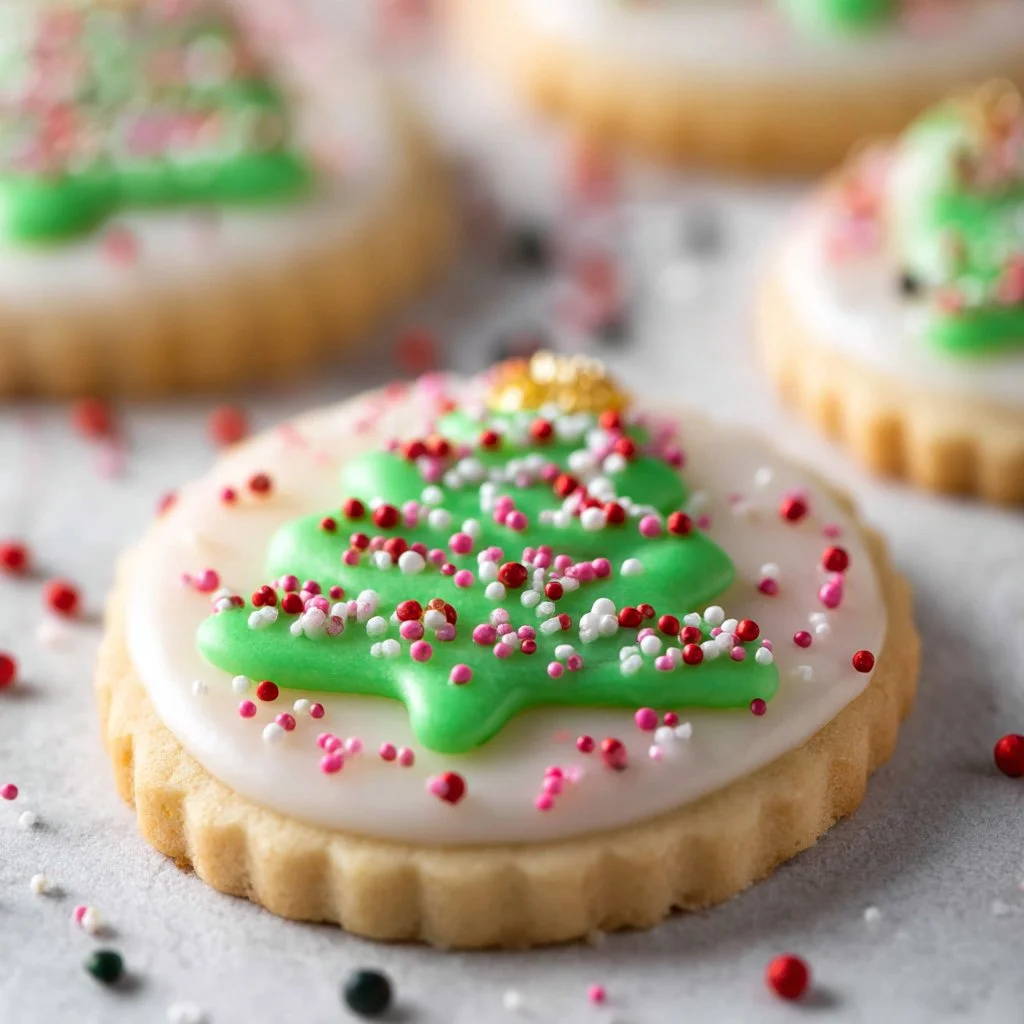
- Roll Out the Dough: Roll the dough out to about 3/8-inch thickness. Use cookie cutters to cut out festive shapes, such as stars, trees, or holiday wreaths.
- Prepare for Chilling: Place the cut-out cookies on the prepared baking sheets, leaving a little space between each one. Refrigerate the cookies for at least one hour, up to 24 hours, which helps maintain their shape during baking.
- Preheat the Oven: When you’re ready to bake, preheat your oven to 350°F (175°C).
- Bake the Cookies: Bake your cookies in the preheated oven for about 12-16 minutes. You’ll know they’re done when the edges turn a lovely golden brown.
- Cool Completely: Once baked, allow the cookies to cool completely on the baking sheets before you proceed with icing them.
- Mint Glaze Preparation: To make the mint glaze, whisk together the powdered sugar, half and half (or milk), and peppermint extract until the mixture is smooth.
- Glazing the Cookies: Dip the tops of the cooled cookies in the glaze, letting any excess drip off.
- Let the Glaze Set: Allow the cookies to sit for about 15-30 minutes for the glaze to dry and set before decorating.
- Buttercream Piping: For the buttercream, mix the very soft butter until smooth. Gradually add the powdered sugar and half and half while mixing. Finally, stir in the peppermint extract and add green food coloring until you achieve your desired shade.
- Decorate the Cookies: Using a piping bag or a simple plastic bag with a corner cut off, pipe the buttercream onto the cookies in a decorative fashion. Add festive sprinkles or decorations for an extra holiday touch.
- Let Dry Again: Allow the decorated cookies to dry completely before storing or serving.
How to Serve Christmas Shortbread Cookies
Servicing your Christmas Shortbread Cookies in style can enhance the festive atmosphere. These cookies are not only delicious but also visually appealing with their colorful icing and decorations. Present them on a beautiful platter, and consider pairing them with a warm cup of cocoa, tea, or milk, which balances the sweetness of the cookies.


For holiday gatherings, consider serving these cookies at parties or as a centerpiece on dessert tables. You could even wrap individual cookies in clear cellophane bags tied with a ribbon, making lovely gifts for neighbors, teachers, or friends. The cheerful colors and festive shapes will surely bring smiles to faces during your holiday festivities.
Expert Tips: Christmas Shortbread Cookies
To ensure your Christmas Shortbread Cookies turn out perfect every time, consider these expert tips:
- Butter Temperature: Make sure your butter is at room temperature, allowing it to cream easily with the sugar. If it’s too cold, the cookies won’t achieve the desired texture.
- Chill the Dough: Chilling the dough is vital for maintaining the shape of your cookies while baking. Don’t skip this step!
- Measure Accurately: Accurate measurement of ingredients is crucial. For instance, spoon flour into the measuring cup and level it off with a knife, instead of scooping directly from the bag.
- Test Baking Time: Every oven can bake differently, so keep an eye on your cookies towards the end of the baking time. You want them lightly golden at the edges to ensure they are perfect.
- Glaze Techniques: When dunking your cookies in the glaze, do so gently for an even coating. Allow for a brief moment to let any excess glaze drip off before placing them on a cooling rack.
How to Store Christmas Shortbread Cookies
Proper storage can keep your Christmas Shortbread Cookies tasting fresh for days. Once your cookies are completely cooled and decorated, you can store them in an airtight container at room temperature. They can last up to a week if kept sealed properly.
For longer storage, consider freezing them. Place the cookies in a single layer on a baking sheet and freeze until solid, then transfer them to a zip-top freezer bag or airtight container. They can last in the freezer for up to three months. When you are ready to enjoy, simply thaw them at room temperature for a delightful treat anytime.
Variations of Christmas Shortbread Cookies
The beauty of Christmas Shortbread Cookies lies in their versatility. You can experiment with various flavors and decorations to suit your taste. Here are some fun variations to consider:
- Chocolate-Dipped Shortbread: After glazing, dip the bottoms of the cookies in melted chocolate for a decadent twist.
- Nutty Addition: Add finely chopped nuts like almonds or pecans into the dough for an added crunch and flavor.
- Spiced Shortbread: Incorporate spices like cinnamon or nutmeg into the dough for a warm holiday flavor.
- Holiday Sprinkles: Use colored sprinkles or edible glitter for a festive and colorful finish that kids will especially love.
- Alternate Extracts: If peppermint isn’t your flavor of choice, try using almond extract or vanilla for a different yet delightful cookie experience.
FAQ
What are Christmas Shortbread Cookies?
Christmas Shortbread Cookies are traditional sweet treats made primarily of butter, sugar, and flour, characterized by their melt-in-your-mouth texture and simplicity.
How long will the cookies stay fresh?
When stored properly in an airtight container, these cookies can remain fresh for up to a week. If you freeze them, they can last up to three months.
Can I make these cookies ahead of time?
Absolutely! You can prepare the dough and refrigerate it or freeze it before baking or decorate the cookies a day or two in advance, allowing you to enjoy more time with family during the holiday season.
Should I chill the dough?
Yes, chilling the dough is crucial as it helps the cookies maintain their shape while baking. Ideally, refrigerate them for at least one hour before baking.
What types of decorations can I use on the cookies?
You can pipe on buttercream, drizzle with chocolate, or use colored sprinkles. The options are endless to express your holiday creativity!