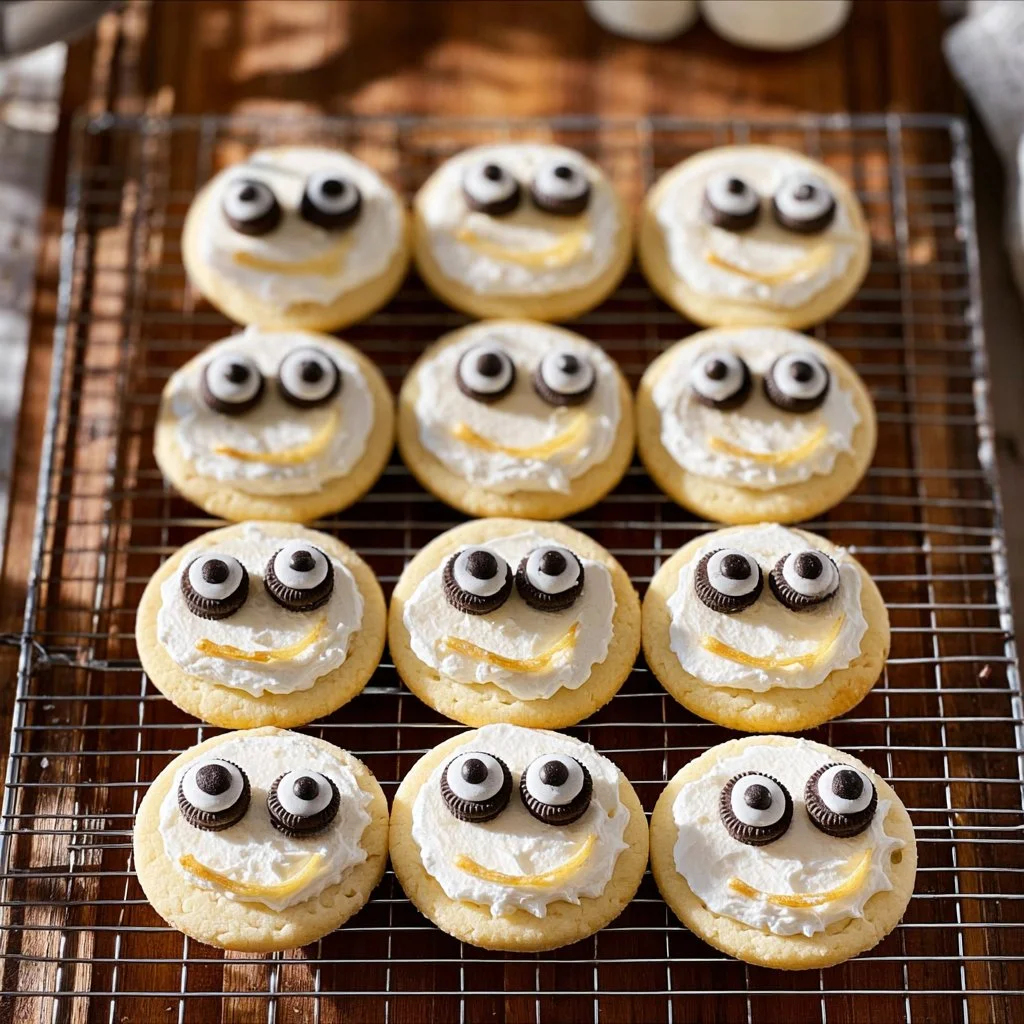
When it comes to Halloween, the excitement isn’t just about costumes and creepy decorations; it’s also about delightful treats that can enchant your taste buds. One such treat that captures the playful spirit of the season is the charming Ghost Cookies. These cookies are not only fun to look at but are also incredibly delicious. Whether you are planning a party or simply want a spooky snack to share with friends and family, Ghost Cookies are perfect for any Halloween gathering.
Why We Love This Ghost Cookies Recipe
One of the reasons why this recipe stands out is its simplicity. With readily available ingredients and straightforward steps, you can whip up a batch of these cookies without any hassle. The base cookie is soft and buttery, creating the perfect canvas for ghosts made out of frosting. Then there’s the added crunch from the mini Oreo cookies and the colorful touch from the M&M’s, which makes them irresistible. Each bite offers a delightful blend of flavors and textures, making them a favorite for both kids and adults. Moreover, these cookies are versatile. You can modify them to suit your preferences or even make them a fun baking project for family bonding time.
Ingredients for Ghost Cookies
Creating your Ghost Cookies is not only enjoyable; it also requires minimal, easily accessible ingredients. Here’s what you will need:
For the Cookies:
- 1 1/3 cup all-purpose flour
- 3/4 teaspoon baking powder
- 1/4 teaspoon salt
- 1/2 cup unsalted butter, softened
- 1 cup granulated sugar
- 1 large egg
- 1 teaspoon vanilla extract
- 1/2 teaspoon almond extract
For the Frosting:
- 1 cup unsalted butter, softened
- 4 cups powdered sugar
- Pinch of salt
- 1 teaspoon vanilla extract
- 2 tablespoons milk (adjustable for desired consistency)
For Decoration:
- 36 mini Oreo cookies
- 36 brown M&M’s
These ingredients blend together to create a wonderful treat that’s as delightful to see as it is to eat.
How to Make Ghost Cookies
Making Ghost Cookies is a fun activity that can involve the whole family. Here’s how you can create these festive treats step-by-step:
Preheat the Oven: Begin by preheating your oven to 350 degrees Fahrenheit. This ensures that your cookies will bake evenly.
Prepare Your Baking Sheet: Line your baking sheet with parchment paper to prevent sticking and make cleanup easier.
Mix Dry Ingredients: In a small bowl, whisk together the flour, baking powder, and salt. This step incorporates air into the flour and helps create light, fluffy cookies.
Cream Butter and Sugar: In the bowl of a stand mixer, combine the granulated sugar and softened butter. Beat them together using the paddle attachment until fluffy. This usually takes about 2-3 minutes.
Add Wet Ingredients: Crack the egg into the bowl, then add the vanilla and almond extracts. Continue beating until these ingredients are well combined.
Combine Mixtures: Gradually add the flour mixture into the wet ingredients. Mix just until you can’t see any dry flour left. Make sure to scrape down the sides of the bowl to incorporate everything thoroughly.
Shape the Cookies: With a medium-sized cookie scoop, portion out the dough and roll it into balls. Place them on your prepared baking sheet, ensuring there is enough space between each cookie, as they will spread a bit while baking.
Bake the Cookies: Bake in the preheated oven for approximately 10 minutes. Keep an eye on them; you want the edges to be just lightly golden while the centers remain soft.
Cool Before Frosting: Once baked, remove the cookies from the oven and allow them to cool completely on a wire rack. This prevents the frosting from melting when you apply it.
Prepare the Frosting: While the cookies cool, you can start on the frosting. In the stand mixer, beat together the softened butter, powdered sugar, and a pinch of salt. Gradually add the vanilla extract and the milk, adjusting the consistency until it’s smooth and spreadable.
Frost and Decorate: Generously frost each cookie with the prepared frosting. Place a mini Oreo on top as the ghost’s head, and use a bit of the reserved frosting to adhere the brown M&M’s as eyes.
You now have adorably spooky Ghost Cookies ready to impress!
How to Serve Ghost Cookies
Serving your Ghost Cookies can be a creative part of the experience. Here are a few ways to do so that will make your treat stand out:
On a Festive Platter: Arrange your Ghost Cookies on a decorative platter. You can add some Halloween-themed decorations like spider webs or plastic spiders around the cookies to elevate the presentation.
As Party Favors: Package each cookie in a cute treat bag tied with orange or black ribbons. This makes them a fantastic party favor for guests to take home.
Cookie Decorating Stations: If you’re hosting a Halloween party, set up a decorating station where guests can frost their cookies and add their own mini Oreos and M&M’s. This interactive element can be a delightful addition to your event.
No matter how you choose to serve them, your Ghost Cookies will surely be a hit!
Expert Tips for Ghost Cookies
To ensure that your Ghost Cookies turn out perfect every time, consider the following expert tips:
Softened Butter: Make sure your butter is softened at room temperature but not melted. This will ensure that your cookies are soft and tender rather than greasy.
Chill the Dough: If your dough feels too soft to scoop, you can chill it in the refrigerator for 30 minutes to make it easier to handle.
Baking Time: Keep an eye on your cookies while they bake. Ovens can vary, and you don’t want to overbake your cookies. They should be just set in the center when you take them out.
Customization: Feel free to customize your Ghost Cookies! You can use different types of candy for the eyes or even different extract flavors for a unique taste.
How to Store Ghost Cookies
Storing your Ghost Cookies properly will keep them fresh for longer. Here are some tips:
Room Temperature: Place your cookies in an airtight container at room temperature. They can stay fresh for up to a week if stored correctly.
Refrigeration: If you want to keep them for longer than a week, you can refrigerate them, but this may slightly alter the texture. Ensure they are in a sealed container to prevent them from drying out.
Freezing: For even longer storage, you can freeze your Ghost Cookies. Make sure they are sealed well in a freezer-safe container or divide them with parchment paper to avoid sticking.
When you’re ready to enjoy them again, let them thaw at room temperature or warm them gently in the microwave.
Variation of Ghost Cookies
While the classic Ghost Cookies are delightful, feel free to play around with the recipe! Here are some fun variations you might consider:
Chocolate Chip Ghost Cookies: Add chocolate chips to your cookie dough for an extra chocolatey flavor that complements the vanilla.
Nutty Addition: Incorporate finely chopped nuts like almonds or walnuts into the dough for a crunchy texture.
Colored Frosting: Instead of sticking to white frosting, use food coloring to create colored ghosts. You can make pastel-colored ghosts or even vibrant neon shades.
Spooky Sprinkles: Add Halloween-themed sprinkles to the frosting for a fun and festive look that little ones will adore.
Get creative with your cookies; there are endless possibilities to explore!
FAQ About Ghost Cookies
What are Ghost Cookies?
Ghost Cookies are playful, spooky treats that feature a soft sugar cookie base, frosting, mini Oreos, and M&M’s to resemble cute ghosts. They’re perfect for Halloween parties or gatherings!
How do I make Ghost Cookies?
To make Ghost Cookies, you start by preparing a simple dough from flour, sugar, butter, and extracts. After baking, they are frosted and decorated with Oreo cookies and M&M’s.
How should I store Ghost Cookies?
For best results, store your Ghost Cookies in an airtight container at room temperature, refrigerate for longer freshness, or freeze for extended storage.
Can I customize Ghost Cookies?
Absolutely! You can try different extracts, add chocolate chips, use colored frosting, or top them with various candies to create unique variations.
Are Ghost Cookies suitable for kids?
Yes! Ghost Cookies are fun and easy to make, making them great for kids to enjoy decorating. Just be mindful of any allergies related to ingredients like nuts or chocolate.

Ghost Cookies
Equipment
- Mixing Bowls
- Baking Sheet
- Oven
- Parchment Paper
- Stand Mixer
Ingredients
- 1 1/3 cups all-purpose flour
- 3/4 teaspoon baking powder
- 1/4 teaspoon salt
- 1/2 cup unsalted butter softened
- 1 cup granulated sugar
- 1 large egg
- 1 teaspoon vanilla extract
- 1/2 teaspoon almond extract optional
- 1 cup unsalted butter for frosting, softened
- 4 cups powdered sugar
- 1 pinch salt
- 1 teaspoon vanilla extract for frosting
- 2 tablespoons milk adjustable for desired consistency
- 36 mini Oreo cookies for decoration
- 36 brown M&M’s for decoration
Instructions
- Preheat your oven to 350°F (175°C) and line a baking sheet with parchment paper.
- In a small bowl, whisk together the flour, baking powder, and salt.
- In a stand mixer, cream together the softened butter and granulated sugar until fluffy.
- Add the egg, vanilla extract, and almond extract (if using), mixing until well combined.
- Gradually add the flour mixture into the wet ingredients, mixing until just combined.
- Using a cookie scoop, portion out the dough and roll into balls. Place on the prepared baking sheet.
- Bake for approximately 10 minutes, until the edges are lightly golden and the centers are soft.
- Cool completely on a wire rack before frosting.
- In the stand mixer, beat together the softened butter, powdered sugar, pinch of salt, vanilla extract, and milk until smooth.
- Generously frost each cookie, then place a mini Oreo on top as the ghost’s head.
- Use a bit of frosting to adhere the brown M&M’s as eyes on the mini Oreo.
Send me this recipe!
Just enter your email below and get it sent straight to your inbox!


