Gluten-free sandwich bread is soft, fluffy, and easy to make at home. It’s perfect for toast, sandwiches, or just enjoying with a little butter.
Why We Love This Gluten-Free Sandwich Bread Recipe
One of the most significant challenges for those following a gluten-free diet is finding bread that tastes good and has a pleasant texture. This gluten-free sandwich bread does not disappoint. It’s light, tender, and perfect for any sandwich filling you can imagine. The unique combination of ingredients results in a loaf that has a similar consistency and flavor profile to traditional bread. Additionally, you can customize it with herbs, spices, or other flavors if you wish. It’s not just bread—it’s an experience of warmth and comfort.
Ingredients for Gluten-Free Sandwich Bread
To create this scrumptious gluten-free sandwich bread, you’ll need the following ingredients:
- 460 grams King Arthur Measure for Measure Gluten-Free Flour
- 8 grams Xanthan Gum
- 10 grams Yeast
- 1 gram Cream of Tartar
- 27 grams Sugar
- 13 grams Salt
- 334 grams Warm Milk
- 57 grams Unsalted Butter (room temperature)
- 5 grams Apple Cider Vinegar
- 2 Eggs (room temperature)
These ingredients blend perfectly together to form a dough that rises beautifully, yielding a loaf that is fluffy yet firm—a true delight for your taste buds.
How to Make Gluten-Free Sandwich Bread
Step 1: Prepare Your Pan
Begin by lightly spraying an 8×4 or 9×5-inch bread loaf pan with cooking oil. This step is essential to ensure that your bread does not stick to the pan after baking.
Step 2: Mix the Dry Ingredients
In your Kitchenaid mixer fitted with the paddle attachment, combine the King Arthur Measure for Measure Gluten-Free Flour, xanthan gum, yeast, cream of tartar, sugar, and salt. Mixing these dry ingredients well allows the flavors to meld, ensuring a uniform taste throughout your bread.


Step 3: Incorporate Wet Ingredients
Gradually add the warm milk, softened unsalted butter, and apple cider vinegar to your dry mixture. Mix until the dough comes together into a smooth batter. The warm milk helps activate the yeast, leading to a beautiful rise in your bread.
Step 4: Add Eggs
Add the eggs one at a time to the dough mixture. Ensure each egg is fully incorporated before adding the next. This step is crucial as it adds moisture and richness to the bread, enhancing its texture and flavor.
Step 5: Transfer and Smooth the Batter
Scoop the dough into the prepared loaf pan. Using a wet rubber spatula, smooth out the top of the dough. A smooth surface helps the loaf rise evenly.
Step 6: Let It Rise
Cover the pan with plastic wrap and let the dough rise for 60 minutes. The rising phase is vital, enabling the yeast to create air bubbles that give your bread its light, airy texture.
Step 7: Preheat Your Oven
As your dough rises, preheat your oven to 375°F. Having your oven preheated ensures that your bread bakes evenly and turns golden brown.
Step 8: Bake the Bread
Once your dough has risen and has doubled in size, place it in the preheated oven. Bake it for about 45 to 60 minutes until it reaches a beautiful golden brown color. You’ll know it’s done when you do the “tap test.” If the loaf sounds hollow when tapped, it’s ready!
Step 9: Cool and Slice
After taking the bread out of the oven, let it cool in the pan for about 10 minutes. Then, turn it out onto a cooling rack and allow it to cool completely before slicing. Slicing too early can yield crumbly pieces that may not hold together nicely.
How to Serve Gluten-Free Sandwich Bread
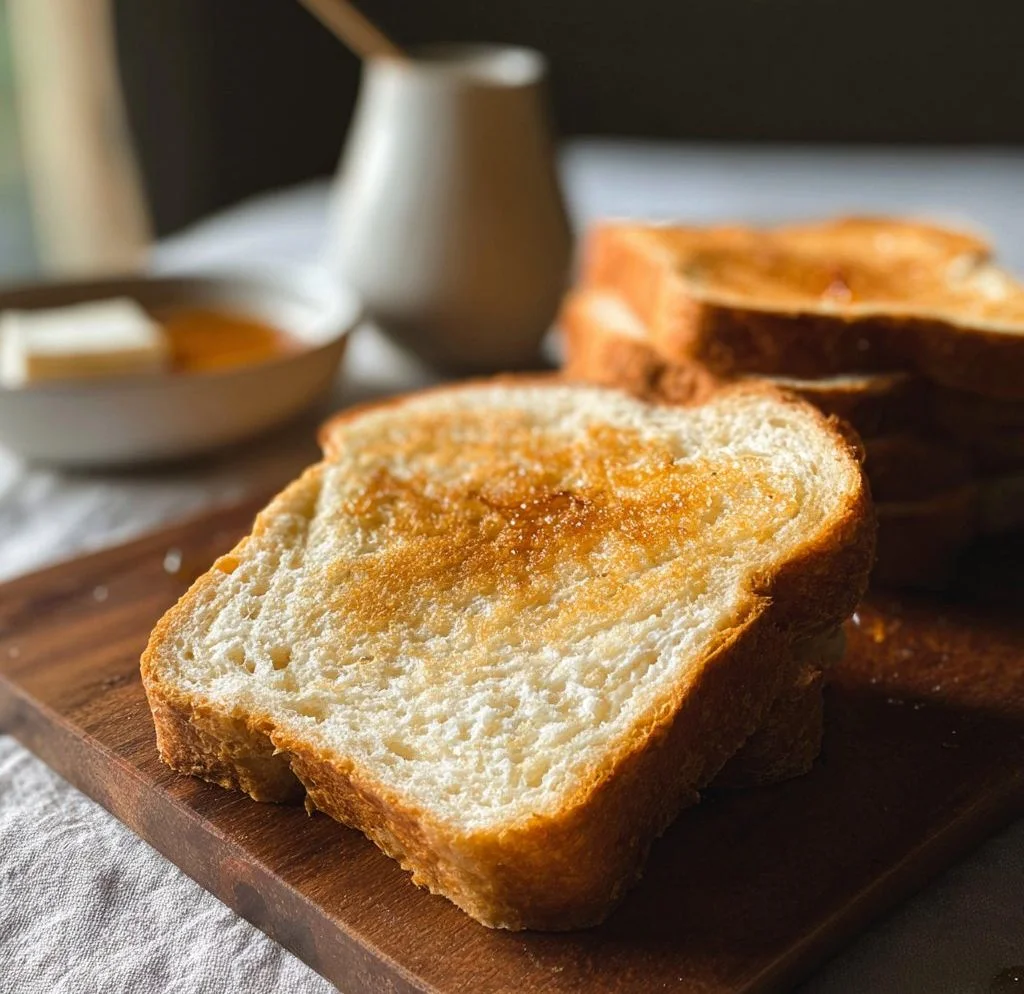
The versatility of this gluten-free sandwich bread is remarkable. Serve it as the base for classic sandwiches featuring fresh veggies and protein options or treat yourself to a simple slice with a pat of butter. Pair it with homemade soups for a cozy meal or enjoy it toasted with avocado for a nutritious breakfast.
For sweet treats, consider topping a slice with nut butter and sliced bananas, or layer it with your favorite spreads and fruits for a delightful afternoon snack. The possibilities are endless, and your gluten-free bread will surely be a crowd-pleaser, no matter the occasion.
Expert Tips for Gluten-Free Sandwich Bread
Creating the perfect gluten-free sandwich bread can sometimes come with its challenges. Here are some expert tips to help you achieve the best results:
- Measure Accurately: For gluten-free baking, precise measurement is critical. Use a kitchen scale to ensure your flour, sugar, and other ingredients are measured correctly.
- Temperature Matters: Ensure that all your wet ingredients, like milk and eggs, are at room temperature. This approach allows for better incorporation and helps the bread rise more effectively.
- Don’t Skip the Xanthan Gum: This ingredient is essential as it mimics the elasticity that gluten provides. It helps bind the dough together, giving your bread structure.
- Experiment with Flavors: Once you’re comfortable with the basic recipe, feel free to add herbs, spices, or seeds to the mixture to customize your bread to your taste.
- Keep an Eye on the Oven: Every oven is different. Start checking your bread at the 45-minute mark to avoid over-baking.
How to Store Gluten-Free Sandwich Bread
To maintain the freshness of your gluten-free sandwich bread, store it correctly. Allow the bread to cool completely before wrapping it in plastic wrap or placing it in an airtight container. If you plan to keep it for more than a few days, consider freezing it. Slice the bread before freezing for easy use later on. Just take out a slice as you need it, toast it if you like, and enjoy a piece of your homemade bread whenever you want!
Variations of Gluten-Free Sandwich Bread
While this basic gluten-free sandwich bread is delicious on its own, there are countless ways to elevate it:
- Herbed Bread: Incorporate dried rosemary, thyme, or basil into your dough to infuse a wonderful aroma and flavor.
- Seeded Bread: Add sunflower seeds, flaxseeds, or sesame seeds to the top of the bread before baking for a beautiful finish and added crunch.
- Sweet Bread: Create a sweet version by adding cinnamon and raisins or a hint of vanilla extract for a delightful twist perfect for breakfast.
- Cheesy Bread: For cheese lovers, fold in shredded cheese into the dough for a savory delight, perfect for sandwiches or simply enjoyed on its own.
FAQs about Gluten-Free Sandwich Bread
What is gluten-free sandwich bread made of?
Gluten-free sandwich bread is typically made with a gluten-free flour blend, such as King Arthur Measure for Measure Gluten-Free Flour. It includes ingredients like xanthan gum, yeast, and other staples to provide flavor and texture without gluten.
How do you know when gluten-free bread is done?
You can tell gluten-free bread is done by tapping it gently on the bottom. If it sounds hollow, it’s likely ready. It should also be golden brown on top.
Can I replace the eggs in the gluten-free sandwich bread recipe?
Yes, you can replace eggs by using flaxseed meal as a binder. Mix 1 tablespoon of flaxseed meal with 2.5 tablespoons of water for each egg. Allow it to sit until it thickens before adding it to the mix.
How do I make gluten-free bread fluffier?
Ensure you’re using a good quality gluten-free flour blend, and don’t skip out on the xanthan gum. The right balance of wet to dry ingredients can also make a big difference in the fluffiness of your bread.
Can this gluten-free bread recipe be made ahead of time?
Absolutely! You can prepare the dough and let it rise, then store it in the fridge overnight. Bring it back to room temperature, shape it, and bake it the next day for fresh bread.

Gluten-Free Sandwich Bread
Ingredients
Dry Ingredients
- 460 grams King Arthur Measure for Measure Gluten-Free Flour
- 8 grams Xanthan Gum Essential for binding the dough.
- 10 grams Yeast
- 1 gram Cream of Tartar
- 27 grams Sugar
- 13 grams Salt
Wet Ingredients
- 334 grams Warm Milk Helps activate the yeast.
- 57 grams Unsalted Butter (room temperature) Softened for easier incorporation.
- 5 grams Apple Cider Vinegar
- 2 Eggs (room temperature) Adds moisture and richness.
Instructions
Preparation
- Begin by lightly spraying an 8×4 or 9×5-inch bread loaf pan with cooking oil.
- In your Kitchenaid mixer fitted with the paddle attachment, combine the dry ingredients: gluten-free flour, xanthan gum, yeast, cream of tartar, sugar, and salt.
- Gradually add the warm milk, softened unsalted butter, and apple cider vinegar to the dry mixture. Mix until the dough comes together into a smooth batter.
- Add the eggs one at a time, ensuring each egg is fully incorporated before adding the next.
- Scoop the dough into the prepared loaf pan and smooth out the top with a wet rubber spatula.
- Cover the pan with plastic wrap and let the dough rise for 60 minutes.
Baking
- Preheat your oven to 375°F.
- Once the dough has risen and doubled in size, place it in the preheated oven. Bake for about 45 to 60 minutes, until golden brown.
- To confirm it's done, tap the bottom; it should sound hollow.
Cooling
- Let the bread cool in the pan for about 10 minutes before transferring it to a cooling rack.
- Allow it to cool completely before slicing.
Send me this recipe!
Just enter your email below and get it sent straight to your inbox!