
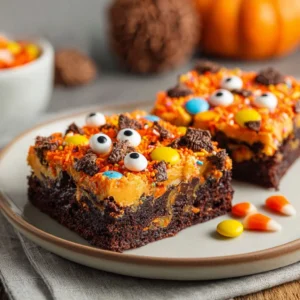
When it comes to Halloween festivities, nothing satisfies your sweet tooth or delights your guests quite like a delicious tray of Halloween brownies. These fudgy, rich chocolate brownies are not only a treat for your taste buds but also a feast for your eyes, adorned with festive colors and decorations. This recipe is designed to help you create an unforgettable dessert that encapsulates the spirit of Halloween. Imagine serving these in a gathering of family or friends, and watch as everyone experiences pure joy with each bite.
Why We Love This Halloween Brownies Recipe
There’s something special about these brownies that makes them perfect for Halloween celebrations. The blend of rich chocolate flavor and playful decorations creates an experience that merges the joys of baking with the festive spirit of the season. With easy-to-follow steps, you’ll be whipping up these brownies in no time.
The best part? They are utterly delicious, beautifully decorated, and perfect for sharing. Whether you’re having a spooky movie night, hosting a Halloween party, or even just treating your family after a day of trick-or-treating, these brownies will surely be a hit. You’ll also love how customizable they are, allowing you to add your creative flair while keeping the classic brownie taste intact. Let’s get started on creating these scrumptious treats!
Ingredients for Halloween Brownies
To prepare your delightful Halloween brownies, gather the following ingredients:
- 1 cup butter (melted, cooled)
- 2 tablespoons coconut oil (or preferred cooking oil)
- 1 1/4 cups sugar
- 1 cup light brown sugar (firmly packed)
- 1/4 teaspoon salt
- 4 large eggs (at room temperature)
- 1 tablespoon vanilla extract
- 1 cup all-purpose flour (spooned and leveled)
- 1 cup unsweetened cocoa powder
- 1.55 oz chocolate bar (optional, grated)
- 1/4 cup black melting wafers
- 1/4 cup orange melting wafers
- 1/4 cup white melting wafers
- 1/3 cup heavy whipping cream (divided)
- 1/4 cup Reese’s Pieces
- 1/4 cup mini Reese’s Peanut Butter Cups
- 1/4 cup Reese’s peanut butter chips
- Orange sanding sugar
- Candy eyes (various sizes)
With these ingredients in hand, you are ready to create a Halloween dessert that will thrill all who taste it!
How to Make Halloween Brownies Directions
Begin by preheating your oven to 350°F (175°C/Gas Mark 4). Lightly spritz a 9×13-inch baking dish with non-stick cooking spray. If you prefer, you can line the dish with parchment paper to make the brownies easier to cut later on.
In a mixing bowl, combine the melted butter, coconut oil, sugar, brown sugar, and salt. It’s important to mix these well to ensure all the ingredients are evenly distributed. This will create a rich and flavorful base for your brownies.
Next, crack in the large eggs, and add the vanilla extract. Stir these ingredients together until they are thoroughly mixed. The mixture should be smooth and glossy.
Now, it’s time to sift in the all-purpose flour and unsweetened cocoa powder. Use a spatula to gently fold in the dry ingredients. Be careful not to overmix; you want to maintain the light and fudgy texture that defines a great brownie. If you’re choosing to use the optional grated chocolate, fold that in too.
Once your batter is ready, transfer it to the prepared baking dish, spreading it evenly. You’ll bake these brownies for about 35-40 minutes, or until a toothpick inserted into the center comes out clean. After baking, allow the brownies to cool for at least 15 minutes. This cooling period is essential for achieving the perfect texture.
While the brownies are cooling, prepare the ganache. Divide the heavy cream into three portions and heat each one separately until bubbling. In separate bowls, combine each portion with a different color of melting wafers (black, orange, and white). Stir until the wafers are fully melted and your ganache is smooth.
Once the brownies have cooled, pour dollops of the colorful ganache over them. Feel free to swirl the ganache if you’d like a fun marbling effect.
Finally, it’s time to decorate! Sprinkle your brownies with Reese’s Pieces, mini peanut butter cups, peanut butter chips, sanding sugar, and add candy eyes for that Halloween touch. Allow everything to set for a bit before you slice and serve.


How to Serve Halloween Brownies
Now that you’ve successfully baked and decorated your Halloween brownies, it’s time to think about serving them. Presentation can make a significant difference in how appealing your treats look, so here are some fun ideas:
On a Spooky Platter: Arrange your brownies on a decorative tray or platter. You might consider using a spooky-themed plate to enhance the Halloween spirit.
With Halloween Decor: Incorporate decorations like plastic spiders, faux cobwebs, or even ghostly tableware around your brownies for a festive ambiance.
As Party Favors: Cut the brownies into individual squares, wrap them in cellophane or place them in small treat bags tied with a ribbon. This is a fun way to treat guests as they leave your gathering.
With Ice Cream: If you want to take your brownies to the next level, serve them warm with a scoop of vanilla or pumpkin-flavored ice cream on top. Drizzle some chocolate or caramel sauce, and sprinkle a few candy eyes for that extra touch.
Enjoying these brownies in good company makes them even sweeter.
Expert Tips: Halloween Brownies
To ensure your Halloween brownies turn out perfectly every time, keep these tips in mind:
Room Temperature Eggs: Using eggs at room temperature will help them incorporate better into your batter, resulting in a smoother texture.
Do Not Overbake: Make sure to keep an eye on your brownies in the oven. Overbaking can lead to dry brownies. Aim for a slightly underbaked center for that fudgy goodness.
Cooling Time: Allow your brownies to cool completely before slicing to ensure clean, neat cuts.
Decorating with Kids: If you have children, involve them in the decorating process! They’ll enjoy letting their creativity shine as they add toppings.
Testing for Doneness: Remember to insert a toothpick into the center. You want it to come out with a few moist crumbs, not wet batter, to ensure your brownies are perfectly baked.
How to Store Halloween Brownies
Storing your Halloween brownies correctly will maintain their deliciousness. Here’s how you can keep them fresh:
At Room Temperature: If you plan to eat the brownies within a couple of days, store them in an airtight container at room temperature.
In the Refrigerator: For longer storage, keep the brownies in an airtight container in the fridge. They can last for up to a week but note that they might lose some of their chewy texture.
Freezing: If you want to keep your brownies for an extended period, you can freeze them. Wrap individual brownie pieces tightly in plastic wrap and then place them in a freezer-safe container. They can be enjoyed for up to three months. To enjoy frozen brownies, simply reach into your stash, thaw them in the fridge, and allow them to come to room temperature before serving.
Variation of Halloween Brownies
While this recipe is a fantastic classic, don’t hesitate to get creative! Here are some fun variations you might consider:
Nuts and Seeds: Add chopped nuts such as walnuts or pecans to the batter for extra texture and flavor.
Mint Chocolate: Incorporate mint extract in the batter, and top your brownies with crushed peppermint candies for a refreshing twist.
Pumpkin Spice: Introduce pumpkin puree and pumpkin pie spices for a seasonal flavor that pairs beautifully with chocolate.
Marshmallow Topping: For a s’mores-like brownie, add mini marshmallows before the brownies are done baking, allowing them to caramelize slightly.
Feel free to mix and match these ideas to create a batch of brownies that suit your tastes and festivities!
FAQ
What is the key to achieving fudgy Halloween brownies?
The secret to incredibly fudgy brownies lies in not overbaking them. When checking for doneness, a toothpick should come out with some moist crumbs clinging to it, indicating they have the perfect fudgy texture.
Can I use other types of chocolate for this recipe?
Absolutely! Feel free to use dark chocolate, milk chocolate, or any other preferred type. Just remember to balance the sweetness accordingly, especially if switching to darker varieties.
What are some creative ways to decorate Halloween brownies?
You can use various methods such as icing with melted chocolate, edible glitter, or even themed sprinkles. Adding colorful candies or toppings that represent Halloween can elevate your brownies from tasty to festive.
Can I make these brownies in advance?
Yes! You can prepare these brownies a day ahead of your celebration. They actually taste even better after the flavors have melded together a bit. Just ensure they are stored properly to keep them fresh.
Halloween Brownies
Equipment
- 9×13-inch Baking Dish
- Mixing Bowls
- Electric Mixer
Ingredients
- 1 cup butter melted and cooled
- 2 tbsp coconut oil or preferred cooking oil
- 1 1/4 cups granulated sugar
- 1 cup light brown sugar firmly packed
- 1/4 tsp salt
- 4 large eggs at room temperature
- 1 tbsp vanilla extract
- 1 cup all-purpose flour spooned and leveled
- 1 cup unsweetened cocoa powder
- 1.55 oz. chocolate bar optional, grated
- 1/4 cup black melting wafers
- 1/4 cup orange melting wafers
- 1/4 cup white melting wafers
- 1/3 cup heavy whipping cream divided
- 1/4 cup Reese’s Pieces
- 1/4 cup mini Reese’s Peanut Butter Cups
- 1/4 cup Reese’s peanut butter chips
- as needed tbsp orange sanding sugar for decoration
- as needed candy eyes various sizes for decoration
Instructions
- Preheat your oven to 350°F (175°C) and lightly grease a 9×13-inch baking dish with non-stick spray.
- In a mixing bowl, combine melted butter, coconut oil, granulated sugar, brown sugar, and salt.
- Add eggs and vanilla extract, mixing until smooth.
- Sift in flour and cocoa powder, folding until just combined. If using, fold in grated chocolate.
- Transfer the batter to the prepared baking dish and spread evenly.
- Bake for 35-40 minutes or until a toothpick inserted in the center comes out clean.
- Let the brownies cool for about 15 minutes before preparing the ganache.
- Divide the heavy cream into three portions. Heat each portion until bubbling, then mix with a different color of melting wafers until smooth.
- Pour dollops of the colorful ganache over the cooled brownies and swirl if desired.
- Decorate with Reese’s Pieces, mini peanut butter cups, and candy eyes.
- Allow the decorations to set before slicing the brownies into squares.
Send me this recipe!
Just enter your email below and get it sent straight to your inbox!