As Halloween approaches, the air fills with excitement, mystery, and an abundance of delightful treats. One sweet creation that captures the spirit of this spooky season is the Halloween Pudding Cup. Not only do these colorful, delicious cups bring joy to the table, but they also challenge your creativity. Perfectly themed for Halloween, these pudding cups are a hit for both kids and adults. The combination of creamy pudding and crunchy Oreo cookies served in fun, festive cups creates an irresistible dessert that is sure to become a beloved tradition in your household.
Why We Love This Halloween Pudding Cups Recipe
There’s something truly enchanting about Halloween Pudding Cups. First and foremost, they are incredibly simple to make, requiring just a handful of ingredients and minimal cooking skills. This means that anyone can whip up a batch of these treats in no time! They are a perfect project for kids, allowing them to get involved in the kitchen, unleash their creativity, and indulge in their spooky sides.
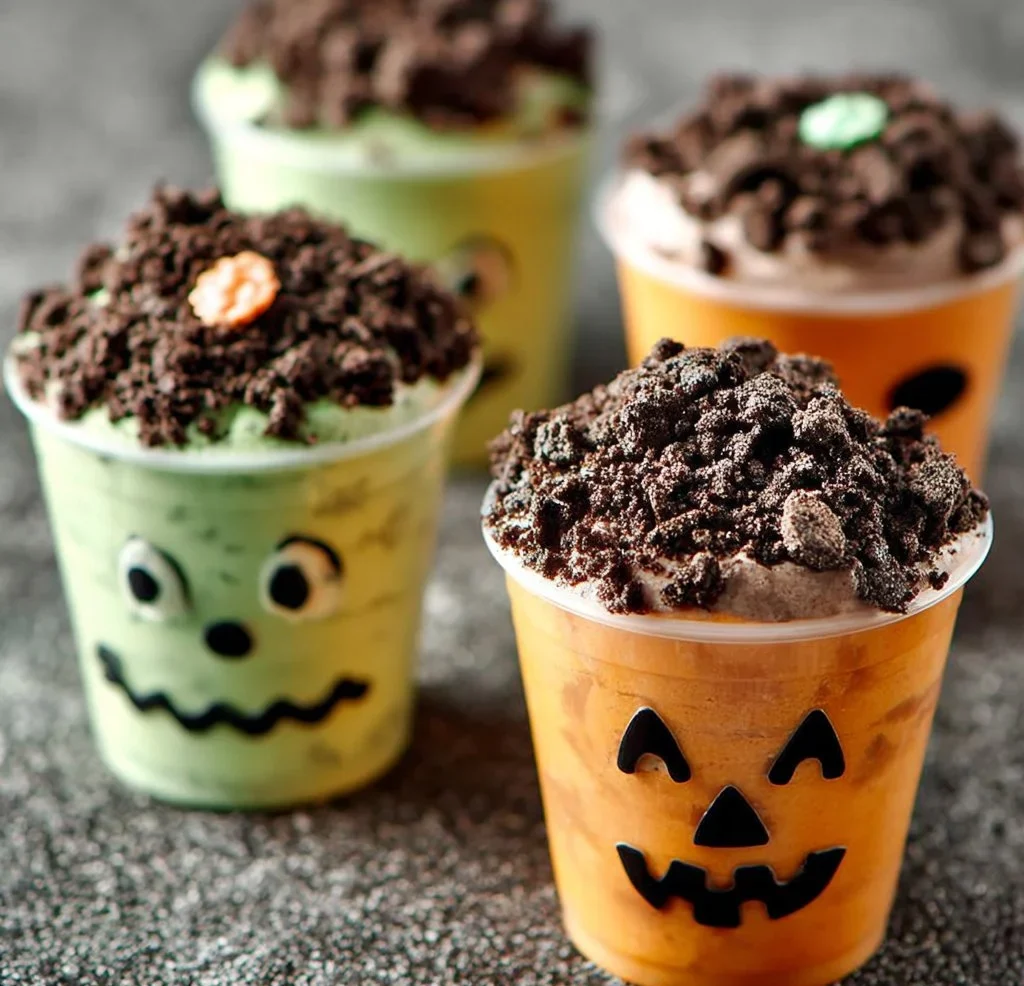
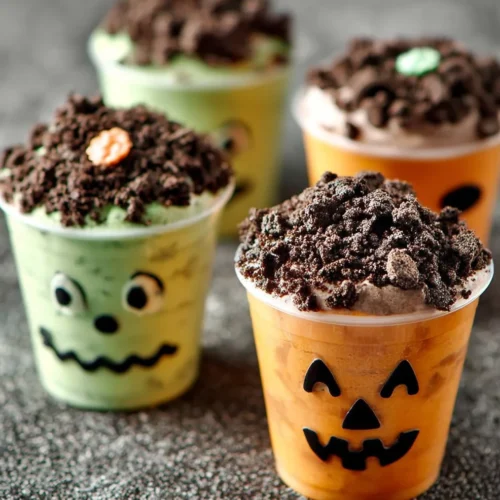
Moreover, these pudding cups are visually appealing, boasting vibrant orange and green colors that evoke the holiday’s spirit. Add in the playful jack-o-lantern and Frankenstein faces, and you have a dessert that not only looks festive but also tastes absolutely scrumptious. With layers of creamy pudding, crunchy cookie crumbs, and endless decoration possibilities, these Halloween Pudding Cups are sure to be a standout at any Halloween gathering.
Ingredients for Halloween Pudding Cups
To bring your Halloween Pudding Cups to life, gather the following ingredients:
- 2 boxes of white chocolate instant pudding
- 4 cups of milk
- Orange food coloring
- Green food coloring
- 10 Oreo cookies
How to Make Halloween Pudding Cups Directions
Creating your Halloween Pudding Cups is a fun and straightforward process. Follow these steps to make your dessert a reality:
Start by placing one box of the instant pudding mix into a mixing bowl. This will be the base of your first pudding color.
Gradually whisk in 2 cups of milk and keep stirring until thoroughly combined. This mixture will start to thicken as you whisk. Allow it to set for a few minutes to reach the right consistency.
Once the pudding is set, it’s time to add some color! Incorporate orange food coloring to your pudding and whisk again until you achieve your desired shade of spooky orange.
Next, take 2 to 4 clear plastic cups and fill them with the orange pudding mixture, making sure to leave an inch or two of space at the top. This empty space is perfect for adding your crunchy topping later.
Now, it’s time to prepare the cookie topping. Take 5 Oreo cookies and place them in a food processor to chop them lightly into crumbs. The rough texture of the cookie will give your pudding cups a delightful crunch.
Sprinkle the cookie crumbs generously on top of each filled pudding cup. This layer adds a delicious chocolatey contrast to the sweet pudding.
To add a festive touch, use a Sharpie marker to draw a jack-o-lantern face on the front of each of the cups. Get creative with the designs—no two jack-o-lanterns need to be the same!
Repeat steps 1-7 for the second box of pudding mix, this time using green food coloring instead of orange. This will create your second layer of pudding, perfect for representing Frankenstein!
Finally, again use the Sharpie to draw a funny Frankenstein face on the front of each of the green pudding-filled cups.


Your Halloween Pudding Cups are now ready to impress!
How to Serve Halloween Pudding Cups
Serving your Halloween Pudding Cups can be as creative as making them! Here are some fun ideas to consider. Position the cups on a spooky-themed platter to embrace the Halloween festivities fully. Use a black, orange, or purple tablecloth for an extra Halloween vibe. Consider garnishing the tops with additional sweet treats, such as candy corn or gummy worms, for added flair and excitement.
For sharing, you can serve each cup with a festive plastic spoon. Encourage your guests to dig into the layers, exploring the creamy pudding and crunchy cookie bits. Children will love the spooky faces and the thrill of enjoying a treat that combines fun and flavor. When it’s time for parties or gatherings, these pudding cups can serve as delightful individual desserts, ensuring that everyone gets their share of playful sweetness.
Expert Tips: Halloween Pudding Cups
To make your Halloween Pudding Cups even more enjoyable, consider the following expert tips. First, take care when coloring your pudding; you can always add a little more food coloring, but it’s hard to take it away if you’ve added too much. So go slow and check the color as you mix!
If you’re preparing these cups ahead of time for a party, you can assemble them a day before. Keep them refrigerated until you’re ready to serve, which will help the flavors meld and the pudding stay perfectly set.
Furthermore, don’t hesitate to get creative with the decorations! You can use edible markers or different candies to create even more themed characters on your cups. This allows you to make a spooky ensemble that represents your taste and creativity.
How to Store Halloween Pudding Cups
If you happen to have any leftover Halloween Pudding Cups, it’s essential to store them correctly to maintain their freshness. Make sure to cover each cup with plastic wrap or a lid to prevent the pudding from drying out. Store them in the refrigerator where they should last for about three days. The longer they sit, the softer the Oreo topping will become; however, they will still taste delicious.
If preparing in advance for an event, make sure to serve the Oreos fresh to retain that delightful crunch, or prepare them separately and sprinkle just before serving.
Variation of Halloween Pudding Cups
While the classic orange and green Halloween Pudding Cups are fabulous, you can take your creativity further with various variations. Consider adding different flavor profiles by swapping out the pudding mix flavors. For instance, you can experiment with chocolate pudding to create a deeper chocolate layer, or use vanilla pudding for a lighter flavor.
Additionally, you can play with the toppings! Crushed candy bars or seasonal sprinkles can add not only flavor but also extra bursts of color. For a healthier twist, consider adding layers of fruit in between the pudding, such as slices of bananas or small strawberries, which provide natural sweetness and a pop of color.
You may also make the cups with different themes to suit particular occasions or tastes. If you want to celebrate Thanksgiving, for example, you could use brown pudding and pumpkin orange coloring!
FAQ: Halloween Pudding Cups
Are Halloween Pudding Cups easy to make?
Absolutely! This recipe is straightforward and enjoyable, making it perfect for both kids and adults. With only a few steps and minimal cooking required, you can easily create delicious pudding cups that embody the Halloween spirit.
How long do Halloween Pudding Cups last in the fridge?
When properly stored, your Halloween Pudding Cups can last for up to three days in the refrigerator. What’s great is that they keep the delightful flavors intact, making them a perfect treat to prepare in advance for parties or gatherings.
Can I change the colors in my Halloween Pudding Cups?
Yes! Feel free to customize the colors as much as you like. You can use different food colorings to match your desired theme or even try using flavored pudding to switch things up. Experimenting with colors can create an exciting twist on this delicious dessert.
Halloween Pudding Cups
Equipment
- Mixing Bowls
- Plastic cups or dessert cups
- Food Processor
Ingredients
- 2 boxes white chocolate instant pudding
- 4 cups milk
- as needed drops orange food coloring
- as needed drops green food coloring
- 10 Oreo cookies crushed
Instructions
- In a mixing bowl, combine one box of instant pudding with 2 cups of milk. Whisk until thoroughly combined and let it set for a few minutes.
- Once set, add orange food coloring until desired shade is achieved. Fill plastic cups with the orange pudding mixture, leaving space at the top.
- In a food processor, crush 5 Oreo cookies into crumbs and sprinkle on top of the orange pudding layer.
- Using a Sharpie, draw jack-o-lantern faces on the front of each cup.
- Repeat the process with the second box of pudding mix, using green food coloring this time for the Frankenstein layer.
- Finish by drawing Frankenstein faces on the green pudding cups.
- Your Halloween Pudding Cups are now ready to serve!
Send me this recipe!
Just enter your email below and get it sent straight to your inbox!