
When it comes to dessert, few things can compete with the miraculous combination of cream cheese and the distinct, inviting flavors of red velvet. Enter the Mini Red Velvet Cheesecakes—a decadent treat that not only pleases your palate but also dazzles the eye with its vibrant hue. These bite-sized delights are perfect for gatherings, parties, or simply to satisfy your sweet tooth any day of the week.
Why We Love This Mini Red Velvet Cheesecake Recipe
What is it about Mini Red Velvet Cheesecakes that makes them so irresistible? For one, they encapsulate everything that is great about desserts. They are rich, creamy, and oozing with flavor, yet their miniature size allows you to indulge without the guilt. These treats are visually stunning, making them a perfect addition to any festive table or celebration.
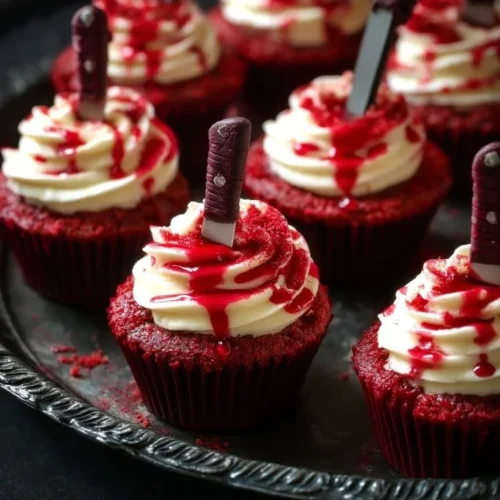
Additionally, the versatility of the recipe allows you to customize it to your liking. From the rich crust of crushed Oreo cookies to the silky smooth cream cheese filling, every element of this dessert has been thoughtfully curated to create a harmonious experience. Plus, the addition of edible “blood” makes them fun and thematic—ideal for spooky gatherings or Halloween festivities.
Ingredients for Mini Red Velvet Cheesecakes
To make these delightful mini cheesecakes, gather the following ingredients, ensuring that each one is ready for mixing:
- 36 Oreo cookies, crushed finely
- 1/2 cup butter, melted
- 2 Tablespoons granulated white sugar
- 3 (8 ounce) packages cream cheese, at room temperature
- 1 1/2 cups granulated white sugar
- 4 large eggs, lightly beaten
- 3 Tablespoons unsweetened cocoa
- 1 cup sour cream
- 1/2 cup buttermilk
- 2 teaspoons vanilla extract
- 1 teaspoon distilled white vinegar
- 2 ounces red food coloring
- 4 ounces cream cheese
- 1/4 cup butter, at room temperature
- 2 cups powdered sugar
- 1 teaspoon vanilla extract
- 4 parts corn syrup
- 1 part water
- Red food coloring
- Blue food coloring
- Cornstarch
How to Make Mini Red Velvet Cheesecakes: Directions
Creating your Mini Red Velvet Cheesecakes is a straightforward process that will reward you with delightful treats ready to wow everyone. Start by preheating your oven to 350 degrees Fahrenheit and lining a standard cupcake pan with paper liners.
Step 1: Create the Crust
Combine the crushed Oreo cookies, melted butter, and granulated sugar in a mixing bowl. Stir until everything is well combined. Now, take a Tablespoon of this mixture and press it into the bottom of each cupcake liner. You want to form a solid, even crust that will hold up once baked.


Step 2: Prepare the Cheesecake Filling
In a separate bowl, beat the cream cheese and granulated sugar at medium-low speed for about a minute. You want the mixture to be smooth and creamy. Gradually incorporate the lightly beaten eggs, unsweetened cocoa, sour cream, buttermilk, vanilla extract, distilled white vinegar, and red food coloring. Mix these ingredients until they are just combined—do not overmix, as you want to maintain a fluffy texture.
Step 3: Fill and Bake
Once your filling is ready, fill each cupcake liner about three-quarters full. This will give the cheesecakes enough room to rise without overflowing. Place the pan in the oven and bake for 25 to 35 minutes. To check if they are ready, the centers should be set but may still have a slight jiggle. Once done, remove them from the oven, allow them to cool in the pan, then cover and chill them in the refrigerator for at least 8 hours or overnight.
Step 4: Make the Edible Blood (Optional)
Prepare the edible blood by mixing four parts corn syrup to one part water. You can adjust the color by adding red food coloring until you reach your desired shade. For authenticity, mix in a drop of blue food coloring. Add cornstarch until the mixture thickens to a drizzle-able consistency.
Step 5: Frost the Cheesecakes
For the frosting, beat the cream cheese and butter together until smooth and creamy. Gradually add the powdered sugar and vanilla extract, beating until the mixture is fluffy and light. Use either a spatula to spread or a piping bag to pipe a thin layer of frosting on top of each chilled cheesecake.
Step 6: Drizzle and Serve
If you wish, drizzle some of the edible blood on top of the cheesecakes for a spooky presentation—this step is certainly optional but adds a fun twist! Serve your Mini Red Velvet Cheesecakes cold, directly from the refrigerator, for the best flavor and texture.
How to Serve Mini Red Velvet Cheesecakes
Serving your Mini Red Velvet Cheesecakes can be just as fun as making them. Imagine a beautifully laid-out dessert table featuring these little delights, each one enticingly topped with creamy frosting and a tantalizing drizzle.
For a festive occasion, consider placing them on a decorative platter and garnishing with fresh berries or mint leaves for a bit of color contrast. If you’re hosting a Halloween party, you can even arrange them on a spider web-patterned tablecloth to enhance the spooky theme. Remember to provide small forks or spoons, making them easy to grab and enjoy.
For an intimate gathering or a cozy night in, serve these cheesecakes with a cup of coffee or tea. The combination of the creamy texture of the cheesecake and the warmth of your drink is comforting and indulgent. You could also pair them with a dollop of whipped cream or even some extra chocolate shavings for a touch of extravagance.
Expert Tips for Mini Red Velvet Cheesecakes
Creating the perfect Mini Red Velvet Cheesecakes can be even more satisfying if you keep a few tips in mind.
Room Temperature Ingredients: Make sure that your cream cheese and eggs are at room temperature. This helps achieve that smooth consistency you want when mixing.
Don’t Overmix: When combining ingredients, mix just until everything is combined—overmixing can lead to dense cheesecakes.
Baking Timing: Each oven varies, so start checking your cheesecakes at the 25-minute mark. Remember that they’ll continue to set as they cool.
Cooling: Let your cheesecakes cool in the pan for at least 10 minutes, then refrigerate them for the best texture and flavor.
Custom Toppings: Feel free to explore different toppings. Crushed nuts, chocolate ganache, or fresh fruit are all great choices for customizing these mini treats.
How to Store Mini Red Velvet Cheesecakes
To keep your Mini Red Velvet Cheesecakes fresh and delicious, store them in an airtight container in the fridge. They should stay fresh for about one week. Alternatively, if you decide to make them in advance, these mini delights freeze well too! Just wrap them individually in plastic wrap and place them in a freezer-safe container.
When you’re ready to enjoy them, let them thaw overnight in the fridge. For the best enjoyment, add fresh toppings right before serving to maintain their elegant appearance.
Variations of Mini Red Velvet Cheesecakes
While the classic Mini Red Velvet Cheesecakes are delightful as they are, you might want to mix things up with some variations.
Chocolate Ganache Topping: Consider topping them with a rich chocolate ganache for a more indulgent version. The chocolate pairs wonderfully with the cheesecake.
Cream Cheese Swirls: For an artistic touch, you can create swirls in your cheesecake mixture before baking. Just take some of the cheesecake mix reserved and add a dash of cocoa, then swirl it in.
Nutty Crust: If you prefer a different crunch, try using a mixture of crushed graham crackers with a handful of finely chopped nuts instead of Oreos for the crust.
Mini Red Velvet Trifles: Layer the cheesecake filling with red velvet cake crumbles and whipped cream in small cups for a fun and unique presentation.
Alternative Flavorings: Experiment with different extracts, such as almond or hazelnut, to give your cheesecakes a unique twist.
FAQs about Mini Red Velvet Cheesecakes
What makes Mini Red Velvet Cheesecakes different from traditional cheesecakes?
Mini Red Velvet Cheesecakes offer a unique twist by incorporating red velvet flavors and a fun petite size, making them perfect for parties and gatherings!
Can I make Mini Red Velvet Cheesecakes ahead of time?
Absolutely! They refrigerate well for up to a week and can also be frozen for longer storage.
Is it necessary to use red food coloring?
While the red food coloring is integral for achieving that distinct red velvet look, it’s optional. You can omit it for a different appearance but it won’t have that classic red velvet character.
Mini Red Velvet Cheesecakes
Equipment
- Mini cupcake pan
- Mixing Bowls
- Whisk
- Spatula
Ingredients
- 36 Oreo cookies crushed finely
- 1/2 cup butter melted
- 2 tablespoons granulated sugar
- 3 packages cream cheese at room temperature (8 ounces each)
- 1 1/2 cups granulated sugar
- 4 large eggs lightly beaten
- 3 tablespoons unsweetened cocoa
- 1 cup sour cream
- 1/2 cup buttermilk
- 2 teaspoons vanilla extract
- 1 teaspoon distilled white vinegar
- 2 ounces red food coloring
- 4 ounces cream cheese for frosting, at room temperature
- 1/4 cup butter at room temperature for frosting
- 2 cups powdered sugar sifted
- 1 teaspoon vanilla extract for frosting
- 4 parts corn syrup
- 1 part water
- as needed red food coloring
- as needed blue food coloring
- as needed cornstarch
Instructions
- Preheat your oven to 350°F (175°C) and line a standard cupcake pan with paper liners.
- In a mixing bowl, combine the crushed Oreo cookies, melted butter, and sugar to create the crust. Press this mixture into the bottom of each cupcake liner.
- In a separate bowl, beat the cream cheese and sugar until smooth. Gradually add the eggs, cocoa, sour cream, buttermilk, vanilla, vinegar, and red food coloring, mixing until just combined.
- Pour the cheesecake filling into each cupcake liner, filling them about three-quarters full.
- Bake for 25-35 minutes until the centers are set but slightly jiggly. Cool in the pan for 10 minutes, then refrigerate for at least 8 hours.
- To make the edible blood, mix corn syrup and water, adding red food coloring and a drop of blue food coloring for depth. Thicken with cornstarch if necessary.
- For the frosting, beat cream cheese and butter until smooth. Gradually add powdered sugar and vanilla, mixing until fluffy.
- Frost the chilled cheesecakes and drizzle with the edible blood for a spooky effect.
- Serve cold for the best flavor and texture!
Send me this recipe!
Just enter your email below and get it sent straight to your inbox!