
When it comes to cookies, nothing beats the delightful combination of peanut butter and chocolate. Peanut Butter Spider Cookies are not just a tasty treat; they’re also a fun project that you can create with your family. Perfect for Halloween parties or even for an afternoon snack, these cookies bring together the rich flavor of peanut butter with a playful, spooky design.
Why We Love This Peanut Butter Spider Cookies Recipe
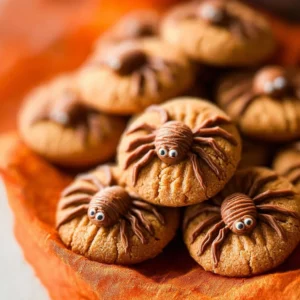
These cookies hold a special place in the hearts of many, primarily because of their unique and fun presentation. The festive nature of the spider design makes them perfect for Halloween or any themed party. But it’s not just about looks; the taste is extraordinary too. The creamy peanut butter contrasts beautifully with the sweetness of chocolate and the crunch of the cookie.
Whether you’re a seasoned baker or just starting out in the kitchen, this recipe is straightforward and allows for some creativity. You can easily involve your kids in the process, making it a memorable bonding experience. With just a handful of ingredients and some simple steps, you’ll be ready to impress your loved ones with your baking skills.
Ingredients about Peanut Butter Spider Cookies
Here’s a complete list of the ingredients you’ll need to make your Peanut Butter Spider Cookies. Each component plays an essential role in creating that perfect texture and flavor.
- 1 1/4 cups light brown sugar
- 3/4 cup peanut butter
- 1/2 cup vegetable shortening
- 3 tablespoons whole milk
- 1 teaspoon vanilla extract
- 1 large egg
- 1 3/4 cups all-purpose flour
- 3/4 teaspoon baking soda
- 3/4 teaspoon kosher salt
- 1/2 cup granulated sugar
- 1 cup chocolate melting wafers
- 36 Lindt truffles (or any chocolate truffles)
- 72 candy eyes
How to Make Peanut Butter Spider Cookies Directions
Creating your Peanut Butter Spider Cookies is an exciting adventure. Follow these simple steps to whip up a batch that is sure to impress:
-
Preheat Your Oven: Start by preheating your oven to 375°F (190°C). Line a large baking sheet with parchment paper or use a silicone baking mat for easy cleanup.
-
Prepare the Dry Ingredients: In a medium bowl, whisk together the all-purpose flour, baking soda, and kosher salt. This helps to ensure even distribution of the leavening agent and salt in your cookie dough. Set this mixture aside for later.
-
Cream the Mixture: In a large bowl, use a hand mixer or stand mixer fitted with a whisk attachment to cream together the vegetable shortening, peanut butter, light brown sugar, whole milk, and vanilla extract. Beat the ingredients on medium speed until you achieve a smooth and creamy consistency.
-
Incorporate the Egg: Once the mixture is smooth, add the large egg and beat just until combined. This adds moisture and richness to your cookies.
-
Combine the Wet and Dry Ingredients: Pour the flour mixture into the peanut butter mixture all at once. Mix gently until just combined. You want to avoid overmixing, as this can lead to tough cookies.
-
Scoop the Dough: Using a medium cookie scoop, portion out the cookie dough. Roll each scoop into a ball and then roll it in granulated sugar before placing it on your prepared baking sheet. Be sure to leave at least 2 inches between each cookie to allow for spreading.
-
Bake the Cookies: Place the baking sheet in the oven and let the cookies bake for 9 to 10 minutes. The edges will firm up, while the centers will remain slightly puffy and soft.
-
Create the Indentation: Once baked, remove the cookies from the oven and use the back of a round teaspoon to gently indent the center of each cookie. This will hold the truffle later.
-
Cool the Cookies: Transfer your cookies to a wire rack and let them cool for about 20 minutes. This cooling time is essential for the cookies to set properly.
-
Melt the Chocolate: In a microwave-safe bowl, melt the chocolate melting wafers in 30-second intervals, stirring in between until it’s fully melted and smooth. Once melted, transfer the chocolate to a piping bag fitted with a #2 round tip.
-
Decorate With Chocolate Legs: Now it’s time to make your spiders! Starting from the outer edge of the cookie, pipe the melted chocolate back toward the center to create the spider legs. Do this eight times to form eight legs for each spider. For easier cleanup, consider doing this step on wax paper or a silicone mat.
-
Add the Truffles: Place a Lindt truffle in the center of each cookie. This will be the body of your spider.
-
Attach the Candy Eyes: Finally, use the melted chocolate to carefully stick the candy eyes onto the top of each truffle. And there you have it—your Peanut Butter Spider Cookies are all set to delight!


How to Serve Peanut Butter Spider Cookies
When it comes to serving Peanut Butter Spider Cookies, presentation matters. Place the cookies on a festive platter, perhaps with a Halloween-themed tablecloth or in a fun decorative box for parties. You can even arrange them alongside other themed treats to create an eye-catching dessert table.
These cookies can be served warm or at room temperature, making them versatile for any occasion. Pair them with a cold glass of milk or a hot cup of cocoa for a cozy afternoon snack.
If you’re planning a Halloween bash or a get-together with friends, be sure to have these cookies ready for dessert. Their playful design will undoubtedly spark conversations and bring smiles to everyone’s faces.
Expert Tips: Peanut Butter Spider Cookies
To ensure your Peanut Butter Spider Cookies turn out perfectly, consider these expert tips:
-
Use Room Temperature Ingredients: Make sure your peanut butter and shortening are at room temperature. This helps them blend properly and ensures a smooth dough.
-
Don’t Skip the Indenting: Indenting the cookies right after they come out of the oven is crucial. It creates a perfect spot for placing the truffles later.
-
Chill the Dough (If Necessary): If you find that your cookie dough is too sticky, consider chilling it in the refrigerator for about 30 minutes. This will make it easier to handle.
-
Choose Quality Chocolate Truffles: The quality of the truffles makes a big difference in flavor. Opt for high-quality chocolate truffles for a rich taste.
-
Piping Technique: When piping the chocolate legs, apply gentle pressure and create thin, even lines. This will make your spiders look more realistic and well-defined.
-
Storage Tips: If making the cookies ahead of time, keep them in an airtight container to maintain their soft texture.
How to Store Peanut Butter Spider Cookies
To keep your Peanut Butter Spider Cookies fresh and delightful, store them in an airtight container at room temperature. They will remain soft for up to five days. If you want to extend their shelf life, place them in the refrigerator, where they can last for up to a week.
For long-term storage, consider freezing the undecorated cookies. Place them in a freezer-safe container with parchment paper between layers to prevent sticking. When you’re ready to enjoy them, simply thaw and decorate with the chocolate and candy eyes as needed.
Variation of Peanut Butter Spider Cookies
While the classic Peanut Butter Spider Cookies are a hit, you can always switch things up! Here are a few variations that you might consider:
-
Nutty Swirl: Mix in some chopped nuts along with the peanut butter for extra crunch and flavor.
-
Add Chocolate Chips: For an extra chocolate boost, fold in semi-sweet or dark chocolate chips into the dough before baking.
-
Peanut Butter Lovers: If you want an even more intense peanut flavor, consider using crunchy peanut butter in place of smooth.
-
Different Decorations: Instead of candy eyes, use mini marshmallows or even small gummy candies for a different twist.
-
Cookie Sandwiches: Create a sandwich by adding a layer of frosting or even another cookie between two cookies for a richer dessert experience.
FAQ: Peanut Butter Spider Cookies
What are Peanut Butter Spider Cookies?
Peanut Butter Spider Cookies are soft and chewy cookies made with peanut butter, adorned with chocolate spider legs and topped with candy eyes, perfect for Halloween or fun gatherings.
How long do Peanut Butter Spider Cookies last?
When stored in an airtight container at room temperature, these cookies typically stay fresh for up to five days. For a longer shelf life, you can refrigerate or freeze them.
Can I make these cookies using a different nut butter?
Absolutely! You can substitute peanut butter with almond butter or sunflower seed butter for a different flavor or to accommodate allergies.
Can I use different chocolates for decoration?
Yes! While the recipe suggests chocolate melting wafers, you can use white chocolate, colored melts, or even royal icing for decoration.
Are these cookies suitable for parties?
Definitely! These cookies are a fun and festive treat for parties, especially for themed events like Halloween. Their unique design captures everyone’s attention!
Peanut Butter Spider Cookies
Equipment
- Mixing Bowls
- Baking Sheet
- Piping bag
- Oven
Ingredients
- 1 1/4 cups light brown sugar
- 3/4 cup peanut butter
- 1/2 cup vegetable shortening
- 3 tablespoons whole milk
- 1 teaspoon vanilla extract
- 1 large egg
- 1 3/4 cups all-purpose flour
- 3/4 teaspoon baking soda
- 3/4 teaspoon kosher salt
- 1/2 cup granulated sugar
- 1 cup chocolate melting wafers
- 36 Lindt truffles or any chocolate truffles
- 72 candy eyes
Instructions
- Preheat your oven to 375°F (190°C) and line a baking sheet with parchment paper.
- In a medium bowl, whisk together the all-purpose flour, baking soda, and kosher salt. Set aside.
- In a large bowl, cream together the vegetable shortening, peanut butter, light brown sugar, whole milk, and vanilla extract until smooth.
- Add the egg and mix until just combined.
- Gradually add the flour mixture to the peanut butter mixture, mixing gently until just combined.
- Scoop the dough using a medium cookie scoop, roll into balls, and roll in granulated sugar before placing on the baking sheet.
- Bake for 9 to 10 minutes until edges are firm but centers are puffy.
- Remove from the oven and gently indent the center of each cookie using the back of a teaspoon.
- Let the cookies cool on a wire rack for 20 minutes.
- Melt the chocolate melting wafers in a microwave-safe bowl, stirring until smooth.
- Pipe chocolate legs onto each cookie, creating eight legs for each spider.
- Place a truffle in the center of each cookie and attach candy eyes with melted chocolate.
Send me this recipe!
Just enter your email below and get it sent straight to your inbox!