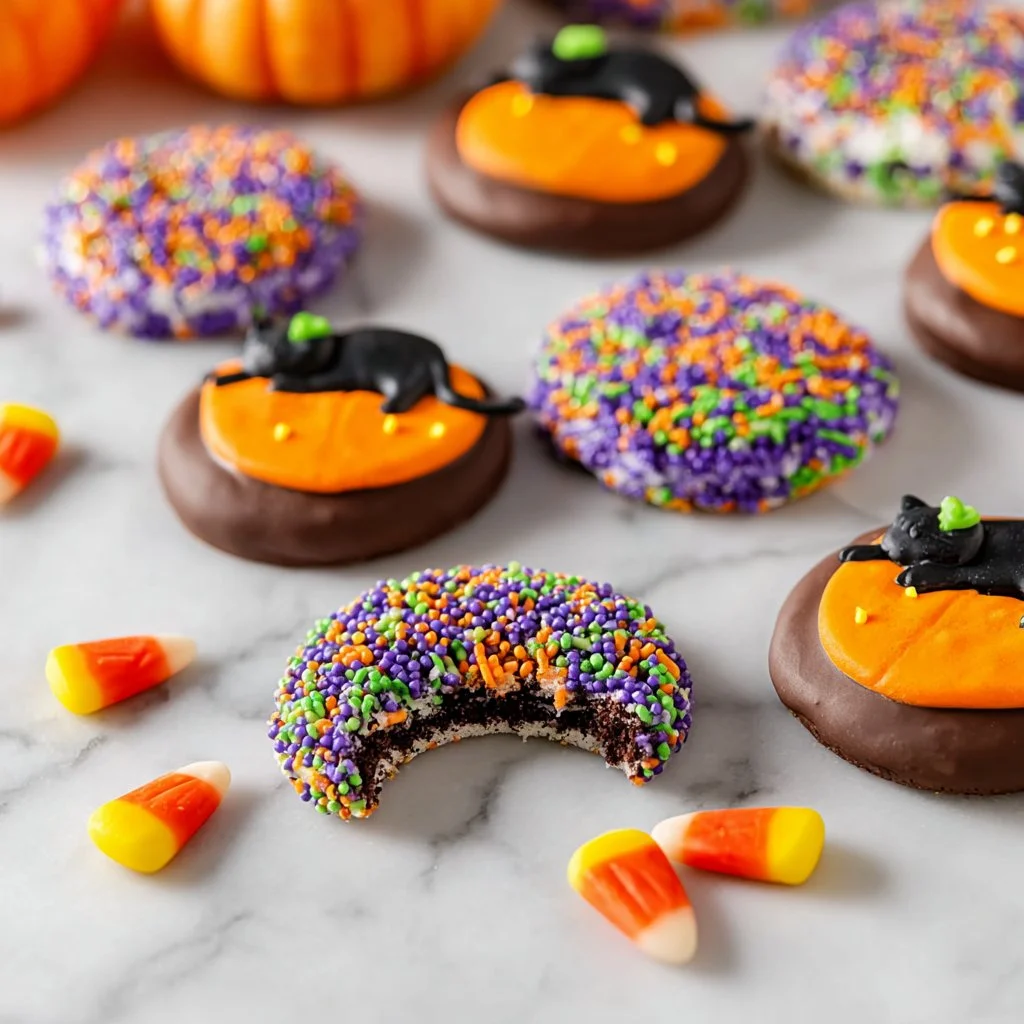
Halloween is a time for creative crafts, spooky decorations, and some of the most delightful treats. One of the most fun and exciting ways to celebrate this spooky season is by indulging in Halloween Oreos. These delightful cookies combine the classic flavor of Oreos with a twist of festive decoration that makes them perfect for parties, gatherings, or even just enjoying a sweet snack at home. If you’re looking to impress your friends and family with a fun and easy Halloween-inspired treat, you’ve come to the right spot!
Why We Love This Halloween Oreos Recipe
There are countless reasons to love this Halloween Oreos recipe. First, it’s incredibly easy to make, which means you won’t need to spend hours in the kitchen preparing them. With just a handful of ingredients and straightforward steps, you can whip up batches of these delightful treats in no time. The gooey fudge coating combined with the contrasting orange candy melts really captures the essence of Halloween while still keeping the iconic Oreo flavor front and center.
Another reason you’ll adore this treat is its versatility. Halloween Oreos are not just limited to orange candy melts and Halloween sprinkles. You can modify the colors and decorations to fit any theme or occasion, making them suitable for holidays or celebrations beyond Halloween. The kids will have a blast helping with the decorating, making it a fun family activity that sparks creativity and brings everyone together.
Let’s look at what you’ll need to create your Halloween Oreos!
Ingredients about Halloween Oreos
To create your Halloween Oreos, you will need the following ingredients:
- 1 package of Fudge Covered Oreos
- 1 cup Wilton orange candy melts
- 1 cup Wilton Halloween sprinkles
- Wilton Halloween icing decorations (various shapes and designs)
How to Make Halloween Oreos Directions
Making your Halloween Oreos is simple and fun. Follow these step-by-step instructions to create a batch that will have everyone talking about your baking prowess!


Prepare Your Melts: Start by using a microwave-safe bowl to heat the Wilton orange candy melts. Microwave them for 45 seconds. After that, stir well. If you still see lumps, heat them in 30-second intervals, stirring in between, until the melts become smooth and flow easily. You want a consistency that mimics melted chocolate—smooth, thick, and pipeable.
Coat the Oreos: Once your candy melts are ready, keep the Fudge Covered Oreos in their tray. Use a piping bag or a squeeze bottle to carefully pipe a ring of the orange candy liquid around the middle of each Oreo, right where the cream filling normally sits. As you rotate the cookie, make sure that the candy melts form a full, even layer.
Add Festive Sprinkles: Before the candy melts set completely, sprinkle your Wilton Halloween sprinkles over the coated Oreo. Again, keep rotating the cookie to ensure even coverage. You want each Oreo to look festive and inviting.
Set the Cookies: Allow the cookies to sit for a minute or two. This gives the candy melts a chance to set slightly while still being a bit tacky for the next step.
Decorate with Icing: Once the sprinkles are in place, it’s time to finish decorating! Carefully take each cookie out of the tray and pipe a dot of orange candy melt on top. Quickly place a Wilton Halloween icing decoration on each dot. This additional touch enhances the festive look and adds an extra element of fun.
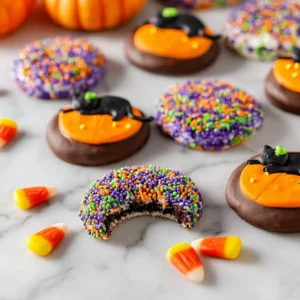
Present and Enjoy: Finally, arrange your decorated Halloween Oreos on a serving plate or tray. To make it even more festive, scatter some candy corn and additional sprinkles around the cookies. You’re now ready to impress your guests or just enjoy them with your family.
This simple process allows you to create cookies that are pleasant to view and delicious to eat. Plus, the joy of preparing these treats together with loved ones is something you’ll cherish.
How to Serve Halloween Oreos
Serving your Halloween Oreos can be just as fun as making them! When it comes time to display these colorful treats, take some time to think about how to make them pop on your table. You could consider the following ideas to serve them beautifully:
Platter Display: Arrange your Halloween Oreos on a large, festive platter. You can choose a plate that features Halloween themes or vivid colors like orange and black to enhance their visual appeal. Consider layering them in groups for a more dynamic look.
Decorative Touches: Add some colorful props around your cookies, such as plastic spiders, mini pumpkins, or themed confetti. These small additions create an inviting atmosphere and highlight the festive spirit of Halloween.
Themed Treat Bags: If you’re hosting a party, consider placing some cookies into small treat bags for guests to take home. Tie them off with orange and black ribbons for a sweet party favor that keeps the Halloween spirit alive even after the celebration ends.
No matter how you choose to present your Halloween Oreos, they will be a big hit, and your guests will love the extra touch you’ve added with your creativity.
Expert Tips: Halloween Oreos
When making your Halloween Oreos, a few expert tips can help you ensure they turn out perfectly every time.
Candy Melt Consistency: When melting your candy melts, it’s essential to only microwave them in short intervals to avoid overheating. Managing the heat carefully will ensure a smooth and glossy finish.
Sprinkle Choices: Mix and match different types of sprinkles for a more vibrant, eye-catching look. You can include nonpareils, confetti, or themed sprinkles that reflect different Halloween characters or symbols.
Involve the Kids: If you have children, get them involved! They will enjoy enhancing the cookies with their creativity, whether it’s decorating or arranging the presentation.
Use Parchment Paper: If you worry about the Oreos sticking while they set, consider placing a piece of parchment paper on your plate. This way, even if the candy melts are a bit sticky, your cookies will remain easy to remove and pretty while they dry.
Experiment with Coloring: If you want to try different Halloween colors, consider using black, purple, or green candy melts alongside orange ones. This will create a varied and colorful treat that’s sure to draw attention.
How to Store Halloween Oreos
Storing your Halloween Oreos properly will keep them fresh and delicious throughout the Halloween season. Follow these simple storage tips to ensure they maintain their delightful taste and texture:
Airtight Container: Place your cooled Halloween Oreos in an airtight container. This will help keep them from becoming stale or losing their crispness.
Cool, Dry Place: Store the container in a cool, dry place away from direct sunlight. The humidity can ruin the candy coating and soften the cookies.
Layering: If you stack your Halloween Oreos, be sure to place parchment paper or wax paper between layers. This prevents them from sticking together, especially if you’ve applied decorations that might get tacky over time.
With proper storage, your Halloween Oreos can last up to a week. Just make sure to keep them sealed and protected to maintain their flavor and crisp texture.
Variation of Halloween Oreos
For those who love experimentation in the kitchen, consider trying some variations of Halloween Oreos to mix things up! Here are some fun ideas you can explore:
Different Cookie Bases: Instead of using Fudge Covered Oreos, why not try other varieties? You can use standard Oreos, or even explore seasonal options like pumpkin spice or peppermint Oreos.
Colorful Candy Coatings: Venture beyond orange candy melts! Try using chocolate, or other fall colors like purple, green, or black candy melts. This will allow you to change up the aesthetic of your cookies to fit themes.
Add Flavor: If you want to give your cookies a special twist, consider adding a layer of flavored candy melts, such as mint or strawberry, before coating them in orange. This will introduce a delightful new flavor dimension.
Use Different Icings: Play around with various icing decorations. You can experiment with ghosts, bats, or even spooky eyes to add a fun twist to your Halloween Oreos’ appearance.
These variations not only keep things exciting but also present an opportunity for you to get creative and invent new festive treats that can delight family and friends.
FAQ about Halloween Oreos
If you have questions about your Halloween Oreos, you’re not alone! Here are a few frequently asked questions that can help clarify any uncertainties:
What candy melts can I use for Halloween Oreos?
You can use any color of candy melts, but for Halloween-themed cookies, orange, black, purple, or green options work wonderfully. White chocolate can also be colored with candy colors.
Can I customize the sprinkles?
Absolutely! Feel free to mix various colors and sizes of sprinkles. You can use themed content that fits the Halloween spirit or different shapes based on your preference.
How long do Halloween Oreos last?
Your Halloween Oreos can last about a week when stored in an airtight container in a cool, dry place. Ensure they are kept protected from moisture to maintain their freshness.
Can I freeze Halloween Oreos?
Yes! Halloween Oreos can be frozen. Just make sure they’re well-wrapped or placed in an airtight container. When you want to eat them, simply allow them to thaw at room temperature.
Can kids help make Halloween Oreos?
Definitely! This recipe is kid-friendly and can be a fun activity for families to enjoy together. It’ll let kids express their creativity through decoration!
Halloween Oreos
Ingredients
- 1 package Fudge Covered Oreos
- 1 cup Wilton orange candy melts
- 1 cup Wilton Halloween sprinkles
- Wilton Halloween icing decorations various shapes and designs
Instructions
- In a microwave-safe bowl, heat the Wilton orange candy melts for 45 seconds. Stir well, then heat in 30-second intervals until smooth.
- Keep the Fudge Covered Oreos in their tray. Use a piping bag to pipe a ring of orange candy around the middle of each Oreo.
- Before the candy sets, sprinkle Halloween sprinkles over the coated Oreo to ensure even coverage.
- Allow the cookies to sit for a few minutes before decorating with a dot of orange candy melt and placing a Halloween icing decoration on top.
- Arrange the decorated Halloween Oreos on a serving plate, adding candy corn and sprinkles around them for presentation.
Send me this recipe!
Just enter your email below and get it sent straight to your inbox!