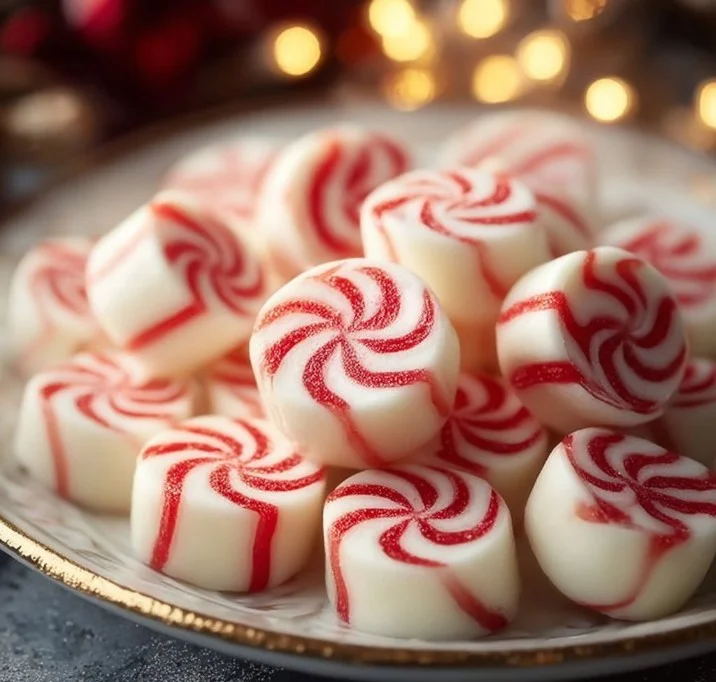
Soft Christmas Peppermints, or Old-Fashioned Butter Mints, bring a delightful sweetness to the holiday season. These creamy, minty treats are not only nostalgic but also a wonderful addition to your festive gatherings. You will love the way these melt in your mouth, offering a perfect blend of sweetness and refreshing peppermint flavor. Homemade versions are far superior to store-bought, allowing you to customize colors and flavors, and create beautiful treats to share with friends and family.
Why We Love This Soft Christmas Peppermints (Old-Fashioned Butter Mints) Recipe
What makes Soft Christmas Peppermints a favorite is their simplicity and charm. Every bite is an experience, reminding you of childhood memories and warm holiday gatherings. You’ll enjoy crafting these mints, whether it’s your first time in the kitchen or you’re a seasoned pro. Not only are they easy to make, but you also get the opportunity to get creative with colors and shapes. They’re perfect for giving as gifts or placing in a festive bowl for guests to enjoy. These mints don’t just satisfy your sweet tooth; they also add a beautiful touch to any holiday celebration.
Ingredients about Soft Christmas Peppermints (Old-Fashioned Butter Mints)
To make approximately 40-50 pieces of Soft Christmas Peppermints, gather the following ingredients:
- 4 cups powdered sugar
- 4 oz cream cheese, softened
- 1 tablespoon unsalted butter, softened
- ½ teaspoon peppermint extract (adjust as desired)
- Pinch of salt
- Gel food coloring (optional)
- Granulated sugar for coating
How to Make Soft Christmas Peppermints (Old-Fashioned Butter Mints) Directions
Start off by preheating your space, ensuring you have everything within reach. In a large mixing bowl, combine your softened cream cheese and butter. Using an electric mixer set to medium speed, blend them together until the mixture is smooth and fluffy, which typically takes about 2-3 minutes. Be sure to scrape down the sides of the bowl intermittently to achieve an even texture.
Next, incorporate the peppermint extract along with a pinch of salt. If you are a fan of a stronger mint flavor, feel free to adjust the peppermint extract to your liking. Keep in mind that a little goes a long way, so start with ½ teaspoon and modify as necessary.
Gradually begin adding the powdered sugar to the bowl, one cup at a time. Mix slowly to avoid a sugary cloud. As you add the sugar, the texture will shift from soft to more dough-like. Once the mixture starts to thicken and gets too stiff for the mixer, it’s time to switch gears. Dust your hands with powdered sugar and start kneading the dough by hand until it becomes smooth and pliable, yet not sticky.


Now, it’s time to have some fun with color! Divide the dough into portions based on how many colors you’d like to use. Classic choices for Christmas include white, red, and green. Add a drop or two of gel food coloring to each portion, and knead it in until fully integrated. If you want to keep your hands clean, consider using gloves or kneading on parchment paper.
Once colored, it’s time to shape your mints. Dust your working surface with powdered sugar to prevent sticking, then roll each portion of dough into ropes about ½ inch thick. Carefully cut them into bite-sized pieces, roughly ½ inch in size. For a festive presentation, you could roll each piece into a ball and press down lightly with a fork to create a criss-cross design. Alternatively, using candy molds or cookie stamps can yield lovely, intricate shapes.
To finish, roll each shaped mint in granulated sugar to coat them. This not only looks beautiful but also provides a bit of texture and helps to prevent the mints from sticking together. Line a baking sheet with parchment paper and place the mints in a single layer on it. Allow them to air dry for 12–24 hours at room temperature. This process helps the mints develop a firm outer shell while remaining soft and creamy on the inside.
How to Serve Soft Christmas Peppermints (Old-Fashioned Butter Mints)
Serving your beautifully crafted Soft Christmas Peppermints is an experience in itself. Presentation matters, especially during the holidays. Consider arranging these delightful treats in an eye-catching bowl or a festive dish. You can make a striking display by layering different colors or shapes. They can also work wonderfully as party favors; simply bag a few in clear cellophane, tie it with a ribbon, and gift it to your guests for a sweet takeaway.
If you’re hosting a holiday gathering, feel free to combine these mints with other sugary treats such as cookies, brownies, and candy canes for an indulgent dessert table. Their bright colors add a cheerful pop, making them ideal for any holiday décor. Serve with tea, hot cocoa, or coffee to create a balanced flavor experience.
Expert Tips: Soft Christmas Peppermints (Old-Fashioned Butter Mints)
To ensure your Soft Christmas Peppermints turn out perfectly, here are some expert tips for you to consider:
- Temperature Matters: Make sure your cream cheese and butter are at room temperature for optimal mixing. This ensures a smoother texture for your mints.
- Powdered Sugar Precision: When adding powdered sugar, do so gradually to avoid clumps. If you want a smoother candy, sift your powdered sugar before using it.
- Flavoring: peppermint extract is potent, so start with a small amount. If you prefer a stronger flavor, add more after tasting the dough.
- Vibrant Colors: When adding gel food coloring, a little can go a long way. You can always add more if needed, but it’s tougher to lighten a darker shade!
- Kneading Technique: Dust your hands and work surface with powdered sugar when kneading to keep the dough from sticking.
- Air Drying: Ensure proper air circulation while your mints dry to get that perfect outer layer. You can leave them out on a countertop or in a cool, dry place.
By following these tips, you’ll enhance your chances of creating the perfect batch of Soft Christmas Peppermints!
How to Store Soft Christmas Peppermints (Old-Fashioned Butter Mints)
Once your Soft Christmas Peppermints have dried and are ready to be savored, proper storage will ensure they stay fresh and delicious. Store your mints in an airtight container, layering them with parchment paper to keep them separate and prevent sticking. They can be kept at room temperature for up to two weeks.
If you want to extend their lifespan, consider refrigerating them, particularly in warmer climates. The mints will maintain their flavor and texture longer in the fridge but should be brought to room temperature before serving for the best experience.
Variation of Soft Christmas Peppermints (Old-Fashioned Butter Mints)
There are many ways to customize your Soft Christmas Peppermints to suit your preferences! Here are a few enjoyable variations:
- Flavored Extracts: Experiment with other flavors in addition to peppermint. Options like vanilla, chocolate, or almond extract can create unique taste experiences.
- Color Combinations: Instead of traditional colors, think outside the box. Use colors that match your celebration theme or mix different shades for a fun effect.
- Add-ins: Consider mixing in crushed candy canes or sprinkles for added texture and fun. The crushed candy canes introduce a delightful crunch that’s perfect for the holidays.
- Themed Shapes: You can use seasonal cookie cutters to create themed shapes like stars, trees, or bells, making them even more festive!
- Chocolate Coated: For chocolate lovers, dip the mints in melted chocolate for an indulgent twist. This combination of creamy mint with rich chocolate is a fantastic way to take them to the next level.
With these variations, you can make your Soft Christmas Peppermints even more unique and personal.
FAQ
What are Soft Christmas Peppermints (Old-Fashioned Butter Mints)?
Soft Christmas Peppermints are homemade candies that have a rich, creamy texture with a refreshing mint flavor. Made primarily from cream cheese, butter, and powdered sugar, they are often shaped into small pieces and dried to create a delightful treat perfect for the holiday season.
How can I customize the flavor of my Soft Christmas Peppermints?
You can easily customize the flavor by adjusting the amount of peppermint extract or incorporating other extracts like vanilla or almond. Experiment with different flavor profiles to find your favorite combination!
How long do Soft Christmas Peppermints last?
When stored in an airtight container at room temperature, Soft Christmas Peppermints can last for up to two weeks. For prolonged freshness, you can refrigerate them.
What is the best way to store Soft Christmas Peppermints?
To store Soft Christmas Peppermints, place them in an airtight container, separated by layers of parchment paper to prevent sticking. If you live in a warm climate, refrigeration may be a good option.
Can I change the colors of my Soft Christmas Peppermints?
Definitely! You can use gel food coloring to change the appearance of your mints. Consider using festive colors like red and green or any colors that match your holiday theme.
With simple ingredients and an easy-to-follow process, creating your own Soft Christmas Peppermints can be a delightful experience, enhancing your holiday joy! Enjoy crafting these treats and sharing them with your loved ones.

Soft Christmas Peppermints
Ingredients
Mint Mixture
- 4 cups powdered sugar Sifted for smoother texture, if desired.
- 4 oz cream cheese, softened Ensure this is at room temperature.
- 1 tablespoon unsalted butter, softened Ensure this is at room temperature.
- ½ teaspoon peppermint extract Adjust the amount to taste.
- 1 pinch salt Enhances flavor.
Optional Additions
- Gel food coloring To color the mints, optional.
- Granulated sugar for coating For rolling the mints.
Instructions
Preparation
- Preheat your workspace and gather all ingredients.
- In a large mixing bowl, combine softened cream cheese and butter. Blend using an electric mixer on medium speed until smooth and fluffy for 2-3 minutes.
- Add the peppermint extract and a pinch of salt. Adjust the peppermint flavor as desired.
- Gradually add powdered sugar one cup at a time, mixing slowly to avoid a sugary cloud. Once too thick for the mixer, switch to kneading by hand.
- Knead the dough until smooth and pliable, dusting hands with powdered sugar as needed.
Coloring and Shaping
- Divide the dough into portions and add gel food coloring, kneading until the color is fully integrated.
- Roll each portion into ropes ½ inch thick and cut into ½ inch pieces.
- Optionally roll pieces into balls and flatten slightly with a fork or use molds for shapes.
Finishing
- Roll each mint in granulated sugar and place on a parchment-lined baking sheet.
- Let air dry for 12–24 hours at room temperature for a firmer shell.
Send me this recipe!
Just enter your email below and get it sent straight to your inbox!