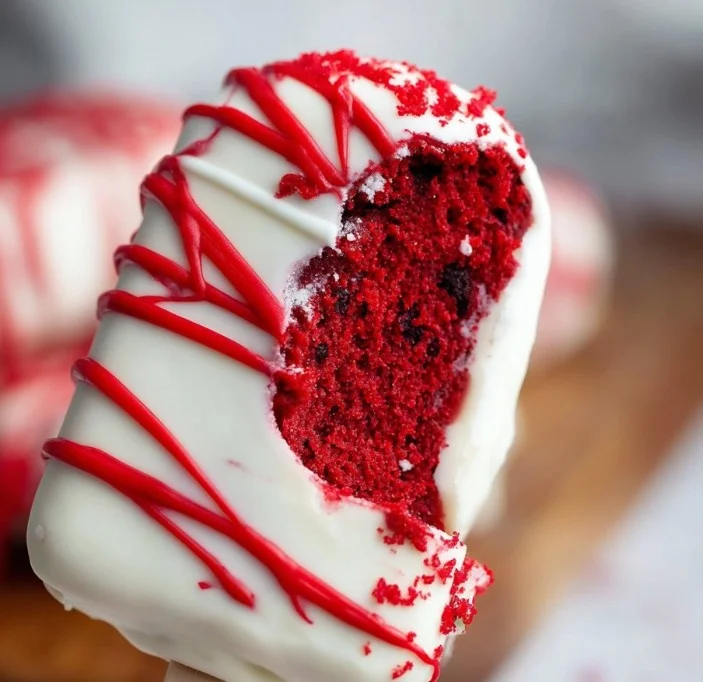
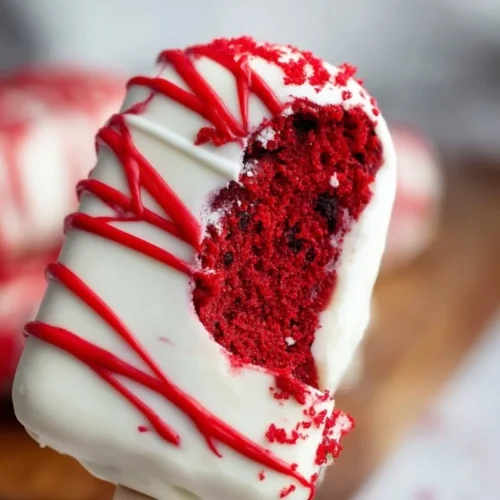
When it comes to captivating desserts that can bring excitement to any occasion, Blood Splatter Cakesicles take the cake—literally! Perfect for Halloween parties, themed gatherings, or just a fun baking project to delight your friends and family, these eerie treats seamlessly blend fun with flavor. With the rich taste of red velvet cake and a playful presentation, you’re in for a delectable experience that’s as haunting as it is delicious.
Why We Love This Blood Splatter Cakesicles Recipe
This Blood Splatter Cakesicles recipe makes it easy to whip up a treat that captures the spirit of festive occasions. The combination of creamy cream cheese and rich chocolate provides a perfect bite. One of the best parts? They’re simple and fun to make! With a box of red velvet cake mix, some basic pantry ingredients, and a sprinkle of creativity, you can create these wildly popular sweets that look as good as they taste.
These cakesicles are not just a feast for your mouth; they’re also a feast for your eyes. The deep red color of the cake, combined with the striking splatter effect, makes for an impressive presentation. Plus, the fun shapes and vibrant colors allow for endless creativity—so you can personalize these treats for your gathering or even turn them into a festive activity you can enjoy with friends.
Ingredients for Blood Splatter Cakesicles
To set you up for success, here’s everything you will need to make dazzling Blood Splatter Cakesicles:
- 1 box red velvet cake mix: This will serve as the base joyfully charged with flavor.
- 1 cup water: Essential for creating the right cake batter consistency.
- 1/2 cup vegetable oil: This ingredient helps keep your cakes moist.
- 3 eggs: Will provide structure and richness to your cake.
- 4 ounces cream cheese, softened: This creamy addition binds everything together, enhancing the flavor.
- 48 ounces white chocolate almond bark: Perfect for dipping your cakesicles in smooth, creamy chocolate.
- 6 ounces red candy melts: For that eye-catching blood splatter effect.
- 24 popsicle sticks: Essential for creating the cakesicle shape and making it easy to enjoy.
How to Make Blood Splatter Cakesicles
Start your baking journey by preheating your oven to a toasty 350°F (approximately 175°C). This sets the ideal stage for your red velvet cake to rise flawlessly. In a large bowl, combine the red velvet cake mix, water, vegetable oil, and eggs. Using a handy whisk or mixing tool, stir everything together until the batter is well blended and smooth, ensuring there are no lumps.
Once combined, it’s time to transfer the luscious batter into a 9×13-inch cake pan. Slide it into your preheated oven and let it bake for about 30 minutes. Keep an eye on it, and you’ll know it’s done when you can insert a toothpick into the center and it comes out clean. Once baked, allow the cake to cool completely.


After cooling, crumble the cake into fine crumbs in a mixing bowl. Now, bring in the cream cheese! Add the softened cream cheese to the crumbs and blend until it forms a dough-like consistency. This is your cakesicle filling, rich and creamy with a hint of tanginess from the cream cheese.
Next, grab your cakesicle mold. For each mold, take about a tablespoon of the cakesicle dough. Press it firmly into the mold, ensuring it fills the shape nicely. Once you’ve done that for all 24 compartments, insert a popsicle stick into the center of each mold. This will make it easy to grab your cakesicle later!
Pop the filled molds into the freezer for around 10 minutes. This helps firm them up, making the next steps easier and cleaner. While the cakesicles firm up in the freezer, it’s time to melt your white chocolate almond bark. Follow the package instructions for the best results. Once it’s smooth and melted, take out the cakesicles and dip each one into the white chocolate. Make sure each side is coated well, and let any excess chocolate drip off before placing them on a flat surface to harden.
The final touch comes with the red candy melts. Melt them according to the package instructions and use a fork or your clean hands to flick the melted chocolate over the hardened cakesicles. This creates the dramatic blood splatter effect, making your treats look extra unique and visually enticing.
How to Serve Blood Splatter Cakesicles
Now that your Blood Splatter Cakesicles are beautifully decorated and ready to go, it’s time to serve them! Arrange your cakesicles on a decorative platter. A black or dark-themed serving dish will enhance their spooky appearance. You can even sprinkle around some edible glitter or faux spider webs for an extra Halloween flair.
When you present these delightful treats, be sure to have a few napkins nearby, as they can be a bit messy due to the chocolate splatter. Offering each guest their own cakesicle on a stick makes for easy serving. You might also consider pairing the cakesicles with a themed beverage—like a spooky punch—to enhance the overall experience even further.
Expert Tips: Blood Splatter Cakesicles
To ensure your Blood Splatter Cakesicles turn out perfectly, keep these expert tips in mind:
Cooling Time: Make sure the red velvet cake is fully cooled before crumbling and mixing with the cream cheese. This prevents the mixture from becoming too gooey.
Consistency: If your cakesicle dough feels too dry, add a pinch of cream cheese; if it’s too wet, add a little more cake crumble until you reach the desired consistency.
Melting Chocolate: When melting the white chocolate almond bark and candy melts, do so slowly and in small increments to avoid burning. Stir frequently until smooth.
Experiment with Dips: While white chocolate pairs perfectly with the red velvet, don’t hesitate to swap for milk or dark chocolate for a different flavor profile.
Storage: If you’re making these ahead of time, store them in an airtight container to maintain freshness; they can last for several days.
How to Store Blood Splatter Cakesicles
If you happen to have leftover Blood Splatter Cakesicles (though we doubt it on a festive occasion), you’ll need to know how to store them correctly. Once they have completely hardened and set, place them in an airtight container. If you’re stacking them in layers, be sure to use parchment paper between each layer to prevent them from sticking together.
Store your cakesicles in the refrigerator for up to 5 days. Just ensure that they are kept in a cool, dry place to maintain their fresh taste and beautiful appearance.
Variations of Blood Splatter Cakesicles
Creativity knows no bounds, and there are countless ways to print your signature style on your Blood Splatter Cakesicles. Here are a few variations you might consider:
Flavor Swap: While red velvet is classic, feel free to experiment with other cake mixes, like chocolate, vanilla, or even carrot cake.
Colorful Drizzle: Instead of using only red candy melts, try a mix of colors for the splatter effect, creating a more vibrant and whimsical look.
Add-ins: Incorporate mini chocolate chips, crumbled cookies, or even sprinkles into the dough mixture for an added layer of texture.
Theme it Up: Depending on the season or occasion, you can use themed molds or decorate with themed toppings like edible eyes for a more festive flair.
Decorative Coating: After dipping in white chocolate, consider rolling the cakesicles in crushed nuts or sprinkles before the chocolate hardens.
Frequently Asked Questions
What are Blood Splatter Cakesicles?
Blood Splatter Cakesicles are creative desserts made from red velvet cake dough, coated in white chocolate, and decorated with a splatter of red candy melts to give an eerie effect. They are perfect for themed parties!
How do I ensure my Blood Splatter Cakesicles turn out well?
Making sure your ingredients are fresh, following the baking times accurately, and allowing proper cooling and setting time can lead to the perfect cakesicles.
Can I customize the flavors of my Blood Splatter Cakesicles?
Absolutely! Feel free to experiment with different cake flavors and add-ins to make your cakesicles unique and reflective of your style.
Blood Splatter Cakesicles
Ingredients
- 1 box red velvet cake mix
- 1 cup water
- 1/2 cup vegetable oil
- 3 large eggs
- 4 oz cream cheese, softened
- 48 oz white chocolate almond bark
- 6 oz red candy melts
- 24 pieces popsicle sticks
Instructions
- Preheat your oven to 350°F (175°C). In a large bowl, combine the red velvet cake mix, water, vegetable oil, and eggs. Mix until smooth.
- Pour the batter into a 9×13-inch cake pan and bake for about 30 minutes, or until a toothpick comes out clean. Allow the cake to cool completely.
- Crumble the cooled cake into fine crumbs in a mixing bowl. Add the softened cream cheese and mix until a dough-like consistency forms.
- Press about a tablespoon of the mixture into each cavity of a cakesicle mold. Insert popsicle sticks into the center and freeze for 10 minutes.
- Melt the white chocolate almond bark according to package instructions. Dip each cakesicle into the melted chocolate, coating well, and let excess chocolate drip off.
- Melt the red candy melts and flick over the hardened cakesicles to create the blood splatter effect.
Send me this recipe!
Just enter your email below and get it sent straight to your inbox!