
Butter mints are a favorite treat in many households, especially during special occasions and holidays. These delightful confections are not only easy to make but also pack a delightful flavor that leaves you craving more. They encapsulate the rich, creamy taste of butter, enhanced with a hint of sweetness and the fresh essence of vanilla. Whether they’re served at a family gathering or during a casual evening at home, butter mints add a touch of nostalgia and charm to any moment.
Why We Love This Butter Mints Recipe
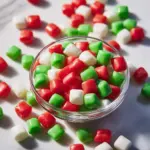
Butter mints have stood the test of time, cherished for their delicious simplicity. The texture is heavenly—soft yet firm enough to hold its shape. What makes this recipe especially appealing is its versatility. The ingredients are easy to find, and the process is straightforward, making it perfect for bakers of all skill levels. You can customize them with your favorite food colorings, creating delightful shades that suit any occasion.
Additionally, these mints are delightful after meals, serving as a refreshing palate cleanser. They also make fantastic gifts when packaged beautifully, adding a personal touch for holidays or special celebrations. When you share these mints with family and friends, not only do you share a tasty treat, but you also create memories as everyone savors their delightful taste together.
Ingredients for Butter Mints
Creating your own batch of butter mints requires just a handful of ingredients that you probably already have in your kitchen. Here’s what you will need:
- 2 cups powdered sugar: This is the base for your mints, providing sweetness and a smooth texture.
- 1/2 cup butter, softened: The creamy flavor of butter is what makes these mints rich and delicious.
- 1 tsp vanilla extract: This ingredient adds a lovely fragrance and enhances the overall flavor.
- 1-2 tbsp milk (if needed for consistency): You’ll use this to achieve the perfect texture for rolling or cutting.
- Food coloring (optional): If you’re feeling creative, this lets you mix in some color to make your mints visually appealing.
How to Make Butter Mints Directions
Making butter mints is a straightforward task that will have your kitchen smelling fantastic. Follow these steps to achieve buttery perfection:
- Prepare Your Workspace: Make sure your kitchen is clean and organized. Gather all necessary ingredients and tools, including a mixing bowl, spatula, and wax paper.
- Mix the Dry Ingredients: In a large mixing bowl, combine the powdered sugar and softened butter. Use a spatula or mixer to blend these two ingredients together until the mixture becomes smooth and creamy. This is the base of your mints.
- Add Flavoring: Pour in the vanilla extract, and mix it thoroughly. Take a moment to appreciate the aroma that fills the air as you mix; it’s the essence of homemade goodness!
- Adjust Consistency: If you find that the mixture is too dry and crumbly, slowly add milk, one tablespoon at a time. Incorporate it while mixing until you achieve a texture that is soft but not sticky—smooth enough to mold into shapes.
- Add Color: If you wish to create vibrant mints, now is the time to add food coloring. Divide the mixture into separate bowls for each color you want to create. Use a toothpick or your hands to mix the color evenly into the dough until you get your desired shade.
- Shape the Mints: Take small portions of the dough and roll them into balls. Alternatively, you can use cookie cutters for fun shapes, especially for festive occasions.
- Set the Mints: Line a baking sheet with wax paper and arrange your shaped mints on it. Allow them to set at room temperature for about 30 minutes. This step lets them firm up a bit, making them easier to handle.
- Enjoy or Store: Once they have set, you can enjoy your butter mints immediately or transfer them to an airtight container for future enjoyment.
How to Serve Butter Mints
Butter mints can be served in a variety of ways, making them a fun addition to any occasion. Here are some serving suggestions:


- Perfect for After-Dinner Treats: Place a small dish of butter mints on the table after meals. They serve as a delightful and refreshing end to dinner.
- Gift-Ready: Package your mints in decorative cellophane bags or small boxes, perhaps adding a festive ribbon. They make wonderful homemade gifts for friends, family, or co-workers.
- Party Favors: If you’re hosting a special event like a wedding or birthday party, offer butter mints as favors. Guests will appreciate the sweet gesture.
- Kids’ Parties: Kids love colorful treats! Your brightly colored butter mints can be a hit at children’s parties. They’re easy to grab and enjoy as they play.
Expert Tips for Making Butter Mints
To ensure your butter mints turn out perfectly, consider these expert tips:
- Softened Butter: Ensure your butter is adequately softened but not melted. This helps in achieving the right consistency while mixing and shaping.
- Gradual Milk Addition: Add milk slowly and assess the texture as you go. Too much liquid can lead to a sticky mess, which is hard to shape.
- Chill for Firmness: If the butter mints are too soft to shape, consider refrigerating the mixture for a short period to firm it up.
- Color Mixing: If you’re adding multiple colors, work with one color at a time. Use gloves for easy cleanup and to keep colors from mixing unintentionally.
- Presentation Matters: For an attractive display, use colorful plates or cupcake liners. A little decoration can go a long way in creating an inviting presentation.
How to Store Butter Mints
Proper storage is essential if you want to keep your butter mints fresh and flavorful. Here’s how to do it:
- Airtight Containers: Store your butter mints in an airtight container to prevent them from drying out. Glass jars or plastic containers with tight-fitting lids work well.
- Cool, Dry Place: Keep the container in a cool, dry place away from direct sunlight. This helps retain the mints’ texture and prevents any melting or stickiness.
- Refrigeration: If you live in a warm climate, consider storing them in the refrigerator. Just ensure to bring them to room temperature before serving for the best texture.
- Shelf Life: Properly stored butter mints can last for up to two weeks. However, they are best enjoyed fresh for maximum flavor.
Variations of Butter Mints
While the classic butter mints are delicious on their own, you can explore several variations to suit your taste. Here are a few ideas to try:
- Mint Flavoring: Swap the vanilla extract for peppermint or spearmint extract to give your butter mints a refreshing twist.
- Chocolate Coated: Dip your mints in melted chocolate for a rich and indulgent treat. Let them cool on wax paper until the chocolate hardens.
- Nutty Option: Fold in finely chopped nuts such as pecans or walnuts for added texture and flavor.
- Citrus Zest: Add a zest of lemon or orange to the mixture for a bright citrus flavor that pairs exceptionally well with the butter.
- Herbed Mints: Experiment with a hint of herbs such as lavender or rosemary for a unique aromatic experience.
FAQ About Butter Mints
What are butter mints?
Butter mints are sweet, creamy confections made primarily from powdered sugar and butter, often enjoying a hint of flavor from vanilla extract. They usually have a soft yet firm texture and can be shaped into balls or cut into various designs.
How long do butter mints last?
When stored correctly in an airtight container, butter mints can last up to two weeks, keeping their flavor and texture intact.
Can I customize butter mints with different flavors?
Absolutely! You can easily customize your butter mints by substituting vanilla with other extracts like peppermint, spearmint, or even citrus flavors. This gives you the freedom to create a variety of taste profiles.
How should I store my butter mints?
Store your butter mints in an airtight container in a cool, dry place. If the weather is particularly warm, refrigeration may be a good option, but make sure to allow them to come to room temperature before serving.
Can kids help in making butter mints?
Definitely! Making butter mints can be a fun activity for kids. While they can help with mixing and shaping, ensure safety by supervising them when using kitchen tools.
Butter Mints
Ingredients
Main Ingredients
- 2 cups powdered sugar Provides sweetness and smooth texture.
- 1/2 cup butter, softened Creates the rich, creamy flavor.
- 1 tsp vanilla extract Enhances the flavor with a lovely fragrance.
- 1-2 tbsp milk Use to adjust consistency.
- Food coloring (optional) For fun colors to suit occasions.
Instructions
Preparation
- Prepare your workspace by ensuring a clean and organized area. Gather all necessary ingredients and tools.
- In a large mixing bowl, combine the powdered sugar and softened butter. Mix until smooth and creamy.
- Add the vanilla extract and mix thoroughly to incorporate the flavor.
- If the mixture is too dry, slowly add milk, one tablespoon at a time, until the desired texture is achieved.
- If desired, add food coloring to the mixture and divide it into bowls to create different colors.
- Take small portions of the dough and roll them into balls or shape them with cookie cutters.
- Line a baking sheet with wax paper and place the shaped mints on it. Allow to set at room temperature for 30 minutes.
- Enjoy immediately or store in an airtight container.
Send me this recipe!
Just enter your email below and get it sent straight to your inbox!