Christmas Oreos are more than just a dessert; they are a canvas for your creativity and a hit among both kids and adults. With a few simple ingredients, you can transform ordinary Oreos into a stunning holiday treat that everyone will love. Whether you’re planning to serve these at a festive gathering, gift them to friends and family, or simply indulge yourself, these Christmas Oreos are the perfect addition to your holiday celebrations.
Why We Love This Christmas Oreos Recipe
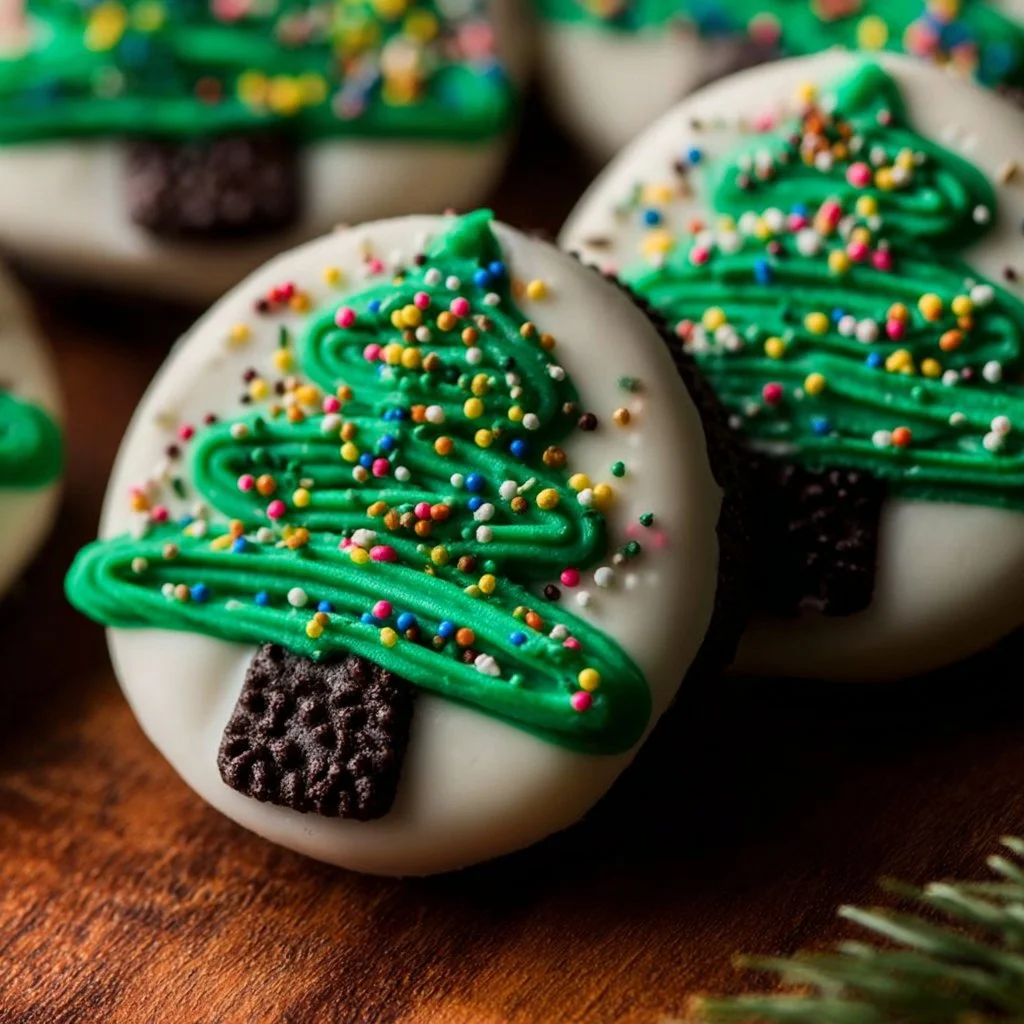
What truly makes this Christmas Oreos recipe a favorite is its simplicity and versatility. In just a few steps, you can produce beautiful, delicious cookies that are not only a feast for the palate but also a feast for the eyes. The creamy white chocolate and vibrant green candy melts create a delightful contrast, and the opportunity to decorate with nonpareils, jimmies, or edible stars allows for a personalized touch.
Making these cookies is a fun activity, suitable for the entire family. Kids can get involved in dipping the Oreos and adding their favorite sprinkles, making it a delightful bonding experience. Plus, they serve as a fantastic go-to option for last-minute holiday gifting or cookie exchanges, ensuring you always have something special on hand.
Ingredients about Christmas Oreos
Creating your festive Christmas Oreos requires just a handful of ingredients. Here’s what you will need to gather:
- 4 ounces of white chocolate or white candy melts
- 12 Oreos
- 2 ounces of green candy melts
- Rainbow nonpareils (optional)
- Yellow or gold beads or stars (optional)
- Chocolate jimmies (optional)
These ingredients come together to create a visually stunning and delicious holiday treat that you’ll be proud to share.
How to Make Christmas Oreos Directions
Now that you have your ingredients ready, let’s dive into the fun part: making your Christmas Oreos. Follow these directions to ensure your cookies turn out perfectly!


- Prepare Your Baking Sheet: Start by lining a large baking sheet with parchment paper or a silicone baking mat. This will ensure that your chocolate-coated Oreos do not stick and can easily be removed once set.
- Melt the White Chocolate: Take your white chocolate or white candy melts and melt them in the microwave. Use a small, shallow microwave-safe cup or bowl, heating in short intervals to prevent burning. Stir until smooth. If you prefer a double boiler method, place the chocolate in the top bowl and set it over simmering water, stirring until melted.
- Dip the Oreos: Take an Oreo and dip the bottom half into the melted white chocolate. Ensure it is well-coated, then place it on your prepared baking sheet. Repeat this step with all Oreos, allowing them to set at room temperature for about 15 minutes.
- Melt the Green Candy Melts: Next, melt your green candy melts using the same method as the white chocolate. Once melted, transfer the mixture to a piping bag. If you don’t have a piping bag, use a small cookie-decorating bottle with a tiny snip in the corner.
- Pipe Your Designs: With the piping bag ready, practice your creativity! Using a zig-zag motion, pipe lines onto the Oreos to create an abstract tree shape. Remember, it’s best to work in small batches, decorating one or two Oreos at a time, as the melted chocolate begins to harden quickly.
- Add Your Decorations: Now comes the fun part! While the green chocolate is still soft, sprinkle nonpareils, chocolate jimmies, or place the yellow or gold beads atop the chocolate.
- Set and Serve: Allow your decorated Christmas Oreos to set completely at room temperature. Once they are hardened, you can serve them right away or package them beautifully for gifting.
These steps result in a batch of lovely Christmas Oreos that embody the joy of the season.
How to Serve Christmas Oreos
Serving your Christmas Oreos can be as creative as making them. You can place them on a festive platter, surrounded by colorful candies or snacks that match your holiday theme. Consider presenting them in a tiered stand to create an eye-catching centerpiece on your dessert table.
For a personalized touch, package individual Oreos in clear cellophane bags tied with colorful ribbons. These make fantastic gifts for neighbors, teachers, or anyone who deserves a little sweetness this holiday season. Pair them with a thoughtful holiday card, and you have a perfect gift that balances creativity and convenience.
If you’re hosting a party, consider serving these cookies alongside a selection of other treats. The vibrant colors of the Christmas Oreos will catch the eye and entice guests, making them a hit at any celebration.
Expert Tips: Christmas Oreos
To ensure that your Christmas Oreos come out perfectly, keep these expert tips in mind:
- Use High-Quality Chocolate: The quality of your white chocolate or candy melts can significantly affect the taste and texture of your cookies. Opt for a reputable brand for the best results.
- Work in Batches: When decorating with the green candy melts, remember to work in small batches so the lines don’t set quickly. This will help with the application of decorations.
- Room Temperature is Key: Allow your dipped Oreos to set at room temperature. If they are chilled too quickly, the chocolate may crack.
- Keep it Fun: Allow creativity to flourish! The decorations don’t have to be perfect; the charm lies in the handmade aspect.
- Use a Toothpick: If you make a mistake while piping, don’t fret! Use a toothpick to smooth out the chocolate immediately.
By following these suggestions, your Christmas Oreos are bound to impress!
How to Store Christmas Oreos
If you find yourself with leftover Christmas Oreos (though we doubt that will be the case), storing them correctly will maintain their freshness. Keep the cookies in an airtight container at room temperature; they should remain tasty for up to two weeks.
If you prefer to make them ahead of time, consider freezing them. To freeze, wrap the Oreos tightly in plastic wrap or place them in a freezer-safe container. They can last in the freezer for up to two months. However, be mindful that freezing may slightly affect the cookie’s crunch. When you’re ready to enjoy them, thaw the cookies at room temperature in a single layer for the best texture.
Variation of Christmas Oreos
While the original Christmas Oreos are delightful, you can easily customize them to suit different tastes or themes. Here are a few variations you can try:
- Flavor Adaptations: Experiment with using flavored melts, like strawberry or peppermint, for a unique twist on your cookies. This will add unexpected flavors that pair beautifully with the chocolate Oreo.
- Themed Decorations: Change up the decorations based on different holiday themes. For a winter wonderland feel, use blue and white candy melts, and decorate with edible glitter.
- Stuffed Oreos: For an extra indulgent treat, consider stuffing your Oreos with peppermint cream cheese or other flavorful fillings before dipping them in chocolate.
- Chocolate-Dipped Variations: Instead of merely dipping, try drizzling chocolate over the Oreos instead. This adds an artistic touch and can be mixed in with the green candy melts for a marbled effect.
Feel free to get creative and make the recipe your own!
FAQ: Christmas Oreos
Can I use dark chocolate instead of white chocolate for Christmas Oreos?
Absolutely! Dark chocolate adds a delicious richness that contrasts nicely with the Oreo. You can customize the entire recipe based on your preferred taste.
How long does it take for the Christmas Oreos to set?
Generally, the Oreos will take about 15-20 minutes to set at room temperature. However, if you’re in a hurry, you can speed up the process by placing them in the fridge for about 10 minutes.
Can I personalize the decoration for each Oreo?
Of course! Feel free to get creative with your designs. No two cookies have to look the same, making it a fun activity for kids and adults alike.
Is it possible to make these Christmas Oreos gluten-free?
Yes, you can find gluten-free Oreo cookies in stores today. Ensure that your chocolate and toppings are also gluten-free, and you’ll have a delightful holiday treat suitable for everyone.

Christmas Oreos
Ingredients
For the chocolate coating
- 4 ounces white chocolate or white candy melts Choose high-quality chocolate for the best results.
- 2 ounces green candy melts Use for piping designs.
For the Oreos
- 12 pieces Oreos Standard Oreo cookies.
For decoration (optional)
- to taste rainbow nonpareils Add more color and festivity.
- to taste yellow or gold beads or stars For additional festive decoration.
- to taste chocolate jimmies For added texture and flavor.
Instructions
Preparation
- Line a large baking sheet with parchment paper or a silicone baking mat.
- Melt the white chocolate or candy melts in the microwave in short intervals, stirring until smooth.
Dipping
- Dip the bottom half of each Oreo into the melted white chocolate, ensuring it's well-coated.
- Place each dipped Oreo on the prepared baking sheet and allow to set at room temperature for about 15 minutes.
Decorating
- Melt green candy melts using the same method as the white chocolate, then transfer to a piping bag.
- Using the piping bag, pipe designs onto the Oreos while the white chocolate is still soft, creating an abstract tree shape.
- Sprinkle nonpareils, jimmies, or place yellow or gold beads on top of the decorations while they are still soft.
Setting and Serving
- Allow the decorated Christmas Oreos to set completely at room temperature.
- Serve immediately or package them beautifully for gifting.
Send me this recipe!
Just enter your email below and get it sent straight to your inbox!