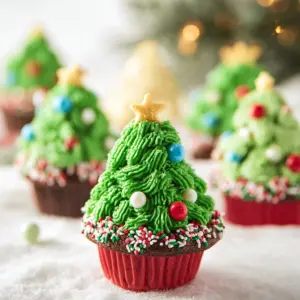
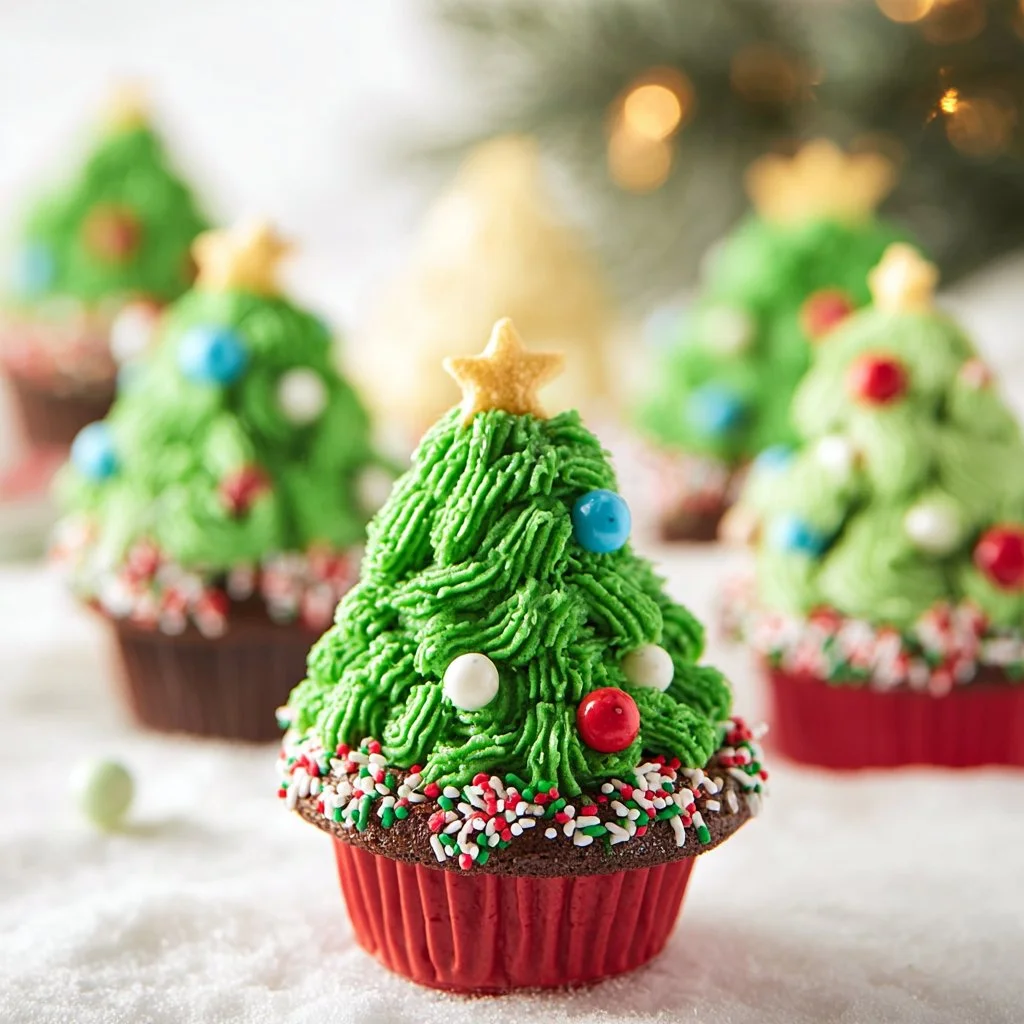
If you’re searching for a festive treat that’s as delightful to look at as it is to eat, you’ve landed in the right place! Christmas Tree Brownie Cups are the perfect blend of rich chocolatey flavor and whimsical holiday cheer. Picture bite-sized brownie cups, each topped with fluffy, green frosting that resembles mini Christmas trees. With vibrant sprinkles and colorful decorations, these treats not only satisfy your sweet tooth but also brighten up any holiday gathering. Whether you’re baking for a party, a family gathering, or just for your own enjoyment, these brownies bring joy and flavor into the mix.
Why We Love This Christmas Tree Brownie Cups Recipe
One of the best things about Christmas Tree Brownie Cups is how simple yet fun they are to make. The recipe uses a mix for the brownie base, which means you spend less time worrying about measurements and more time enjoying the holiday spirit. Because these brownie cups are visually appealing, they double as festive decorations for your dessert table.
The combination of rich, chocolatey brownie flavor with light, fluffy whipped topping creates a delightful contrast that keeps you coming back for more. Plus, the sprinkles and toppings are fully customizable. You can choose the colors and decorations that suit your holiday theme, making them perfect for various celebrations, from office parties to family get-togethers. Whether you love baking or just need a quick dessert idea, these brownie cups chime perfectly with the music of holiday cheer, making them an absolute favorite.
Ingredients for Christmas Tree Brownie Cups
To create your own festive Christmas Tree Brownie Cups, you will need the following ingredients:
- Brownie Mix: 18.3 ounces
- White Chocolate Chips: 1 cup
- Whipped Topping: 16 ounces
- Sprinkles: Red and green nonpareils, red pareils, green sanding sugar sprinkles
- Green Food Coloring: As needed
- Mini M&Ms: 1 cup
With these simple ingredients, you will be able to whip up a batch of deliciously festive brownie cups that are sure to impress your friends and family.
How to Make Christmas Tree Brownie Cups Directions
Creating delectable Christmas Tree Brownie Cups is easier than you might think. Follow these straightforward steps to get your oven ready for the holiday fun!
- Preheat Oven: Start off by preheating your oven according to the instructions provided on the brownie mix box. Make sure to grease two mini muffin tins with cooking spray to ensure the brownie cups come out easily.
- Prepare Brownie Batter: Prepare the brownie mixture as per the instructions on the box. Don’t forget to stir thoroughly for an even consistency.
- Fill Muffin Tins: Pour the brownie batter into each of the greased mini muffin tins. Fill each cup about two-thirds full; this will give your brownie cups room to rise while baking.
- Bake: Place the filled muffin tins in the oven and bake for 12 to 15 minutes. You’ll know they’re ready when the edges are firm, and the tops develop a crinkly texture, signaling they are perfectly baked.
- Create Indentations: Once removed from the oven, use a teaspoon to create a gentle indentation in the center of each brownie. This step will hold the frosting later.
- Cool Down: Allow the brownie cups to cool to room temperature. Take them out of the muffin tins by gently loosening the edges with a knife.
- Melt White Chocolate: In a microwave-safe bowl, melt your white chocolate chips. Start by heating them for 40 seconds, then stir. Continue heating in 10-second intervals until completely melted and smooth.
- Dip Brownies: Take each cooled brownie cup, dip the top into the melted white chocolate, and then into your sprinkles. This adds a festive touch to each treat that makes them even more inviting.
- Prepare Green Frosting: To create the green frosting, add green food coloring to the whipped topping. Fold gently until you reach your desired shade of green.
- Pipe Trees: Using a piping bag, pipe out tree shapes onto the top of each brownie. Get creative! You can make them as tall or as short as you desire. Finally, decorate your brownie trees with mini M&Ms or extra sprinkles for a visually appealing finish.
And just like that, you have your own beautiful batch of Christmas Tree Brownie Cups ready to enjoy!
How to Serve Christmas Tree Brownie Cups
Serving your Christmas Tree Brownie Cups is all about presentation and making the experience festive and fun. Here are some simple ideas on how you can serve these delightful treats:
- Display on a Festive Platter: Use a festive ceramic or Christmas-themed platter to arrange your brownie cups. This makes them a centerpiece for any holiday gathering.
- Add Holiday Decor: Surround your brownie cups with some holiday-themed decorations like mini ornaments, pine branches, or twinkling lights to enhance the festive atmosphere.
- Individual Packaging: For a fun twist, package them in clear cellophane bags tied with ribbon. This makes for a sweet edible gift that your friends and family can take home.
- Pair with Drinks: Consider serving these brownie cups alongside warm beverages like hot cocoa or apple cider. The cozy drinks will complement the sweet treats beautifully.
- Kids’ Party Favorites: For children’s holiday gatherings, let kids pick their own toppings. Set up a mini decorating station with various sprinkles and candies, allowing them to personalize their own brownie cups.
By taking a little extra time to serve and display these brownie cups, you’ll make your holiday events memorable and full of joy.
Expert Tips: Christmas Tree Brownie Cups
To ensure your Christmas Tree Brownie Cups turn out as delicious as they are charming, here are some expert tips to keep in mind:
- Cool Completely: Make sure your brownie cups are completely cool before adding the frosting or dipping in white chocolate. This helps prevent melting or undesired textures.
- Use Quality Ingredients: Choose high-quality brownie mix and chocolate chips for a richer flavor. The better the base ingredients, the more delicious your final product will be.
- Experiment with Toppings: Get creative with your toppings! You can incorporate other types of chocolates, candy canes, or even edible glitter to elevate your brownie cups.
- Perfect Your Frosting: Don’t be afraid to adjust the amount of green food coloring. Test with small amounts until you achieve the perfect shade that resembles lush Christmas trees.
- Pipe with Confidence: When piping the frosting, use a steady hand and maintain consistent pressure to create beautifully shaped trees. If you’re uncertain, practice on parchment paper first.
- Keep It Cool: If your kitchen is warm, consider refrigerating your brownies after frosting for a few minutes. This will help the white chocolate and whipped topping set nicely.
With these tips, you’re sure to create Christmas Tree Brownie Cups that not only look impressive but taste incredible.
How to Store Christmas Tree Brownie Cups
After you whip up a batch of these delightful brownie cups, you may find yourself wondering how to store them to maintain their freshness. Here’s how to preserve their deliciousness:
- Room Temperature Storage: If you plan to eat them within a couple of days, store your brownie cups in an airtight container at room temperature.
- Refrigeration: For longer storage, place your brownie cups in the fridge. The cooled whipped topping will stay fresh and flavorful for up to a week.
- Freezing: You can also freeze these brownie cups if you need to prepare ahead. Place them in an airtight container lined with parchment paper and freeze for up to a month. When ready to serve, thaw them in the fridge overnight.
- Avoid Melting: If you know you won’t finish them quickly, it’s best to avoid decorating with frosting and sprinkles until you’re ready to serve. This will keep everything looking fresh and appealing.
By following these storage tips, you can enjoy these festive treats well beyond the holiday season!
Variations of Christmas Tree Brownie Cups
While the traditional Christmas Tree Brownie Cups are delightful, experimenting with variations can add some extra fun to your holiday baking. Here are a few ideas to spark your creativity:
- Different Flavors: Substitute the brownie mix with blondie mix for a unique spin. The light color can make for an interesting contrast with the green frosting.
- Peanut Butter Brownie Cups: Mix in peanut butter chips or swirl in peanut butter for a nutty flavor that pairs perfectly with chocolate.
- Seasonal Flavors: Consider adding other seasonal flavors such as peppermint extract to the whipped topping for a refreshing twist.
- Healthier Options: For a healthier version, use a black bean brownie mix and sugar-free whipped topping. You can still enjoy the festive look without all the calories.
- Gluten-Free Brownies: If you or your guests are gluten-intolerant, choose a gluten-free brownie mix to ensure everyone can enjoy these festive treats.
- Colorful Frostings: Instead of just green, use different shades of frosting to create colorful trees, adding to the fun and festive spirit.
Experimenting with these variations allows you to create a unique dessert that stands out and caters to various tastes and dietary preferences!
FAQ
What is the best way to decorate Christmas Tree Brownie Cups?
When decorating your brownie cups, dip them in melted white chocolate and cover them with red and green sprinkles. For the “tree” effect, pipe on green frosting and add mini M&Ms or additional sprinkles for that extra festive flair.
How long do the Christmas Tree Brownie Cups last?
These brownie cups can last at room temperature for a couple of days. If kept in the refrigerator, they will be fresh for up to one week. You can also freeze them for later enjoyment!
Can I make Christmas Tree Brownie Cups for a gluten-free option?
Absolutely! Simply select a gluten-free brownie mix and ensure that the toppings and frosting are also gluten-free. Everyone deserves to enjoy holiday treats!
How can I make these brownie cups ahead of time?
You can bake and cool the brownie cups a day or two in advance. Just keep them covered and frost them the day you plan to serve for the best fresh taste.
What are other toppings I can use besides M&Ms?
Feel free to get creative! Crushed candy canes, mini marshmallows, or even edible glitter can add fun colors and elements to your brownie cups, making them even more festive!

Christmas Tree Brownie Cups
Ingredients
- 1 box brownie mix (18.3 ounces)
- 1 cup white chocolate chips
- 1 container (16 ounces) whipped topping
- as needed red and green nonpareils, red pareils, green sanding sugar sprinkles
- as needed green food coloring
- 1 cup mini M&Ms
Instructions
- Preheat your oven according to the brownie mix instructions and grease two mini muffin tins with cooking spray.
- Prepare the brownie mix as directed on the box, stirring thoroughly for an even consistency.
- Pour the brownie batter into the greased mini muffin tins, filling each cup about two-thirds full.
- Bake for 12 to 15 minutes until the edges are firm and the tops have a crinkly texture.
- Use a teaspoon to create a gentle indentation in the center of each brownie as soon as they come out of the oven.
- Allow the brownie cups to cool completely, then gently remove them from the muffin tins.
- Melt the white chocolate chips in a microwave-safe bowl, heating in 40-second increments and stirring until smooth.
- Dip the tops of each cooled brownie cup into the melted white chocolate, then into your choice of sprinkles.
- Add green food coloring to the whipped topping and fold until you achieve your desired shade of green.
- Pipe the green frosting onto each brownie cup to resemble Christmas trees, then decorate with mini M&Ms or additional sprinkles.
Send me this recipe!
Just enter your email below and get it sent straight to your inbox!


