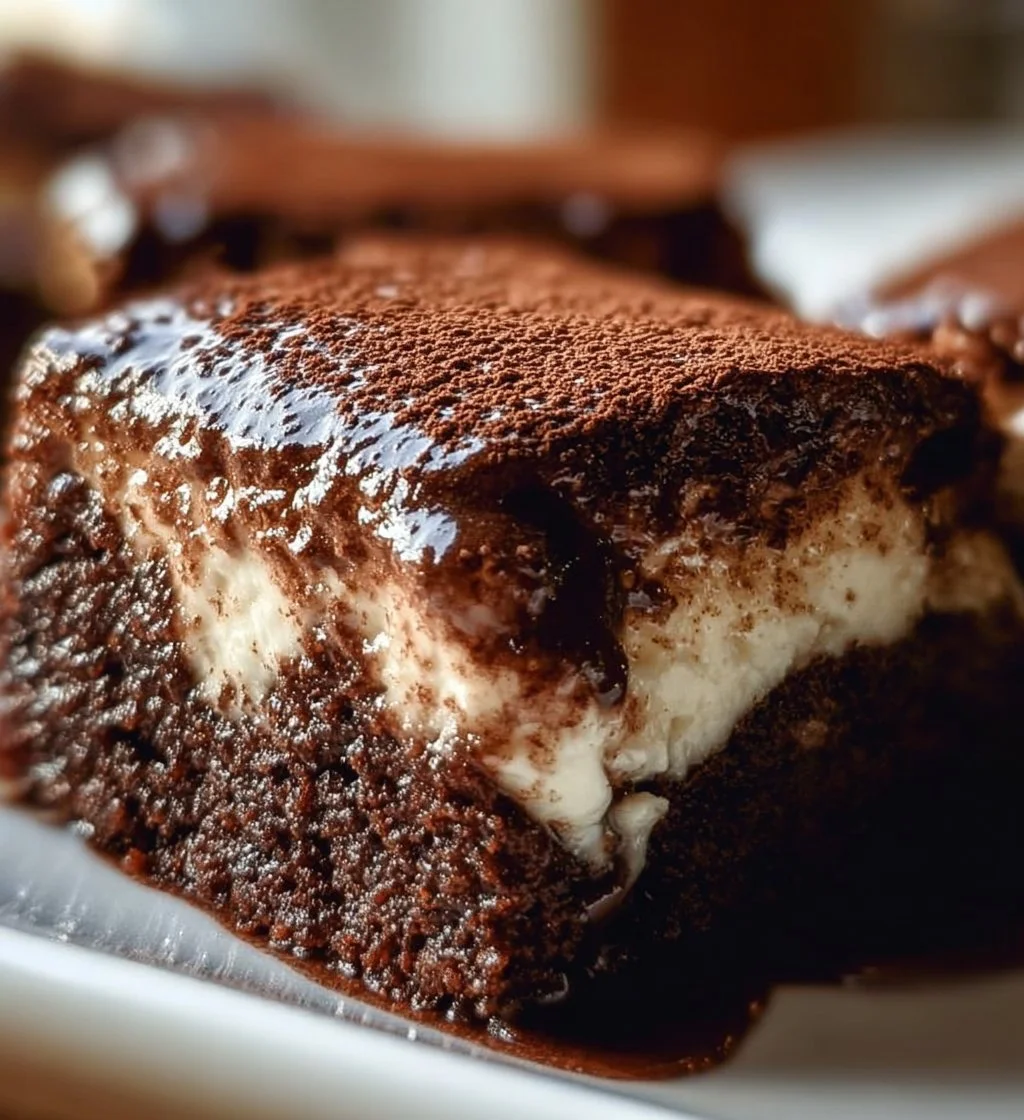
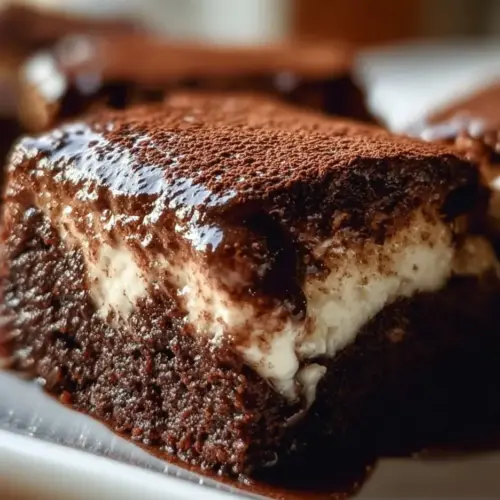
The rich and creamy flavor of tiramisu meets the fudgy goodness of brownies in this delightful gluten free treat. Combining the best of both worlds, these brownies are perfect for anyone craving a sweet dessert without the gluten. You’ll enjoy the smooth coffee and cocoa layers, making it not just a dessert but an experience that transports your taste buds to Italy.
Why We Love This Gluten Free Tiramisu Brownies
These gluten free tiramisu brownies offer a unique twist on the classic dessert. Their soft, moist texture melts in your mouth, and the distinct coffee flavor adds a layer of sophistication. You can enjoy all the elements of tiramisu without worrying about gluten. They are simple to prepare and require no elaborate techniques, making them perfect for both novice and experienced bakers. Additionally, these brownies are versatile enough to serve at any gathering, whether it’s a family dinner, holiday celebration, or a casual get-together with friends.
Ingredients for Gluten Free Tiramisu Brownies
- 1 cup gluten free all-purpose flour
- 1 cup granulated sugar
- 1/2 cup unsweetened cocoa powder
- 1/2 teaspoon baking powder
- 1/4 teaspoon salt
- 1/2 cup unsalted butter, melted
- 2 large eggs
- 2 teaspoons vanilla extract
- 1/2 cup strong brewed coffee, cooled
- 1 cup mascarpone cheese
- 1/2 cup heavy cream
- 2 tablespoons powdered sugar
- Unsweetened cocoa powder for dusting
Directions
- Preheat your oven to 350°F (175°C) and grease a 9×9-inch baking pan or line it with parchment paper.
- In a large bowl, mix together the gluten free flour, granulated sugar, cocoa powder, baking powder, and salt until well combined.
- In another bowl, whisk together the melted butter, eggs, vanilla extract, and cooled coffee.
- Pour the wet ingredients into the dry ingredients and stir until just combined. Do not overmix.
- Spread the batter evenly into the prepared baking pan.
- Bake in the preheated oven for about 25-30 minutes, or until a toothpick inserted in the center comes out with a few moist crumbs.
- While the brownies bake, prepare the tiramisu filling. In a bowl, beat together the mascarpone cheese, heavy cream, and powdered sugar until smooth and creamy.
- Allow the brownies to cool completely in the pan before spreading the mascarpone mixture over the top.
- Refrigerate the brownies for at least 2 hours to set.
- Once set, dust the top with unsweetened cocoa powder before cutting into squares.
How to Serve Gluten Free Tiramisu Brownies
Serving gluten free tiramisu brownies is easy and can enhance the overall experience. You can cut the brownies into squares and place them on a beautiful dessert platter for a visually appealing presentation. For an added touch, serve them alongside a cup of freshly brewed coffee or rich espresso, which complements the coffee flavor in the brownies. You may also want to top each serving with a dollop of whipped cream or a sprinkle of chocolate shavings to elevate the dish further. Consider adding a sprig of mint on top for a pop of color that brightens the plate. These brownies work well for casual gatherings, dinner parties, or even holiday celebrations. They provide a sweet ending to any meal, making them a crowd favorite.
Expert Tips for Gluten Free Tiramisu Brownies
Creating the perfect gluten free tiramisu brownies requires a few expert tips to ensure success. First, make sure to use a high-quality gluten free all-purpose flour blend that contains xanthan gum; this helps with the texture and structure of the brownies. Next, do not skip cooling the brownies completely before adding the mascarpone layer. This step is crucial to prevent the filling from melting into the brownies. When preparing the mascarpone mixture, beat it only until it’s smooth to avoid overmixing, which could result in a grainy texture. For a more intense coffee flavor, you can use espresso instead of regular brewed coffee. If you prefer a sweeter flavor profile, increase the powdered sugar in the mascarpone filling according to your taste. Lastly, storing the brownies in an airtight container in the fridge maintains their freshness and keeps the texture intact.
How to Store Gluten Free Tiramisu Brownies
Storing gluten free tiramisu brownies correctly will help maintain their delicious taste and texture. After the brownies have cooled completely and the mascarpone layer has set, cut them into squares and transfer them to an airtight container. Place a piece of parchment paper between layers to prevent sticking. Keep them in the refrigerator, where they can last for up to one week. If you want to store them for longer, you can freeze the brownies. Wrap each square in plastic wrap and place them in a freezer-safe container or a zip-top bag. They can be stored in the freezer for up to three months. When you’re ready to enjoy them again, simply thaw them in the refrigerator overnight for the best results.
Variations of Gluten Free Tiramisu Brownies
Exploring different variations of gluten free tiramisu brownies can keep your dessert game exciting. For a flavored twist, consider adding a hint of flavored liqueur to the mascarpone mix, such as almond or hazelnut, to complement the coffee flavor. If you prefer a fruity touch, try adding layers of fresh berries like raspberries or strawberries between the brownie and mascarpone, providing a sweet and tart contrast. For texture, fold in some chopped nuts, such as walnuts or almonds, into the brownie batter for added crunch. You could even swirl some chocolate or caramel sauce on top of the mascarpone layer for a decadent finish. If you’re aiming for healthier options, substitute refined sugar with coconut sugar or use a sugar alternative, making this dessert suitable for a variety of dietary preferences. There’s always room to play and personalize these brownies to make them uniquely yours.


FAQ about Gluten Free Tiramisu Brownies
What makes these brownies gluten free?
These brownies are gluten free because they use gluten free all-purpose flour instead of regular flour, allowing everyone with gluten sensitivities to enjoy them.
Can I replace mascarpone cheese with something else?
Yes, you can use cream cheese or a dairy-free cream cheese alternative for a different flavor and consistency.
How long does it take to make gluten free tiramisu brownies?
The preparation and baking time is about 55 minutes, plus an additional 2 hours for chilling before serving.
Can I add more coffee flavor to the brownies?
Absolutely! You can increase the amount of brewed coffee in the batter or use espresso for a stronger flavor.
Are these brownies suitable for freezing?
Yes, you can freeze gluten free tiramisu brownies for up to three months. Just be sure to wrap them tightly to prevent freezer burn.
Gluten Free Tiramisu Brownies
Ingredients
Brownie Base
- 1 cup gluten free all-purpose flour
- 1 cup granulated sugar
- 1/2 cup unsweetened cocoa powder
- 1/2 teaspoon baking powder
- 1/4 teaspoon salt
- 1/2 cup unsalted butter, melted
- 2 large eggs
- 2 teaspoons vanilla extract
- 1/2 cup strong brewed coffee, cooled
Tiramisu Filling
- 1 cup mascarpone cheese
- 1/2 cup heavy cream
- 2 tablespoons powdered sugar
- to taste Unsweetened cocoa powder for dusting
Instructions
Preparation
- Preheat your oven to 350°F (175°C) and grease a 9×9-inch baking pan or line it with parchment paper.
- In a large bowl, mix together the gluten free flour, granulated sugar, cocoa powder, baking powder, and salt until well combined.
- In another bowl, whisk together the melted butter, eggs, vanilla extract, and cooled coffee.
- Pour the wet ingredients into the dry ingredients and stir until just combined. Do not overmix.
- Spread the batter evenly into the prepared baking pan.
Baking
- Bake in the preheated oven for about 25-30 minutes, or until a toothpick inserted in the center comes out with a few moist crumbs.
Tiramisu Layer
- While the brownies bake, prepare the tiramisu filling. In a bowl, beat together the mascarpone cheese, heavy cream, and powdered sugar until smooth and creamy.
- Allow the brownies to cool completely in the pan before spreading the mascarpone mixture over the top.
- Refrigerate the brownies for at least 2 hours to set.
- Once set, dust the top with unsweetened cocoa powder before cutting into squares.
Send me this recipe!
Just enter your email below and get it sent straight to your inbox!