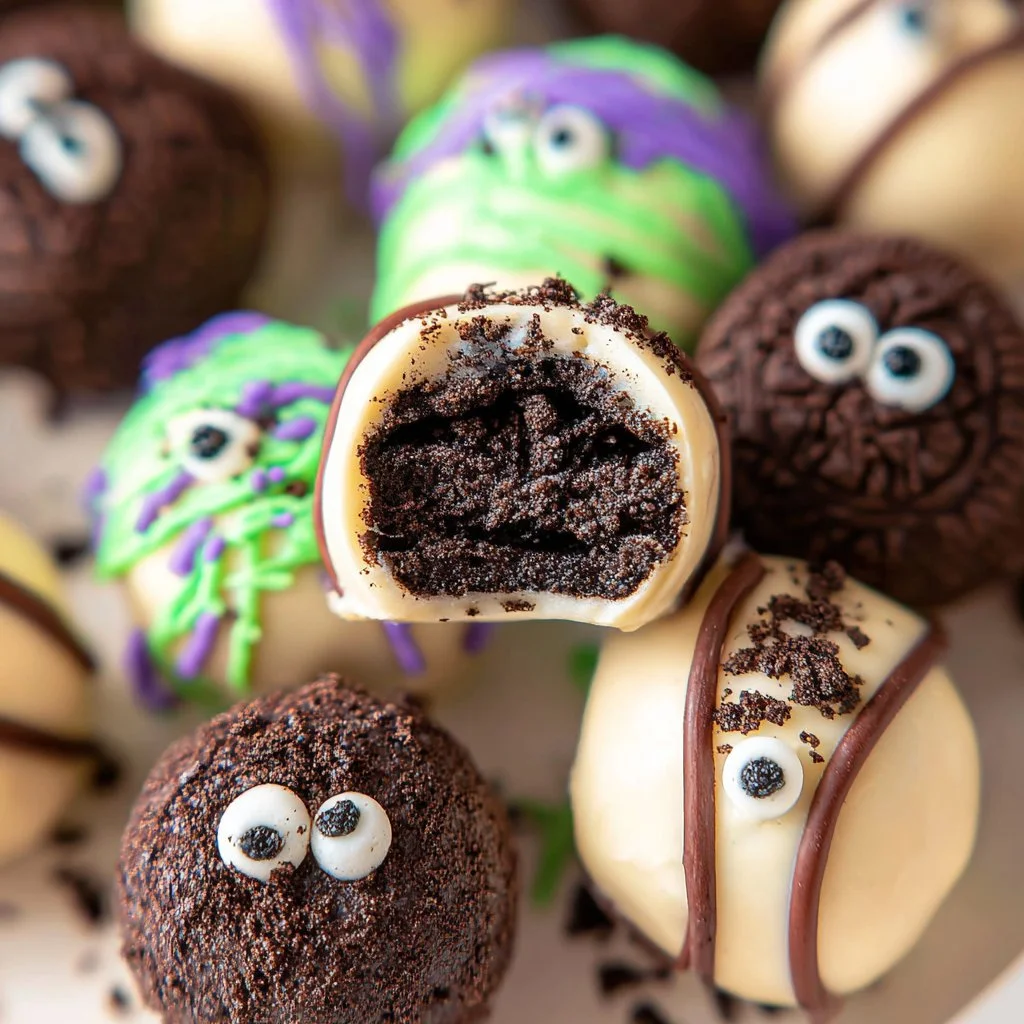
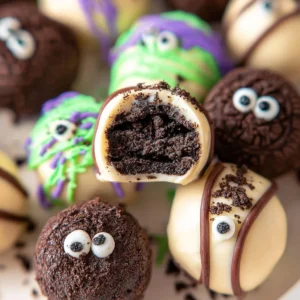
Who doesn’t love a delicious no-bake treat that not only tastes great but also looks fun and festive? Enter Monster Oreo Balls, the perfect sweet indulgence for a variety of occasions, especially around Halloween. These delightful little treats are not just snacks; they are eye-catching monsters that will be a hit at any party or gathering. The rich, creamy interior, combined with the fun and colorful exterior, makes each bite a whimsical experience. Imagine the delight on your friends’ and family’s faces when they see these adorable, monster-themed treats—it’s pure joy wrapped in chocolate!
Why We Love This Monster Oreo Balls Recipe
This Monster Oreo Balls recipe is loved for several reasons. First, it requires minimal cooking, making it an excellent choice for baking novices or those who want to whip up something sweet quickly. You don’t need to preheat an oven or spend hours prepping. The main ingredients are simple and easy to find, which means that you can prepare these delightful treats at a moment’s notice.
Second, they are incredibly versatile. While this recipe focuses on a fun Halloween theme, you can easily adapt the colors and decorations for any occasion. Whether you’re celebrating a birthday, a school event, or even a whimsical Tuesday, these Monster Oreo Balls fit the bill perfectly. You can switch up the colors of the melting wafers to match any theme or occasion, meaning the fun never has to end!
Finally, there’s the team spirit involved in making Monster Oreo Balls. This fun and hands-on activity allow you to engage with your kids, friends, or family members while creating something delicious together. Everyone loves a little creativity, and combine that with some tasty treats, and you have a recipe for happiness.
Ingredients for Monster Oreo Balls
To create your own Monster Oreo Balls, you’ll need the following ingredients, each contributing to that signature blend of flavors and fun.
- 36 Oreos
- 8 ounces cream cheese, softened at room temperature
- 1 teaspoon vanilla extract
- 2 cups white melting wafers
- 2 cups light green melting wafers
- 2 cups purple melting wafers
- 3 tablespoons Crisco shortening
- Green, purple, and black jimmy sprinkles
- Candy eyes of multiple sizes
How to Make Monster Oreo Balls
Creating these Monster Oreo Balls is a simple process that can be accomplished in a few easy steps. Follow this inclusive guide so you can get to the fun part — enjoying your delicious creations!


Crush the Oreos: Begin by placing the Oreos into a food processor. Pulse the Oreos until they reach a fine crumb texture. This step is crucial, as the crumbs will bind with the cream cheese to create the dough-like mixture.
Mix Ingredients: In a large mixing bowl, combine your Oreo crumbs, softened cream cheese, and vanilla extract. Use an electric mixer—either a hand mixer or a stand mixer—to blend these ingredients together for about 1-2 minutes until the mixture becomes fully combined and dough-like.
Form the Balls: Next, take a 2-tablespoon cookie scoop and form the mixture into smooth round balls. Place the formed balls onto a cookie sheet lined with parchment paper. This will help prevent sticking while they chill.
Chill: To help the Oreo balls hold their shape, chill them in the refrigerator for approximately 2 hours. This waiting period makes it easier to dip them in the melting wafers later.
Prepare the Melting Wafers: As you approach the end of the chilling time, it’s time to melt your wafers. In a microwave-safe bowl, heat the white melting wafers at 50% power or on defrost mode for 1 minute. Stir, then add 1 tablespoon of Crisco shortening. Continue heating in 30-second intervals until the mixture is completely smooth and ready for dipping.
Dip the Oreo Balls: One by one, dip each Oreo ball into the melted wafers, ensuring they are completely coated. Return each dipped ball back to the cookie sheet.
Decorate: As soon as you’ve coated the balls, it’s time to make them look like monsters! Immediately add candy eyes and sprinkles on top of each ball, creating your fun monster designs.
Repeat: Continue this process for each color of melting wafers you are using, creating a colorful assortment of Monster Oreo Balls.
Final Chill: Once all your balls are decorated, allow them to chill for another 30 minutes before serving. This helps everything set nicely.
And just like that, you’ve got a batch of adorably spooky Monster Oreo Balls ready to impress your friends and family.
How to Serve Monster Oreo Balls
When it comes to serving your Monster Oreo Balls, you have plenty of fun options. These little treats not only taste great but are also visually appealing, making them the perfect addition to any dessert table or party spread. Here are a few ideas on how to present them beautifully:
On a Festive Platter: Use a colorful platter for presentation, arranging the Monster Oreo Balls in a circle or in fun shapes. Consider using colorful cupcake liners under each ball for an elegant touch!
In a Jar: Place the Oreo balls in clear jars or mason jars. Layer them with some faux spider webs or decorative grass to create a whimsical display that’s perfect for Halloween.
With Labels: If you’re serving these at a party, consider labeling each type of Monster Oreo Ball. Use fun names that go along with the spooky theme, like “Ghoulish Green” or “Frightening Purple!”
As Party Favors: These delightful monsters can also be wrapped individually in clear bags tied with a colorful ribbon. They make fantastic party favors, giving your guests something sweet to take home.
Regardless of how you decide to serve them, these Monster Oreo Balls are sure to be an eye-catching and scrumptious addition to your gathering!
Expert Tips: Monster Oreo Balls
To ensure your Monster Oreo Balls turn out perfectly every time, keep these expert tips in mind:
Use Softened Cream Cheese: For the best results, make sure your cream cheese is softened. This makes it easier to blend with the Oreo crumbs and helps create a smooth mixture.
Chill Well: Don’t rush the chilling process. The more time the balls have to set in the fridge, the easier they will be to coat in chocolate, ensuring they don’t fall apart.
Heat the Wafers Gradually: When melting your wafers, take your time and heat them gradually. This prevents them from burning or seizing up, which can ruin the dipping process.
Experiment with Colors: Feel free to play around with the colors of your melting wafers. You aren’t limited to traditional Halloween colors. As mentioned earlier, you can create Monster Oreo Balls for any occasion—think pastel colors for spring or holiday colors for Christmas.
Get Creative with Decorations: Besides candy eyes and sprinkles, consider using edible glitter or other fun toppings to make your Monster Oreo Balls even more exciting and unique.
How to Store Monster Oreo Balls
After creating your Monster Oreo Balls, you may want to store some for later enjoyment. Here’s how to ensure they remain fresh and tasty:
Refrigeration: Store the Oreo balls in an airtight container in the refrigerator. They can last for about one week, allowing you to enjoy your sweet creations over several days.
Freezing: If you want to keep your Monster Oreo Balls for a longer period, consider freezing them. Place them in a single layer on a baking sheet and freeze until solid. Once they are frozen, transfer them to an airtight container or freezer bag. They can be stored in the freezer for up to three months. To enjoy, simply let them thaw in the refrigerator for a few hours before serving.
Avoid Moisture: Ensure the container is well-sealed to avoid moisture, which can affect the texture of your Monster Oreo Balls. You want to maintain that delicious crunch from the chocolate coating!
Variations of Monster Oreo Balls
While you might start with the classic Monster Oreo Balls recipe, there are countless variations you can experiment with. Here are a few fun ideas to switch things up:
Flavor Variations: Instead of using only Oreos, consider using other flavors of sandwich cookies. For example, you can opt for peanut butter Oreos or mint Oreos for a twist on the original flavor.
Coating Alternatives: If you want to avoid melting wafers altogether, consider dipping the balls in chocolate chips instead. Simply melt them in the same way you would with melting wafers, and you can even add a touch of food coloring for a vibrant look.
Add Mix-Ins: Incorporating mix-ins can add delightful textures. Think about adding mini marshmallows, crushed up candy bars, or even nuts to the cream cheese mixture for an extra surprise in every bite!
Themed Decorations: Customize your Monster Oreo Balls based on specific themes. For instance, consider Valentine’s Day hearts with red melting wafers and pink sprinkles or Thanksgiving turkeys using brown and orange coatings.
Layered Balls: For a colorful twist, create layered Monster Oreo Balls. Use different colored crusts or fillings by dividing the cream cheese mixture and adding food coloring, then layering them as you mold the balls.
These variations not only keep the recipe fresh but also allow you to cater to different tastes and occasions—making your Monster Oreo Balls a versatile treat!
FAQ About Monster Oreo Balls
What are Monster Oreo Balls made of?
Monster Oreo Balls are made of crushed Oreos, cream cheese, and vanilla, coated in colorful melting wafers and decorated with candy eyes and sprinkles. The combination makes for a delicious, no-bake treat that’s perfect for celebrations!
How long do Monster Oreo Balls last?
When stored in an airtight container in the refrigerator, Monster Oreo Balls last about one week. For longer storage, you can freeze them for up to three months.
Can I make Monster Oreo Balls without cream cheese?
While cream cheese is a crucial component for the classic flavor and texture, you can experiment with alternatives like mascarpone cheese or a dairy-free cream cheese for a different twist.
Can I decorate Monster Oreo Balls differently?
Absolutely! Get creative with your decorations. Use different sprinkles, edible glitter, or other fun toppings to make your Monster Oreo Balls unique to your style.
Are Monster Oreo Balls healthy?
While they are undeniably delicious, Monster Oreo Balls are a sweet treat and should be enjoyed in moderation. They contain sugar and are meant for special occasions rather than everyday snacks.
Monster Oreo Balls
Equipment
- Food Processor
- Mixing Bowls
- Baking Sheets
- Parchment Paper
- Microwave-Safe Bowl
Ingredients
- 36 Oreos
- 8 oz cream cheese softened at room temperature
- 1 teaspoon vanilla extract
- 2 cups white melting wafers
- 2 cups light green melting wafers
- 2 cups purple melting wafers
- 3 tablespoons Crisco shortening
- green purple, and black jimmies sprinkles
- candy eyes of multiple sizes
Instructions
- Crush the Oreos in a food processor until fine crumbs form.
- In a large mixing bowl, combine Oreo crumbs, softened cream cheese, and vanilla extract. Mix until well combined.
- Form the mixture into 1.5-inch balls and place on a lined baking sheet.
- Chill the formed balls in the freezer for at least 2 hours to set.
- Melt the white melting wafers in a microwave-safe bowl, adding Crisco shortening for smoothness.
- Dip each chilled Oreo ball into the melted wafers, ensuring they are fully coated.
- Decorate immediately with candy eyes and sprinkles before the coating sets.
- Allow the decorated balls to chill for another 30 minutes before serving.
Send me this recipe!
Just enter your email below and get it sent straight to your inbox!