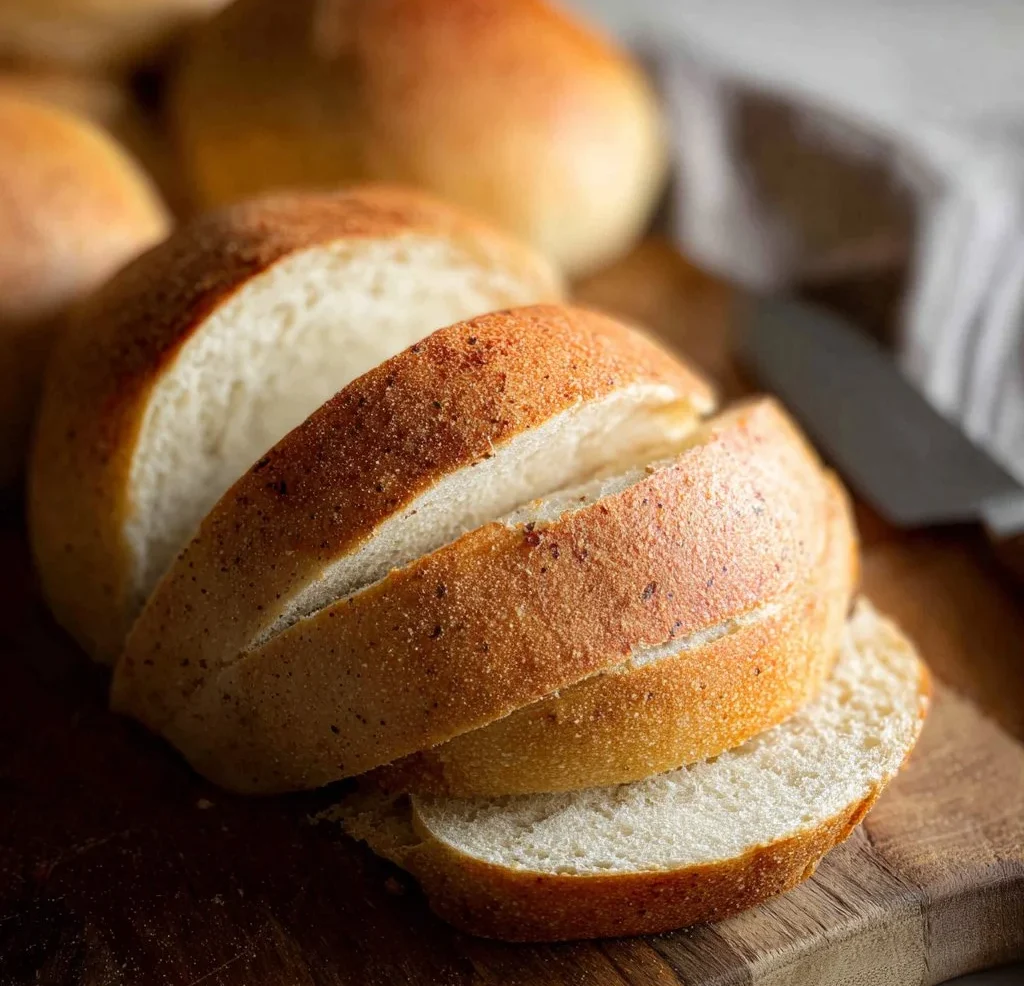
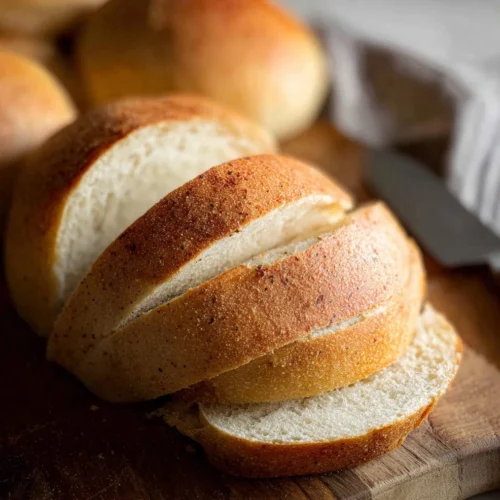
Peasant Bread is a delightful and uncomplicated bread that brings back the essence of homemade goodness. The name itself suggests a humble origin, reflecting traditions passed down through generations. This versatile loaf is perfect for everyone, whether you’re an experienced baker or a beginner looking to explore the world of bread-making. With just a few simple ingredients, you can create a loaf that showcases the art of back-to-basics cooking. This bread, with its golden crust and soft, airy interior, is not only a treat for the taste buds but also a comforting reminder of simpler times.
Why We Love This Peasant Bread Recipe
One of the most appealing aspects of Peasant Bread is its simplicity. You don’t need fancy tools or techniques; just a mixing bowl, some time, and your hands. The satisfaction of creating something from scratch is unparalleled, and this recipe allows you to do just that without overwhelming you. The aroma of freshly baked bread wafting through your home can instantly lift your spirits and make everyone feel welcome.
Moreover, this bread is incredibly versatile. You can enjoy it with butter, use it for sandwiches, or alongside soups and stews. It’s a staple that fits beautifully into any meal. The crusty exterior contrasts with the fluffy, soft inside, creating a delightful texture that pairs perfectly with any topping.
Peasant Bread not only nourishes the body but also nurtures the soul, making it a must-try for any home cook. Let’s dive into the ingredients and methods that help you create this beautiful loaf.
Ingredients about Peasant Bread
To make your very own Peasant Bread, you’ll need the following ingredients:
- 2 cups warm water
- 1 tablespoon active dry yeast
- 1 tablespoon sugar
- 1 teaspoon salt
- 3 1/2 to 4 cups all-purpose flour
- 2 tablespoons butter, melted
These ingredients are simple, yet they come together to create a rich and satisfying bread that you’ll be thrilled to serve to family and friends.


How to Make Peasant Bread Directions
Making Peasant Bread is a fulfilling process that connects you with the art of baking. Here’s how you can create this delightful loaf step by step:
Activate the Yeast: Begin by pouring 2 cups of warm water into a large mixing bowl. The water should be warm to the touch but not hot, as excessive heat can kill the yeast. Add 1 tablespoon of active dry yeast and 1 tablespoon of sugar to the water. Give it a gentle stir and let it sit for about 5-10 minutes. You’ll know it’s ready when it becomes bubbly and frothy, indicating that your yeast is activated.
Combine Dry Ingredients: Now, it’s time to add your dry ingredients. Measure out 3 1/2 cups of all-purpose flour and add it to the yeast mixture. Then, sprinkle in 1 teaspoon of salt. Use a wooden spoon or spatula to stir everything together. The batter will be somewhat sticky, and that’s perfectly okay—there’s no need for kneading in this recipe.
Let the Dough Rise: After combining your ingredients, transfer the dough to a greased bowl. Cover it loosely with a clean kitchen towel or plastic wrap. Set it aside in a warm, draft-free place for about 1 hour. You want the dough to rise until it has doubled in size.
Shape the Dough: Once the dough has risen, it’s time to shape it. Lightly flour a clean surface and turn the dough out onto it. Divide the dough into two equal parts and gently shape each piece into a round loaf. Place the loaves on a parchment-lined baking sheet, allowing enough space between them for further rising.
Final Rise: Cover the shaped loaves with the kitchen towel again, letting them rise for another hour. This additional time allows the gluten to develop further, resulting in a better texture.
Prep for Baking: Preheat your oven to 425°F (220°C). While the oven is heating, brush each loaf with half of the melted butter. This will add flavor and help achieve a golden crust.
Bake the Bread: Place the baking sheet in the oven and bake the loaves for 10 minutes at 425°F. After that, reduce the temperature to 375°F (190°C) and continue baking for an additional 15 minutes. You’ll know the bread is done when it is golden brown on the outside and sounds hollow when tapped on the bottom.
Cool and Serve: Once baked, remove the loaves from the oven and brush with the remaining melted butter. Let them cool on a wire rack for about 20 minutes before slicing. This cooling period also allows for the texture to set beautifully.
You now have your own homemade Peasant Bread, ready to be enjoyed!
How to Serve Peasant Bread
Peasant Bread is incredibly versatile, complementing various meals and occasions. Here are a few delightful ways you can serve this rustic loaf:
With Spreads: Enjoy thick slices with a layer of butter or flavored spreads. Garlic herb butter makes for a delicious addition, enhancing the bread’s natural flavor.
Soup Companion: Serve alongside a hearty soup or stew. The crusty exterior is perfect for dipping, while the soft inside balances the richness of the broth.
Sandwich Delight: Use it as a base for sandwiches. The sturdiness of Peasant Bread holds up well to fillings, whether you prefer deli meats, fresh vegetables, or even cheese.
Breakfast Option: Toast slices to create a warm breakfast treat. Top with a spread of cream cheese or a drizzle of honey for a sweet start to your day.
Charcuterie Board: Incorporate chunks of Peasant Bread into your charcuterie board, paired with various cheeses, olives, and fruits. The bread adds a rustic element, making your board even more inviting.
No matter how you choose to serve your Peasant Bread, it’s sure to be a hit with family and friends.
Expert Tips: Peasant Bread
Creating the perfect Peasant Bread can be as simple as following the recipe, yet a few expert tips can enhance your baking experience:
Water Temperature: Ensure your water is lukewarm. Too hot can kill the yeast, while too cold can slow the process. Aim for about 110°F (43°C).
Flour Measurement: When measuring flour, use the spoon and level method. Dip your measuring cup into the flour and scoop it out without packing it down, then level it off with a flat edge.
Humidity and Temperature: Baking can be affected by environmental conditions. If your home is particularly dry, you might need to adjust the flour ingredient slightly. Add water gradually until you reach the right dough consistency.
Flavor Enhancements: Feel free to experiment with flavorings or additions. Adding herbs like rosemary or thyme can elevate the taste, or you may include olives or sun-dried tomatoes for a gourmet touch.
Use of a Thermometer: If you’re uncertain about whether your bread is adequately baked, use an instant-read thermometer. The internal temperature of the bread should read about 190°F (88°C) when done.
With these tips, your adventure in baking Peasant Bread should go smoothly, resulting in a delicious homemade loaf perfect for various occasions.
How to Store Peasant Bread
To keep your Peasant Bread fresh, it’s essential to know how to store it properly:
Room Temperature: Once cool, wrap the bread in a clean kitchen towel or place it in a paper bag. This method keeps the crust nice and crusty while maintaining some moisture in the bread.
Plastic Wrap: If you prefer to keep the bread softer, wrap it tightly in plastic wrap or place it in an airtight container. This option is especially good if you are storing for a couple of days.
Freezing: If you want to preserve the bread for a more extended period, freezing is a fantastic option. Slice the bread before freezing, placing parchment paper between each slice. Seal in a freezer-safe bag; this way, you can toast individual slices without thawing the entire loaf.
Reviving Stale Bread: If your bread does become stale, don’t toss it! Revive stale slices by spritzing with a little water and popping them in a warm oven for a few minutes. They will regain some of their initial freshness.
By following these storage tips, you can prolong the deliciousness of your Peasant Bread, ensuring it remains a satisfying treat for days to come.
Variation of Peasant Bread
Peasant Bread is a fantastic canvas for creativity in the kitchen. Here are some exciting variations you might consider trying:
Herbed Peasant Bread: Incorporate dried or fresh herbs into the dough for a fragrant and flavorful twist. Rosemary, thyme, or oregano can add a delightful complexity.
Seeded Variation: Mix in seeds such as sunflower, sesame, or poppy seeds to the dough. These not only add flavor and texture but also provide extra nutrients.
Cheesy Delight: Fold in shredded cheese like cheddar or parmesan into the dough before the final rise. This will create a wonderfully cheesy crust as it bakes.
Whole Wheat Option: For a healthier take, substitute part of the all-purpose flour with whole wheat flour. Start by replacing one cup of flour and adjust as needed for consistency.
Sweet Peasant Bread: For a sweeter bread, add a sprinkle of cinnamon and some sugar into the dry ingredients. You could also incorporate dried fruits like raisins or cranberries for a breakfast bread that’s exceptionally delightful.
These variations allow you to customize Peasant Bread to suit your tastes and the preferences of your family and friends.
FAQ about Peasant Bread
What is Peasant Bread?
Peasant Bread is a simple, rustic loaf made from basic ingredients like flour, water, yeast, and salt. It’s easy to make, requiring no special skills or tools.
Can I use a bread maker for this recipe?
Yes! You can use a bread maker; just add the ingredients in the order recommended by the manufacturer and follow the cooking settings for basic white bread.
How long does it take to make Peasant Bread?
The total time to make Peasant Bread can vary but typically takes about 2-3 hours, including rising times.
Can I bake this bread in a cast-iron skillet?
Absolutely! A cast-iron skillet can provide excellent heat distribution. Just be sure to adjust the baking time as needed, and keep an eye on it while it bakes.
Is Peasant Bread healthy?
Peasant Bread can be a wholesome addition to your diet, especially if you opt for whole wheat flour or add in seeds and herbs for additional nutrients. Just remember, moderation is key!
Peasant Bread
Equipment
- Mixing Bowl
- Baking Sheet
- Kitchen Towel
Ingredients
- 2 cups warm water
- 1 Tbsp. active dry yeast
- 1 Tbsp. sugar
- 1 tsp. salt
- 3½–4 cups all-purpose flour
- 2 Tbsp. butter melted
Instructions
- In a large mixing bowl, combine warm water, yeast, and sugar. Let it sit for 5-10 minutes until bubbly and frothy.
- Add melted butter and stir to combine.
- Mix in 3½ cups of flour and salt, stirring until the dough comes together.
- Transfer the dough to a greased bowl, cover with a kitchen towel, and let it rise in a warm place for about 1 hour, or until doubled in size.
- Once risen, turn the dough out onto a floured surface and divide into two equal pieces. Shape each piece into a round loaf.
- Place the loaves on a parchment-lined baking sheet and cover with a towel. Allow to rise for another hour.
- Preheat your oven to 425°F (220°C). Brush the loaves with melted butter before baking.
- Bake for 10 minutes at 425°F, then reduce the temperature to 375°F (190°C) and bake for another 15 minutes, until golden brown and hollow-sounding when tapped.
- Remove from the oven, brush with remaining butter, and cool on a wire rack for about 20 minutes before slicing.
Send me this recipe!
Just enter your email below and get it sent straight to your inbox!