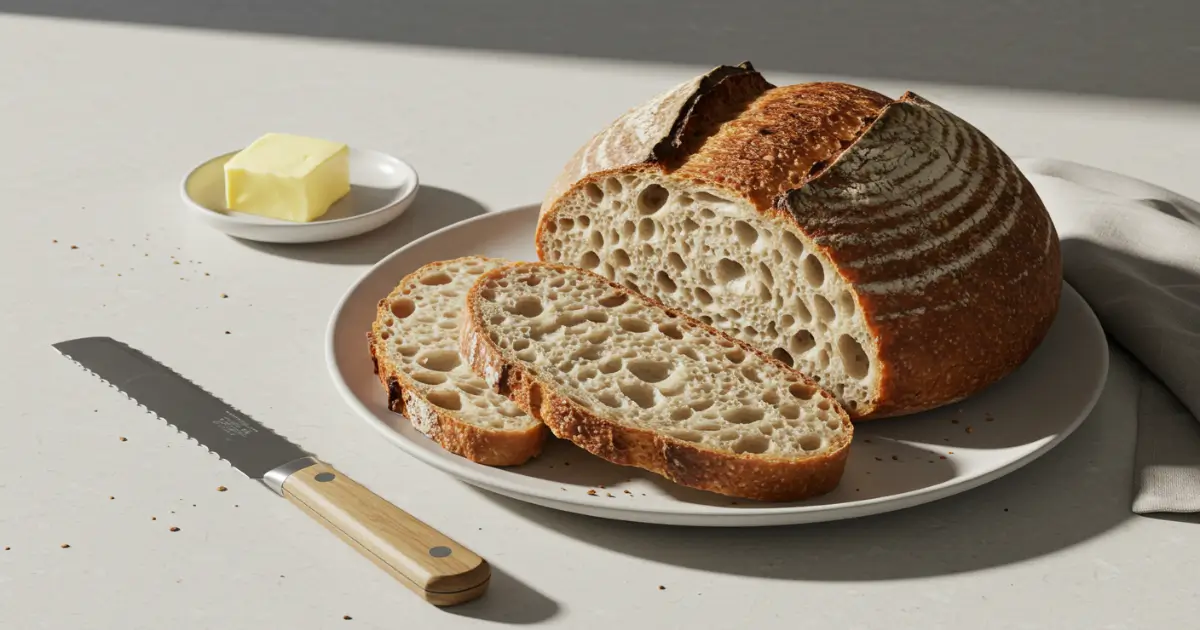
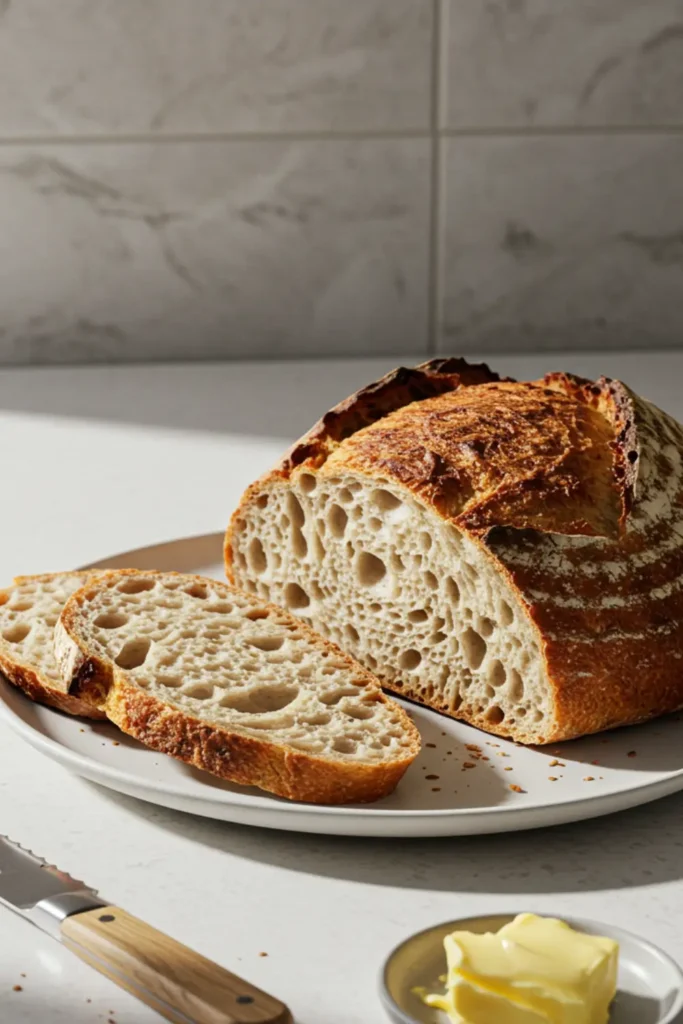
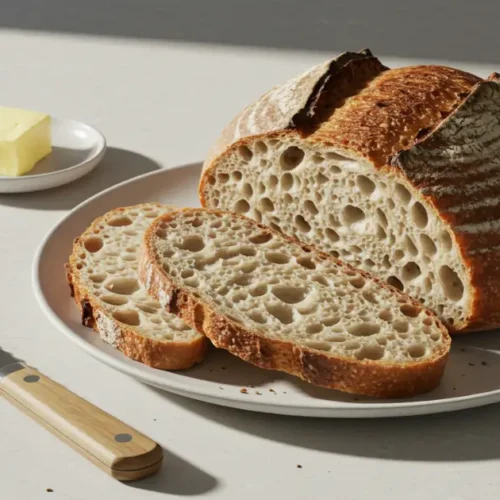
Sourdough bread is a timeless classic, known for its tangy flavor and chewy texture. Made with just a few simple ingredients, this bread relies on a natural fermentation process using wild yeast and bacteria. It’s not only delicious but also easier to digest and has a lower glycemic index. Whether you’re a beginner or an experienced baker, making your own sourdough bread at home is rewarding.
Key Benefits of Sourdough Bread
Sourdough bread isn’t just about the unique flavor—it’s packed with benefits that make it a great choice for any baker. Here’s why you’ll love making this bread at home:
- Natural Fermentation: Unlike most breads, sourdough uses wild yeast and lactic acid bacteria. This natural fermentation process not only gives it its signature tang but also enhances its digestibility, making it easier on the stomach than other types of bread.
- Lower Glycemic Index: Because of its slow fermentation, sourdough has a lower glycemic index, which means it’s gentler on your blood sugar. This makes it a better option for those managing blood sugar levels.
- Rich in Nutrients: Sourdough contains more vitamins and minerals compared to regular bread, including important nutrients like B vitamins, iron, and magnesium. The fermentation process breaks down phytic acid, which can inhibit the absorption of these minerals, making them more bioavailable.
- Better Texture and Flavor: Homemade sourdough bread is unrivaled in texture. The chewy crumb and crisp, golden crust are the result of a long, slow fermentation process. The longer you let it rise, the more complex and flavorful it becomes.
- Customizable: Whether you prefer whole wheat, white, or a mix of both, sourdough can be tailored to suit your taste. You can also experiment with different hydration levels for a lighter or denser loaf.
Making your own sourdough bread at home is incredibly satisfying—not just for the taste but also for the sense of accomplishment in creating a loaf from scratch. With every slice, you’ll appreciate the depth of flavor and the health benefits that come with it!
Ingredients for Sourdough Bread
Sourdough starter – This gives the bread its tangy flavor and rise.
Flour – Bread flour works best for a chewy texture, but all-purpose flour can be used.
Water – Helps form the dough and develop gluten. Use filtered water for best results.
Salt – Enhances flavor and strengthens the dough.
Optional add-ins – Seeds, nuts, or herbs for extra texture and taste.
Instructions for Making Sourdough Bread
Making sourdough bread is a rewarding process that takes patience and a little practice. Here’s a simple step-by-step guide to help you create a delicious loaf at home:
Step 1: Mix the Dough
Combine sourdough starter, bread flour, and water in a bowl. Stir until a shaggy dough forms. Let rest for 30 minutes.


Step 2: Add the Salt
Sprinkle salt over the dough and mix well by folding it several times.
Step 3: Knead the Dough
Knead on a floured surface for 8–10 minutes until smooth, or use the stretch-and-fold method for 10 minutes.
Step 4: First Rise
Place dough in a greased bowl, cover, and let rise for 4-6 hours until doubled. Stretch and fold every 30 minutes.
Step 5: Shape the Dough
Punch down, shape into a loaf, and place in a floured proofing basket or on parchment paper.
Step 6: Second Rise
Cover and let rise for 2-3 hours until puffy. Refrigerate overnight for extra flavor if desired.
Step 7: Bake
Preheat oven to 450°F (230°C) with a Dutch oven inside. Bake covered for 30 minutes, then uncovered for 20-30 minutes until golden brown.
Step 8: Cool
Let cool completely on a wire rack before slicing.
Pro Tips for Perfect Sourdough Bread
Making sourdough bread at home is incredibly satisfying, but there are a few pro tips that can help you take your loaves to the next level. These tips will not only improve the texture and flavor but also make the process more manageable and enjoyable. Here’s how to elevate your sourdough game:
Use a Digital Kitchen Scale
For the most accurate measurements, invest in a digital kitchen scale. Weighing your ingredients, especially the flour and water, ensures consistent results. Sourdough can be a bit sensitive to variations in flour and water ratios, so precision will help you achieve the perfect dough every time.
Maintain a Strong Starter
The key to great sourdough bread starts with an active, healthy starter. Keep your starter well-fed and ensure it’s bubbly and at its peak when you use it. A weak starter can result in a dense loaf with poor rise, so make sure to allow your starter to ferment for at least 4-6 hours before using it in your dough.
Give the Dough Time to Rise
Don’t rush the fermentation process. Sourdough bread requires time to rise and develop its unique flavor. If you’re in a hurry, you can let your dough rise in the fridge overnight for a slower, more flavorful fermentation. The cool environment allows the yeast to work at a slower pace, giving the dough more time to develop flavor.
Temperature Control
Sourdough loves warmth. Ideally, your dough should rise in a warm, draft-free spot. If your kitchen is cold, try placing the dough in your oven (turned off) with just the oven light on. If it’s too hot, the dough may rise too quickly, which could result in a flatter loaf.
Use a Dutch Oven for Baking
For the best crust, use a Dutch oven when baking your sourdough bread. The lid traps steam, creating a moist environment that helps form a crunchy, golden crust. If you don’t have a Dutch oven, you can also bake the bread on a baking stone and add steam to the oven by placing a pan of water on the bottom rack.
Don’t Skip the Scoring
Scoring (cutting slashes in the top of the dough before baking) is more than just decorative—it helps control how the bread expands while baking. It also ensures the steam inside the bread escapes evenly. Use a sharp razor blade or bread lame to make your scores, and be sure to make them deep enough to allow the bread to rise properly.
Cool Before Cutting
Once the bread is out of the oven, resist the temptation to slice into it right away. Let it cool on a wire rack for at least an hour. This allows the crumb to set and gives the flavor time to develop fully. Cutting too early can result in a gummy texture, so be patient for that perfect slice!
Variations of Sourdough Bread
While the classic sourdough bread recipe is delicious on its own, you can experiment with various variations to give your loaf a unique twist. Whether you’re looking to add flavor, texture, or nutrition, there are plenty of ways to customize your sourdough bread to suit your tastes. Here are a few fun ideas:
Whole Wheat Sourdough
What to do: Swap out part of the all-purpose flour for whole wheat flour. Whole wheat flour adds a rich, nutty flavor and boosts nutritional value with extra fiber.
Raisin and Cinnamon Sourdough
What to do: Add raisins and a sprinkle of cinnamon to your dough during the final kneading stage. This variation turns your sourdough into a slightly sweet, aromatic bread that is perfect for breakfast or a snack.
Cheese and Herb Sourdough
What to do: Fold in shredded cheese (cheddar or parmesan works well) and a handful of fresh herbs like rosemary or thyme. This savory twist adds a burst of flavor, making it a great accompaniment to soups or salads.
Serving Suggestions for Sourdough Bread
Sourdough bread is a versatile and hearty option that can elevate any meal. Whether you’re enjoying it on its own or pairing it with various dishes, sourdough’s tangy flavor and chewy texture make it a standout. Here are some delicious ways to serve your homemade sourdough bread:
Classic Avocado Toast
Toast a slice of freshly baked sourdough and spread mashed avocado on top. For extra flavor, sprinkle with red pepper flakes, a squeeze of lemon juice, and a pinch of salt.
Sourdough with Soup
Serve thick, crusty slices of sourdough with your favorite soup. Its texture makes it perfect for soaking up the broth in creamy soups or pairing with hearty vegetable or lentil soups.
Sourdough Grilled Cheese
Use your sourdough to make a grilled cheese sandwich. The chewy texture of sourdough pairs perfectly with melty cheese.
More Bread recipes you will love!
FAQs for Sourdough Bread
Is sourdough bread healthier than regular bread?
Sourdough bread is often considered healthier than regular bread due to the fermentation process. The natural fermentation of sourdough makes it easier to digest, as it breaks down some of the gluten and phytic acid. Additionally, longer fermentation can enhance the nutritional profile by increasing the availability of minerals like calcium and magnesium. However, both sourdough and regular bread can be part of a balanced diet, so it ultimately depends on your preferences and dietary needs.
What exactly is sourdough bread?
Sourdough bread is made through a natural fermentation process using wild yeast and lactic acid bacteria. Unlike most breads, which use commercial yeast, sourdough relies on the wild organisms present in the environment, which gives it its signature tangy flavor and chewy texture. The result is a delicious, crusty loaf with a unique flavor profile.
What is the difference between sourdough and normal bread?
The key difference between sourdough and regular bread lies in the leavening agents used. While regular bread is typically made with store-bought yeast, sourdough relies on wild yeast and bacteria. This natural fermentation process creates a more complex flavor in sourdough bread, with a tangy taste and denser texture. Additionally, sourdough often has a longer shelf life due to the presence of organic acids that help preserve the bread.
sourdough bread
Ingredients
- Sourdough starter: 1/2 cup active and bubbly
- Bread flour: 3 1/2 cups you can substitute with all-purpose flour if preferred
- Water: 1 1/2 cups filtered or non-chlorinated
- Salt: 1 1/2 teaspoons
Instructions
Step 1: Mix the Dough
- In a large mixing bowl, combine the sourdough starter, bread flour, and water. Stir with a wooden spoon or your hands until the dough begins to come together. You’ll have a shaggy, sticky dough at this point—don’t worry, that’s normal!
- Let the dough rest for about 30 minutes. This is called the autolyse phase and allows the flour to fully hydrate, making it easier to knead later.
Step 2: Add the Salt
- Sprinkle the salt over the dough and mix it in thoroughly. You can do this by folding the dough over itself several times or using your hands to work it in. The salt is key to enhancing the flavor and controlling the fermentation process.
Step 3: Knead the Dough
- Transfer the dough to a lightly floured surface. Gently knead the dough for 8–10 minutes or until it becomes smooth and elastic. If it’s too sticky, add a little extra flour, but be careful not to overdo it. You want a soft, slightly tacky dough, not a dry one.
- Alternatively, you can use the stretch and fold method: pull the dough up, stretch it, and fold it over itself. Repeat for about 10 minutes.
Step 4: First Rise
- Once the dough is kneaded, place it in a lightly greased bowl and cover it with a damp cloth or plastic wrap. Let it rise at room temperature for about 4-6 hours or until it has doubled in size.
- During this time, you can perform a few “stretch and folds” every 30 minutes to strengthen the dough and improve the texture.
Step 5: Shape the Dough
- After the first rise, gently punch down the dough to release any air bubbles. Turn it out onto a floured surface and shape it into a round or oval loaf, depending on your preference.
- If you’re using a proofing basket (or banneton), dust it with flour and place the dough inside, seam side up. Otherwise, place it on a baking sheet lined with parchment paper.
Step 6: Second Rise
- Cover the dough and let it rise again for 2-3 hours, or until it’s puffy and has increased in size. If you’re short on time, you can let the dough rise in the fridge overnight for a slower, more flavorful fermentation.
Step 7: Bake
- Preheat your oven to 450°F (230°C) with a Dutch oven or a baking stone inside. Once the oven is hot, carefully place the dough in the preheated Dutch oven or on the stone.
- If using a Dutch oven, cover it with the lid. This will help trap steam and create that perfect, crispy crust.
- Bake for 30 minutes with the lid on, then remove the lid and bake for an additional 20-30 minutes, or until the bread is golden brown and sounds hollow when tapped on the bottom.
Step 8: Cool
- Let the bread cool completely on a wire rack before slicing. This will allow the crumb to set and develop its full flavor.
Send me this recipe!
Just enter your email below and get it sent straight to your inbox!