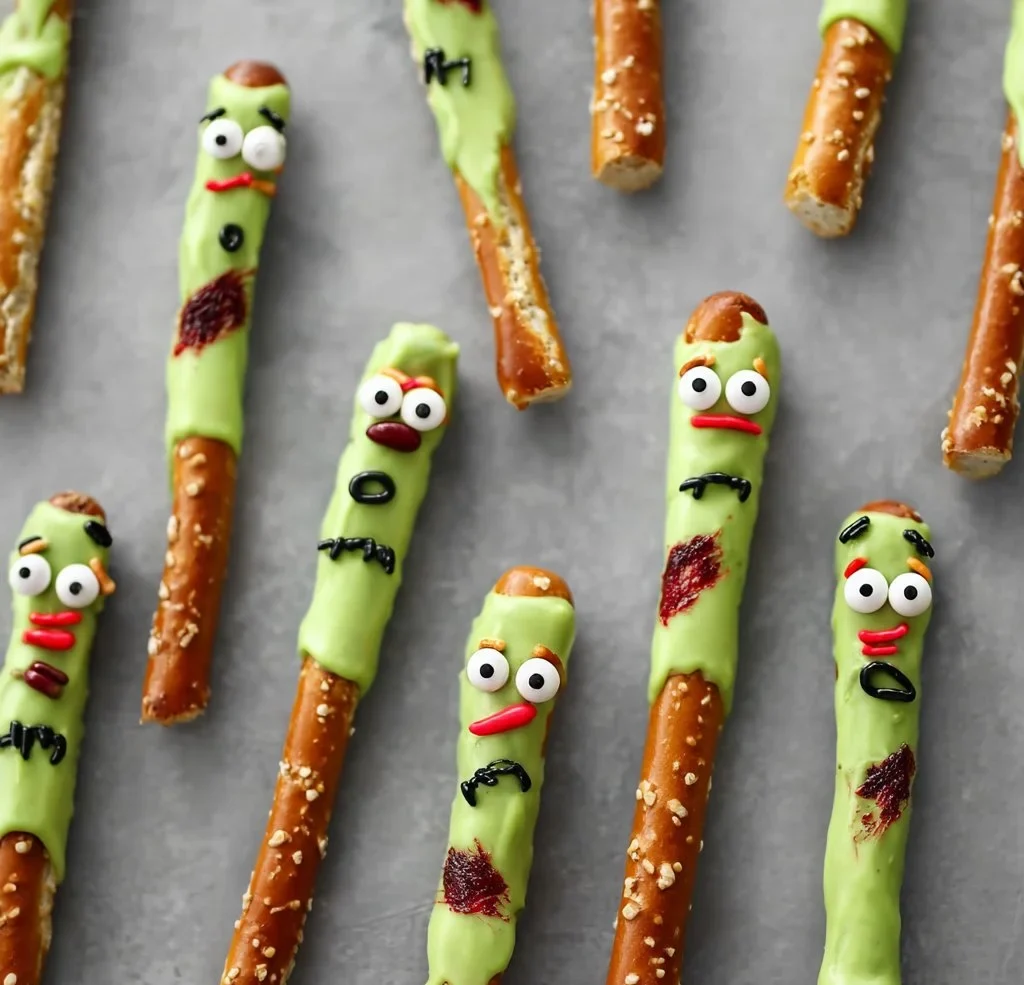
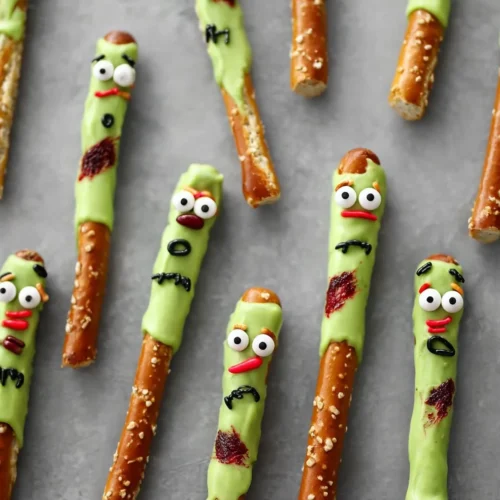
When it comes to spooky snacks, Zombie Pretzels are undeniably a showstopper. These delightful morsels, draped in eerie green and adorned with candy eyes, create a perfect combination of fun and fright. Whether you’re gearing up for a Halloween party, a horror movie marathon, or simply looking for a unique snack that captures the spirit of the undead, these pretzels are the way to go.
Why We Love This Zombie Pretzel Recipe
One of the reasons you’ll find yourself adore Zombie Pretzels is their versatility. They are incredibly easy to make, allowing both the novice cook and the seasoned chef to have fun in the kitchen. Furthermore, the chance to unleash your inner artist while decorating these pretzels adds a personal touch, making your creations even more special.
Not only are Zombie Pretzels fun to make, but they also offer a unique flavor profile. The salty crunch of pretzels pairs beautifully with the sweetness of candy melts, creating a snack that satisfies both salty and sweet cravings. Plus, they are perfect for sharing; impress your friends and family with a spooky treat that is as delicious as it is visually appealing.
Ingredients for Zombie Pretzels
To make these delightful Zombie Pretzels, you’ll need the following ingredients:
- 10 to 15 pretzel rods
- 1/2 cup green candy melts
- 1 to 2 teaspoons vegetable shortening (optional)
- Candy eyes
- Red edible writer
- Black candy color
- Red candy color
- Small paintbrush
Now that you have your ingredients ready, let’s move on to crafting these spooky treats!
How to Make Zombie Pretzels
Creating Zombie Pretzels is both an art and a science, but don’t worry; it’s quite simple. Start by lining a baking tray with wax or parchment paper. This step is crucial as it prevents the pretzels from sticking and makes cleanup a breeze. Set the lined tray aside while you prepare the candy melts.


Next, gather about half a cup of green candy melts in a narrow microwave-safe container. If you choose to use vegetable shortening, add one to two teaspoons to ensure a smooth, easy-to-dip consistency. Microwave the candy melts according to the package instructions. It’s vital to keep an eye on your melts to avoid burning them; stir well after melting to achieve a perfect silky texture.
Once your candy melts are ready, dip a pretzel rod into the vibrant green mixture. For better coverage, tilt the container to the side so more of the rod is coated. After dipping, gently shake off any excess candy melts. Place the coated pretzel on the prepared tray, allowing them to set.
The fun part comes next! Take your candy eyes and stick one or two onto each pretzel. Be careful during this step—if the candy melts are still too hot or liquidy, the eyes may slide off. If that happens, just allow the pretzels to cool slightly before placing the eyes.
Now, it’s time for the final touches! After allowing the pretzels to dry entirely for at least 30 minutes, use a small paintbrush to add details like mouths using the black and red candy colors. This is your moment to be artistic—let your imagination run wild!
How to Serve Zombie Pretzels
Now that you have crafted your delicious Zombie Pretzels, it’s time to present them! Arrange your spooky snacks on a themed platter or a Halloween-inspired dish to enhance the visual appeal. You can place them upright in a holder, resembling a zombie graveyard, or lay them flat for an eerie display.
For an extra festive touch, you might add some additional elements to the serving area, like faux cobwebs or mini skeletons. This not only enhances the ambiance but also creates a fun atmosphere for your gathering. When serving, don’t hesitate to invite your guests to customize their pretzels even further with additional toppings or candy—this invites creativity and makes for an interactive experience.
Expert Tips: Zombie Pretzels
- Time Management: Make sure to allow ample time for the pretzels to dry completely before serving. Patience is key here!
- Candy Melts Alternatives: If you cannot find green candy melts, other bright colors can also suit your theme. Alternatively, use white candy melts and add food coloring.
- Extra Decorations: Add sprinkles or edible glitter to take your pretzels to another level of spookiness!
- Temperature Awareness: Avoid melting your candy over high heat, as this can lead to burning. Melt in short intervals, stirring in between.
- Quiet Creativity: If you have kids helping you decorate, be patient and let them express their creativity. This is a fundamental part of the fun!
How to Store Zombie Pretzels
To keep your Zombie Pretzels fresh, it’s vital to store them correctly. Place them in an airtight container, separating layers with parchment paper to prevent sticking. Keep the container in a cool, dry place away from direct sunlight. If properly stored, these sweet treats can last for up to a week.
However, beware of high humidity or heat—this can cause the candy coating to become sticky or lose its shape. If you anticipate not finishing the pretzels within a few days, consider wrapping some in individual portions for snack-friendly options throughout the week.
Variations of Zombie Pretzels
While the classic Zombie Pretzel recipe is undoubtedly delicious, there’s always room for creativity. Here are a few ideas for variations to keep things exciting.
Colorful Zombie Pretzels: Use different colors of candy melts to create a rainbow of zombies. Try combining various shades for a vibrant display.
Chocolate Zombie Pretzels: Instead of candy melts, dip your pretzel rods in melted chocolate. You can add spooky decorations afterward too.
Sprinkle Madness: After dipping your pretzels but before they dry, coat them in Halloween-themed sprinkles like tiny ghosts or pumpkins.
Nutty Delight: Top your pretzel rods with crushed nuts or graham cracker crumbs to add an extra crunchy texture.
Savory Twist: Consider using savory seasonings on your pretzels before dipping them for a unique flavor—think garlic powder or a sprinkle of cheese.
These variations will surely impress your guests and keep your treat table fresh and exciting!
FAQ about Zombie Pretzels
What exactly are Zombie Pretzels?
Zombie Pretzels are pretzel rods coated in colorful candy melts, decorated to resemble zombies, perfect for Halloween celebrations or spooky-themed events.
How can you make the green coating for Zombie Pretzels?
To make the green coating, simply melt green candy melts in a microwave-safe container. You can add vegetable shortening for a smoother consistency if desired.
How do you decorate Zombie Pretzels?
After dipping each pretzel in the melted candy, immediately place candy eyes on top. Once dried, you can use edible writers or paint to create mouths and other spooky features.
How long do Zombie Pretzels last when stored?
When stored in an airtight container in a cool, dry place, Zombie Pretzels can last up to a week. Just make sure they aren’t exposed to humidity to keep them fresh.
Can I use different colors for the coating?
Absolutely! While the classic green is iconic, you can use any color candy melts to create your unique design.
Zombie Pretzels
Equipment
- Microwave-safe container
- Baking tray
- Wax or parchment paper
- Small paintbrush
Ingredients
- 10-15 pieces pretzel rods
- 1/2 cup green candy melts
- 1-2 teaspoons vegetable shortening optional
- as needed candy eyes for decoration
- as needed red edible writer
- as needed black candy color
- as needed red candy color
- 1 small paintbrush
Instructions
- Line a baking tray with wax or parchment paper.
- Melt green candy melts in a microwave-safe container, adding vegetable shortening if desired.
- Dip each pretzel rod into the melted candy melts, ensuring even coverage.
- Shake off excess candy melts and place the coated pretzel on the prepared tray.
- While the coating is still wet, place candy eyes on top of each pretzel.
- Allow the pretzels to dry for at least 30 minutes.
- Use a small paintbrush to add details like mouths with black and red candy colors.
- Serve your Zombie Pretzels on a themed platter!
Send me this recipe!
Just enter your email below and get it sent straight to your inbox!